

A place for more technical discussions. Please make sure you post in the correct section on the site, this way it keeps the site tidy AND ensures you get a more relevant answer.
Replacing Gen 3 Head Unit - Android Auto, Apple Carplay, DAB, Reversing Camera..
27 May 2025 12:41 #260619
by jimny.mud
Replacing Gen 3 Head Unit - Android Auto, Apple Carplay, DAB, Reversing Camera.. was created by jimny.mud
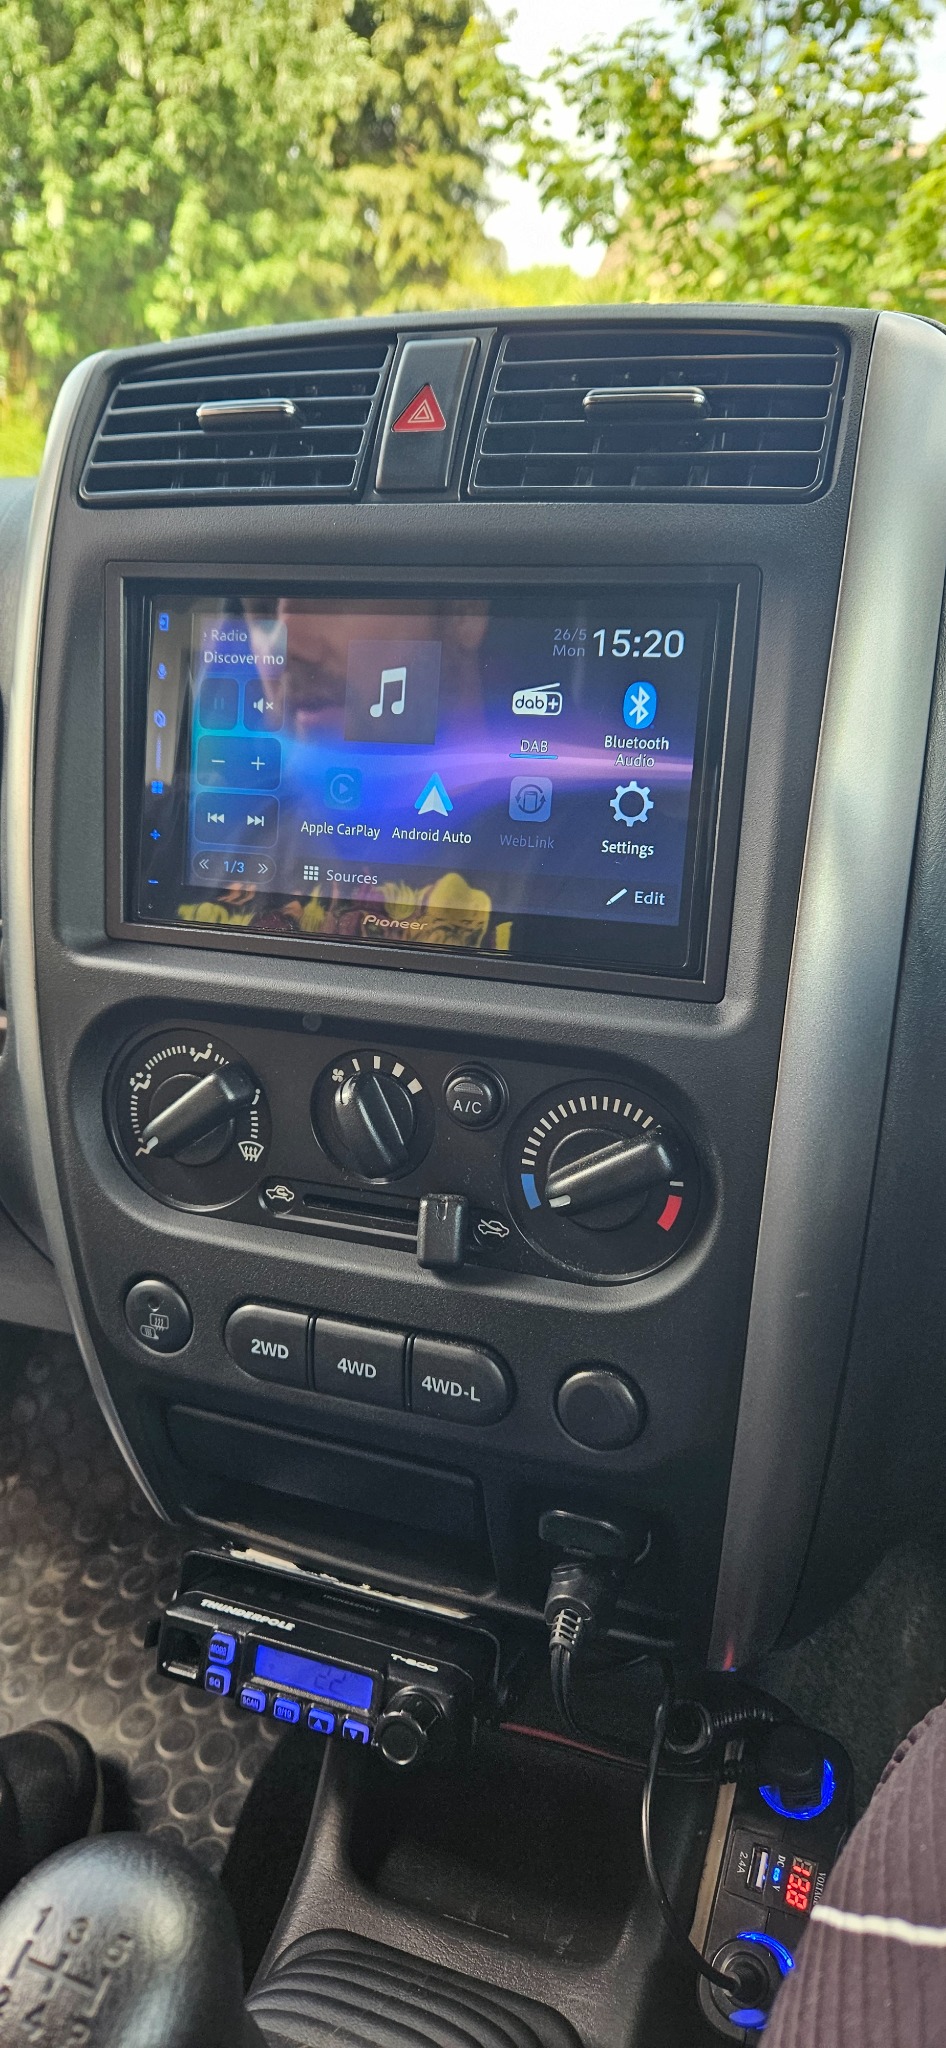
Recently spent lots of time head scratching, trying to get to the bottom of replacing my stock Radio/CD Player in my Gen 3 Jimny. It turned into quite a mine field, but i'm happy to report that I've now successfully upgraded to an all singing all dancing unit with more capabilities that I could ever need
 I tried to take some photos as I went along so that I could put together a thread that will hopefully help other people in the same situation.
Firstly a big shout out to the guy as my local Halfords who advised I check Connects2 ( connects2.com/ ) for compatibility instead of using Halfords. Then also to Dynamic Sounds Ltd ( www.dynamicsounds.co.uk ) for stocking everything that I needed. Then also a shameless plug to my Instagram... @Jimny.mud and my very patient husband

To ensure everything I purchased would be suitable I gave Dynamic Sounds a ring and they advised that you can email their tech team directly (technical@dynamicsounds.co.uk) with a photo of your current head unit, what you are looking for, and your car make, model and year. You with then get an email back (mine was within half an hour) with details and links of all the parts you need to upgrade.
Parts I used:
p.s. I know that these could probably be found cheaper on eBay etc. but it's done now...
www.dynamicsounds.co.uk/pioneer-sph-da77...al.html?search=77dab
www.dynamicsounds.co.uk/ct20sz02-suzuki-...r.html?search=ct20sz
www.dynamicsounds.co.uk/connects2-ct23sz...a-panel-adaptor.html
In addition to the above I also needed:
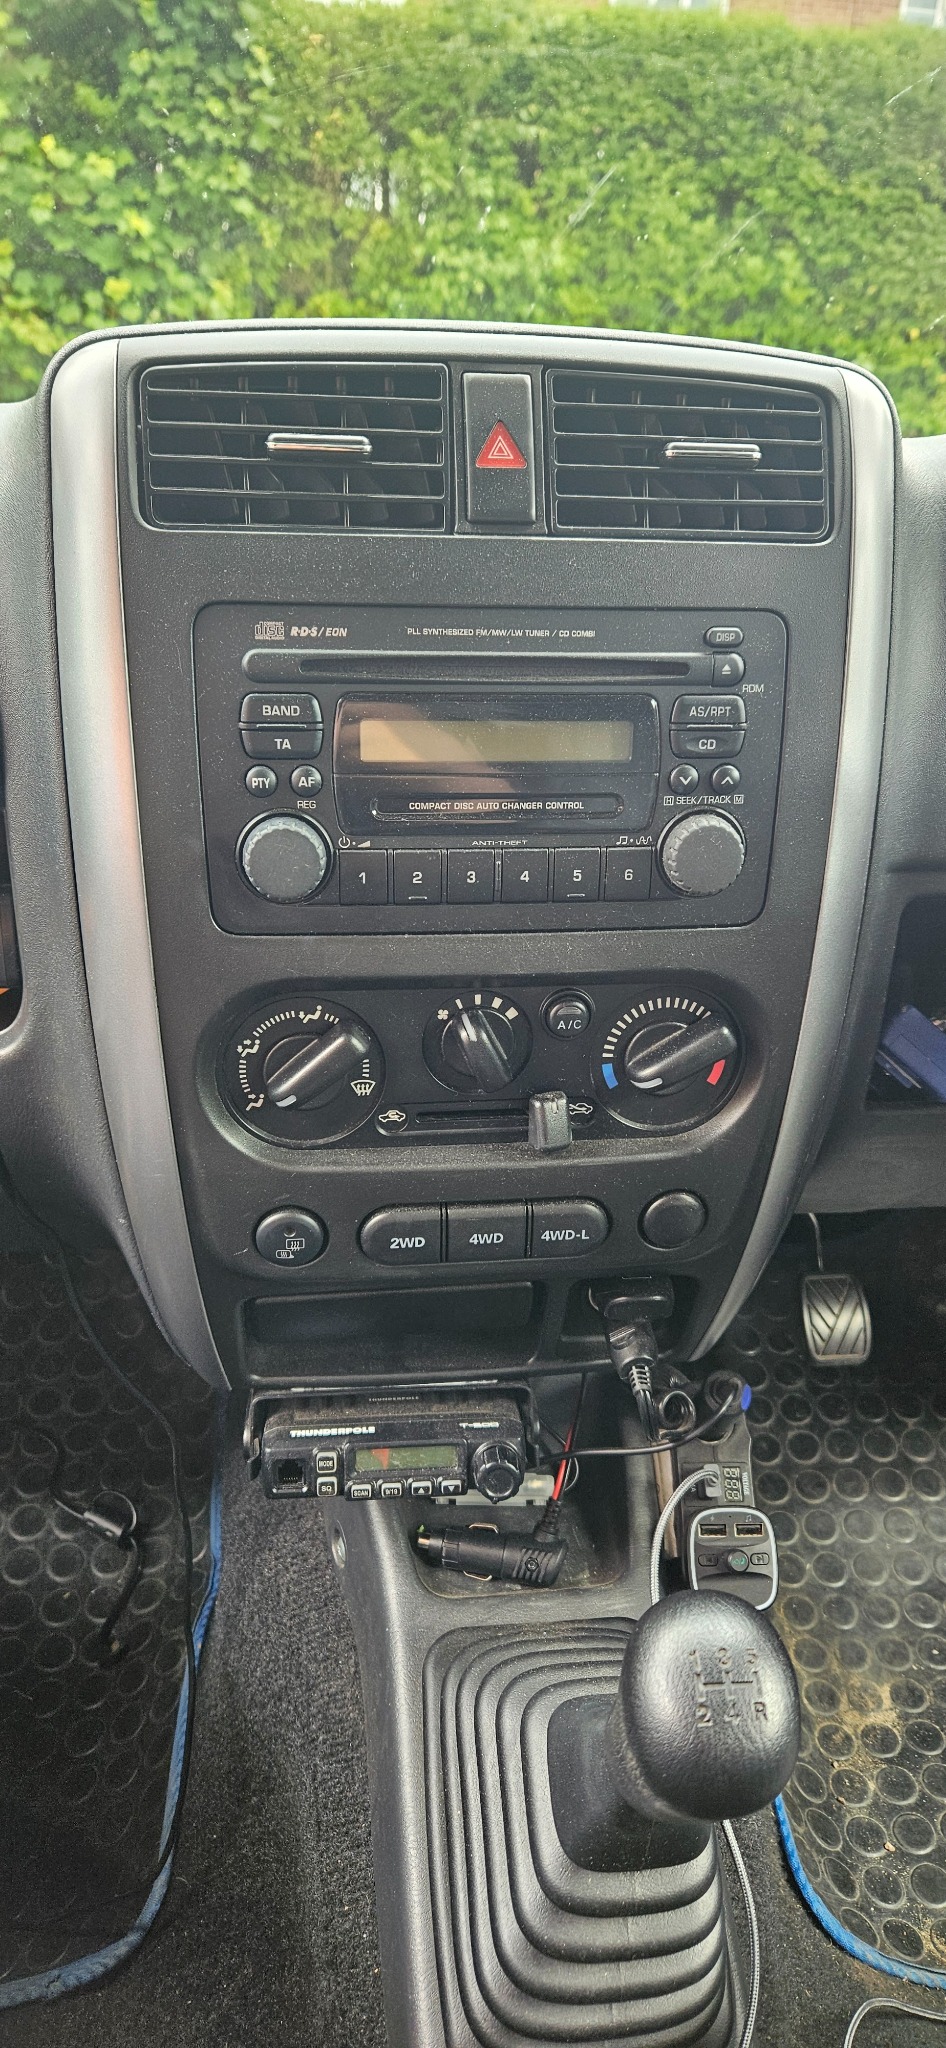
My Jimny is a 2011 and this is what I was working with to begin with.
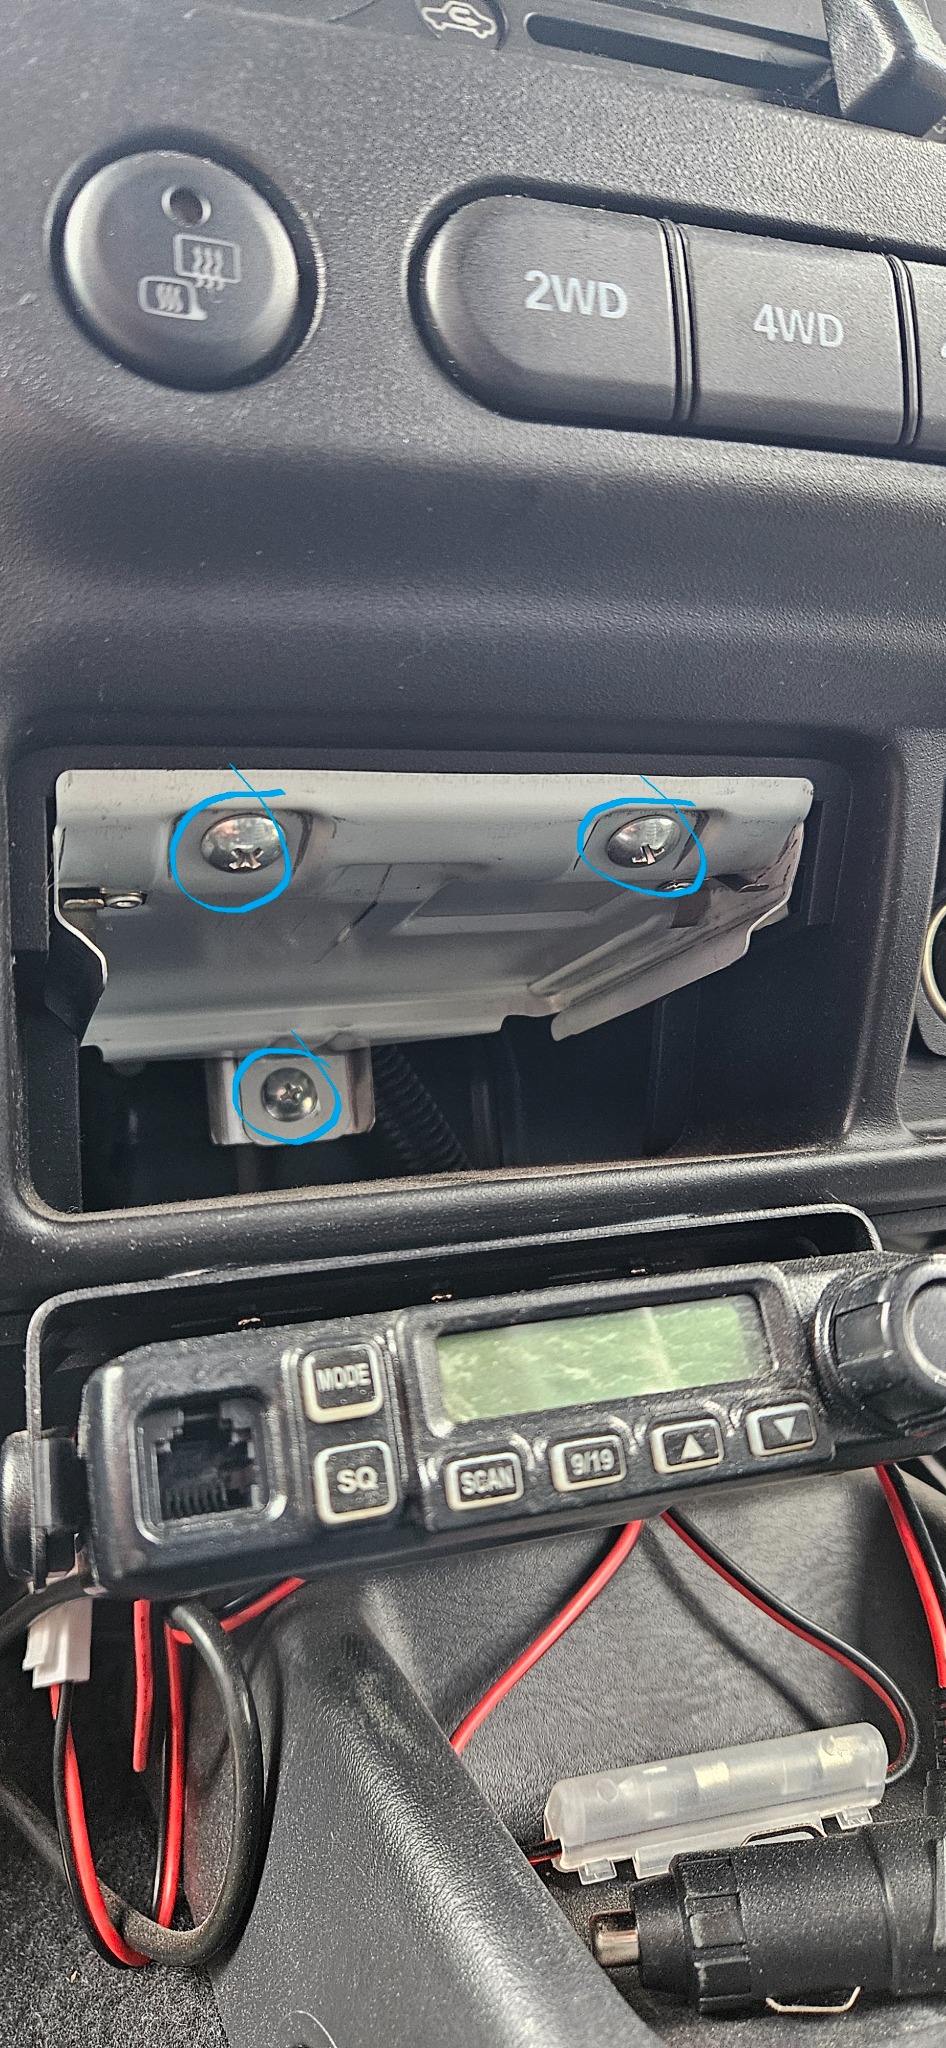
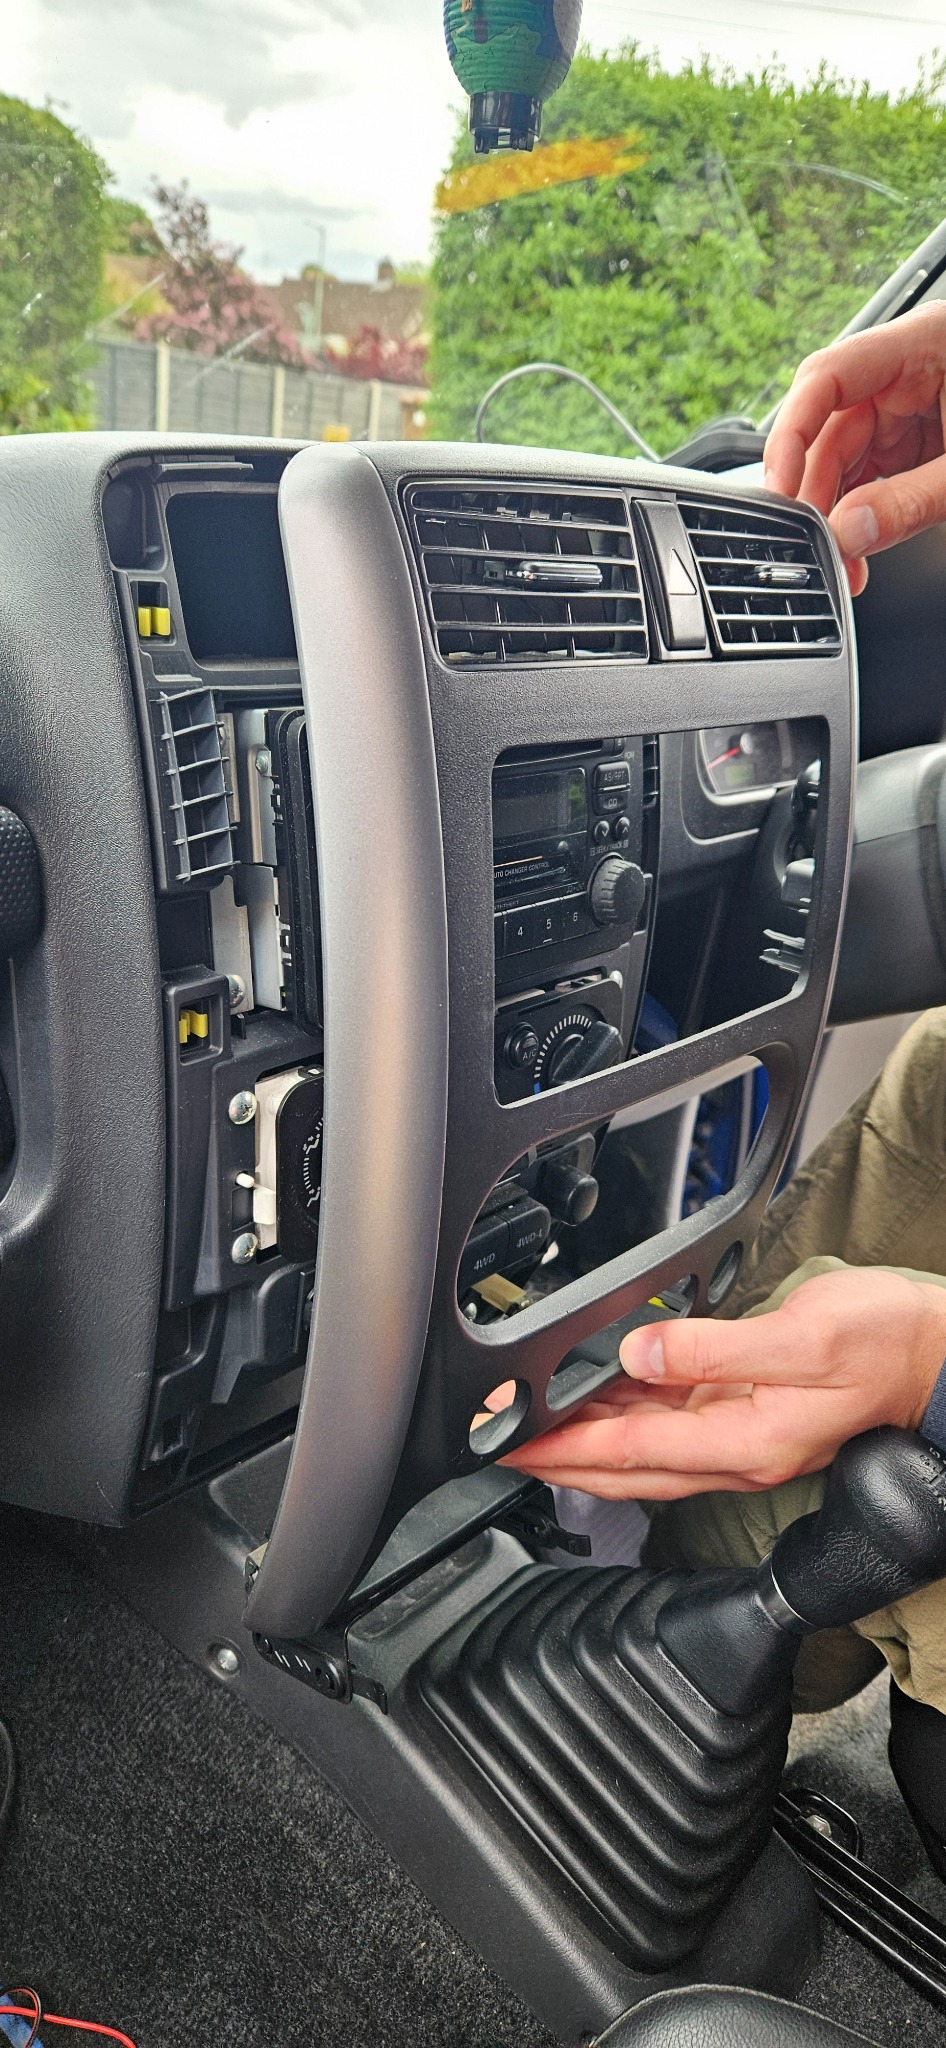
The first thing you are going to need to do is remove the ash tray/bin and take out these three screws. After doing this you will be able to use your trim tools to take off the whole front facia. There are three clips down both the left and the right hand side, which will come out quick easily with a little persuasion.
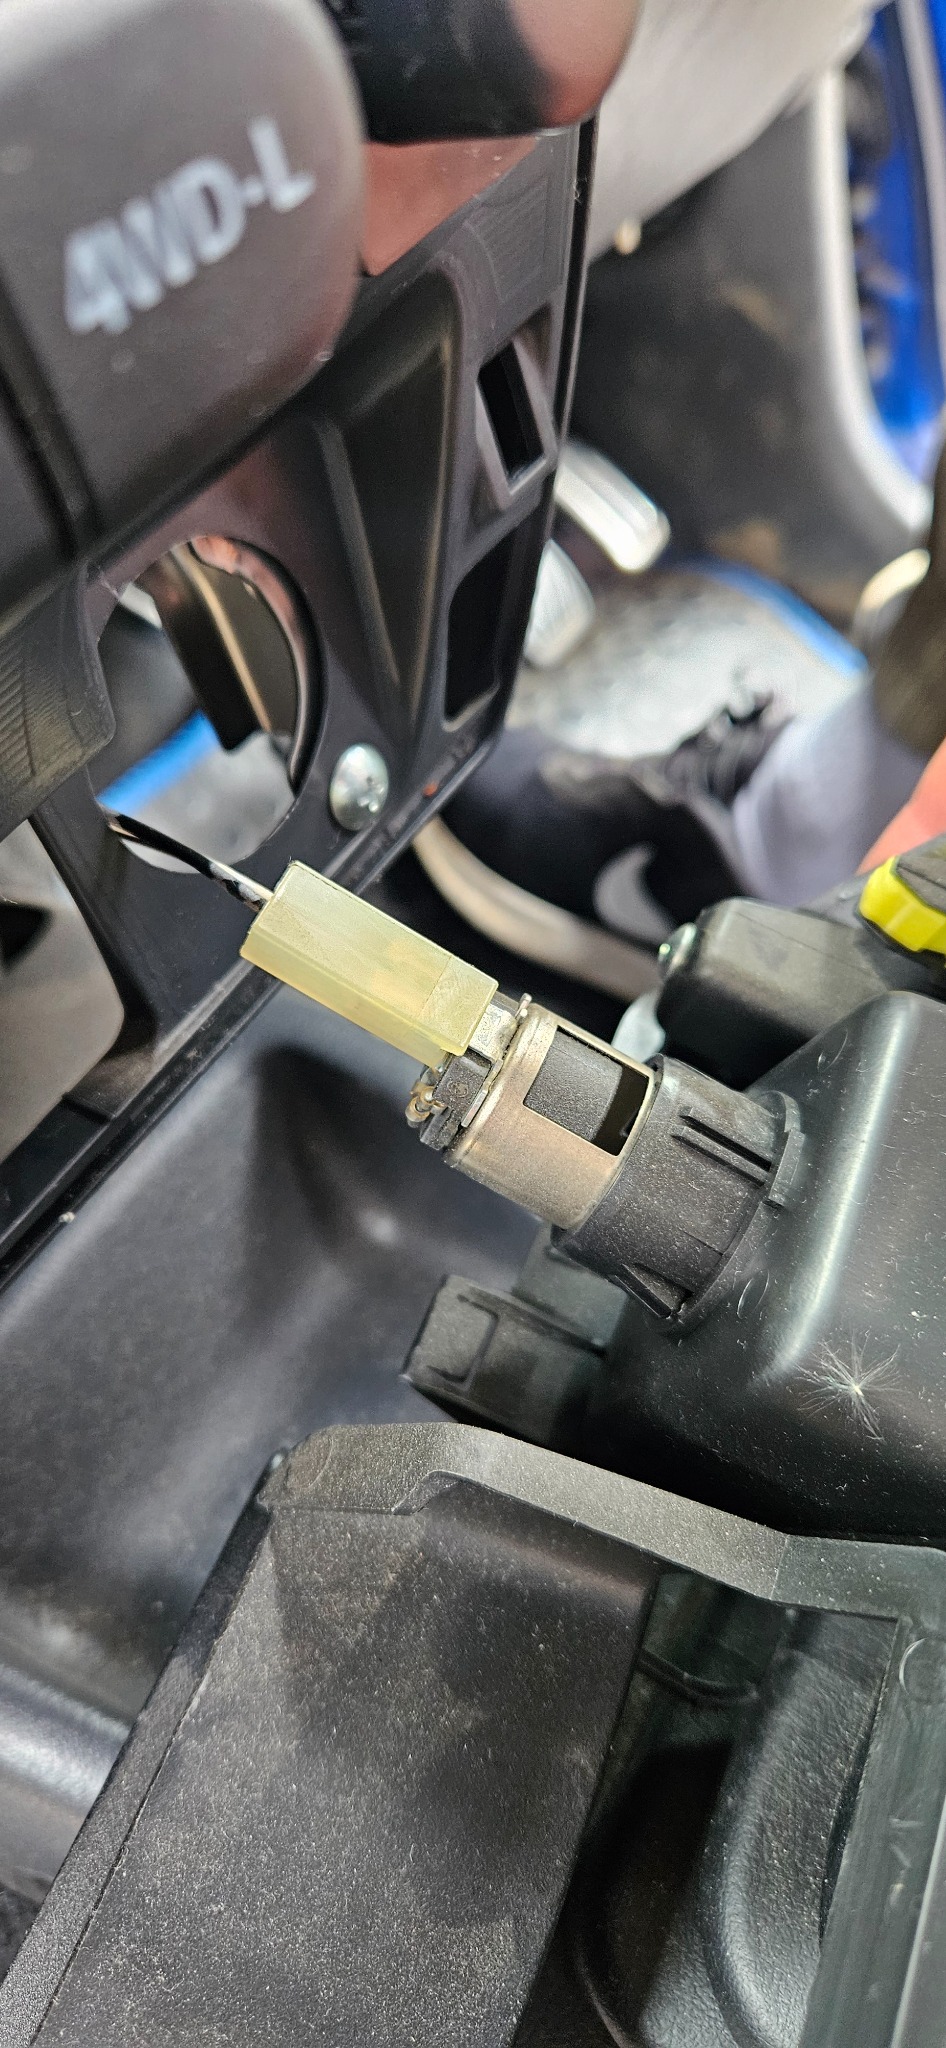
With the facia unclipped, you'll just need to unclip the hazard light and the cigarette lighter, again they are tiny clips but will release with some persuasion.
Next we need to slide out the old unit, this is held in by 4 screws and then will pull out. It sits within a carrier that follows along some tracks.
Once this is out you'll need to unplug the unit, mine was both the power and the radio.
From here my patience was tested and as a result the number of photos drops, apologies.
The Pioneer Unit comes with a carrier already attached, as I needed to utilise the carrier for the old unit I undid all the screws from the old and moved everything over to the new. I think I got lucky here as I didn't measure how inset the unit needed to be in the carrier. but instead lined it up with both the back of the carrier and some matching screw holes. You can then attach the wiring harness to the power cable of your old unit and the cables of your new unit and leave to the side.
Now onto the cable management. This will all depend on what features your new unit comes with, and which of those you want to utilise. I took this opportunity to also run a cable for my dashcam, which was previously an eyesore. I decided to use the column on the drivers side as my place to hide wires, which comes off using the trim removal tools and is held on by two clips. The Pioneer comes with a microphone, which has an attachment to hook over your sun visors. I coupled this with the wire from my dashcam and pushed it into the roof liner and then cable tied to the existing wiring in the column.
I then attached the DAB antenna to the front screen and attached the GPS to the dash as shown in the photo. All the wires went through the opening at the bottom of the column and after some wigging and hanging upside down by the pedals, we got them through to the hole in the head unit. I opted to cable tie them together and then also tie them onto one of the support bars, this was so they didn't rub on the steering column or have too much movement. Then you plug all the cables into their relevant spots and I ran the dashcam down to the 12v.
I opted to not connect the USB or AUX as i'm happy with wireless, but the compatibility is there for the future if needed.
If switching the facia:
This is where my patience was really tested, you will need to strip everything off the old facia and move it onto the new. Hazard switch, 12v, air vents and the two silver side panels. You can get a special tool to remove the 12v which will make your life much easier, but we managed to get it with an allen key and a YouTube video.
The last stretch!
Now it's just a case of putting everything back together, I did start her up at this point to make sure all the wiring was correct before screwing everything back in. The new unit should go back in easily if you are utilising the original carrier. The Pioneer came with black plastic surround, but this wasn't needed with the new facia. The clips for the facia can be a bit fiddly to get back in and i'm glad none snapped in the process. But if they do you can get some quite cheap on eBay.
And there you have it!
Hopefully this has been useful for some, and is easy enough to follow. Happy to answer any questions if people have any.
p.s. This is my first ever post so fingers crossed it works
Firstly a big shout out to the guy as my local Halfords who advised I check Connects2 ( connects2.com/ ) for compatibility instead of using Halfords. Then also to Dynamic Sounds Ltd ( www.dynamicsounds.co.uk ) for stocking everything that I needed. Then also a shameless plug to my Instagram... @Jimny.mud and my very patient husband
To ensure everything I purchased would be suitable I gave Dynamic Sounds a ring and they advised that you can email their tech team directly (technical@dynamicsounds.co.uk) with a photo of your current head unit, what you are looking for, and your car make, model and year. You with then get an email back (mine was within half an hour) with details and links of all the parts you need to upgrade.
Parts I used:
p.s. I know that these could probably be found cheaper on eBay etc. but it's done now...
- Pioneer SPH-DA77DAB 6.8" WVGA Screen:
www.dynamicsounds.co.uk/pioneer-sph-da77...al.html?search=77dab
- Wiring Harness Adaptor:
www.dynamicsounds.co.uk/ct20sz02-suzuki-...r.html?search=ct20sz
- Fascia Panel Adaptor
www.dynamicsounds.co.uk/connects2-ct23sz...a-panel-adaptor.html
In addition to the above I also needed:
- Basic tools (screwdrivers, snips etc.)
- Trim removal tools
- Cable ties
- Some patience...
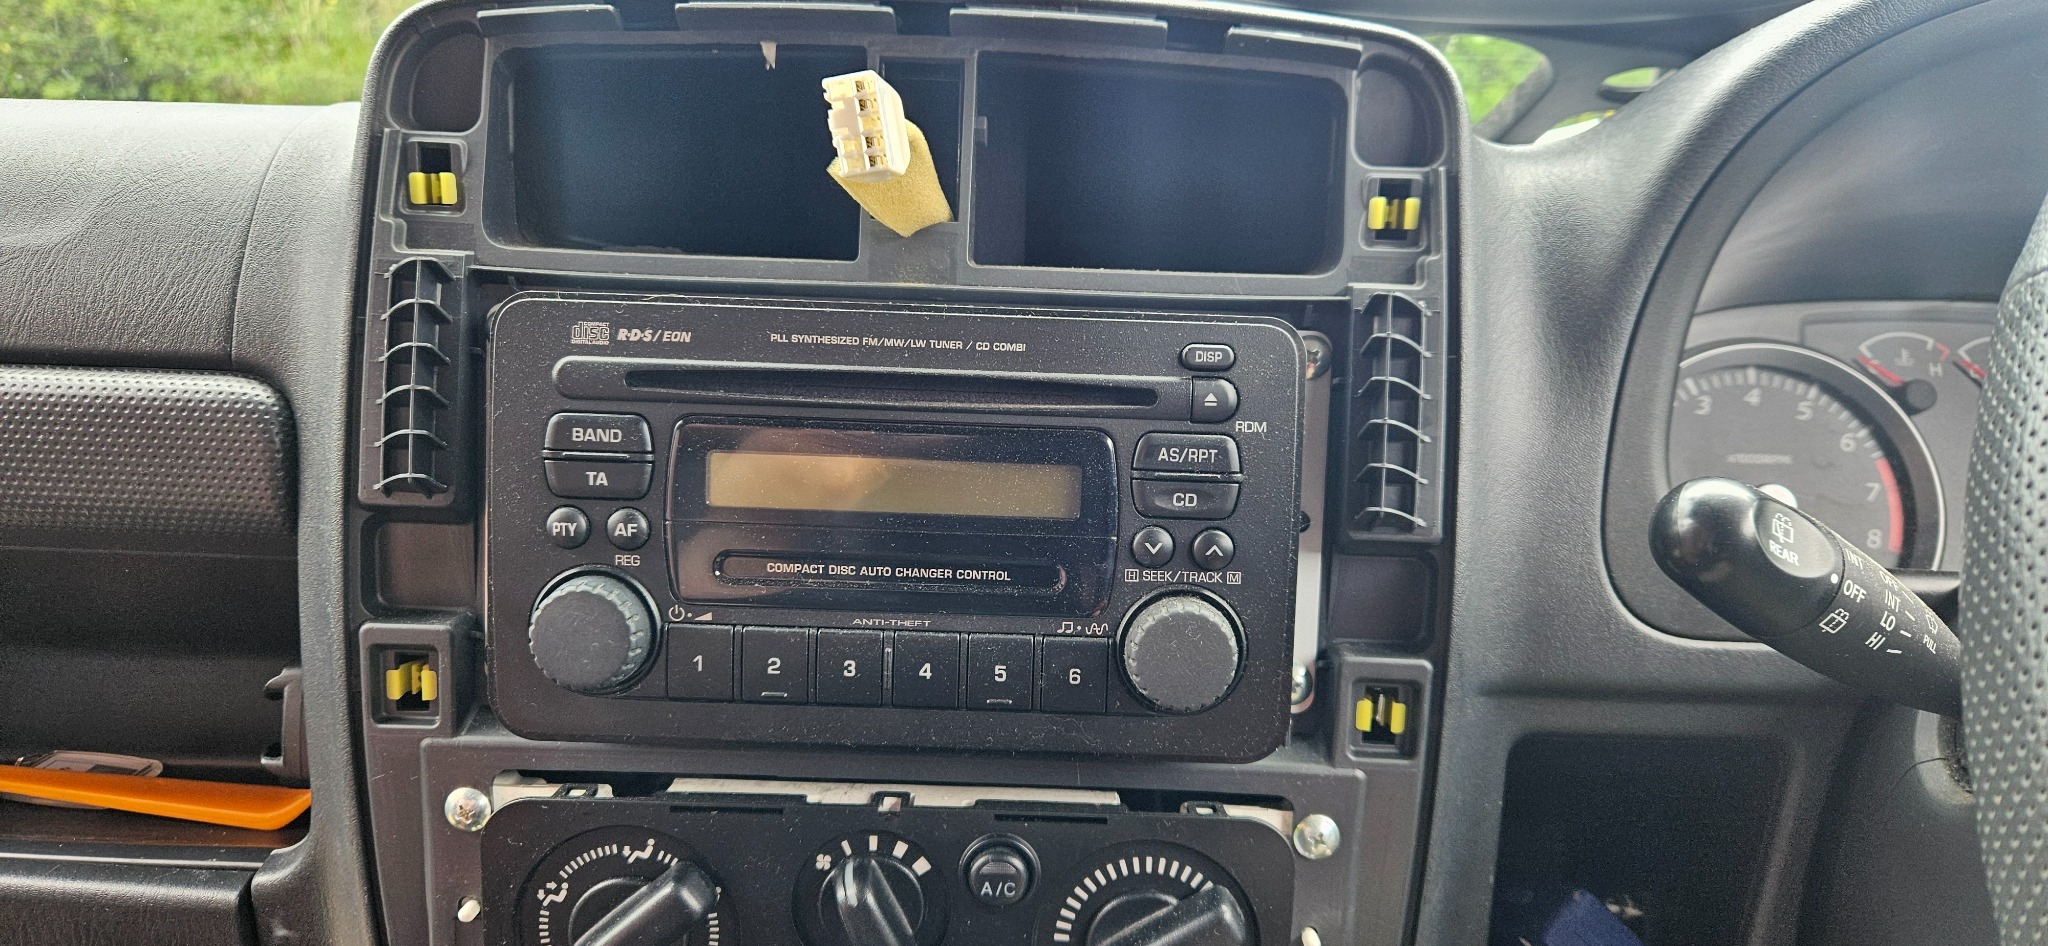
My Jimny is a 2011 and this is what I was working with to begin with.
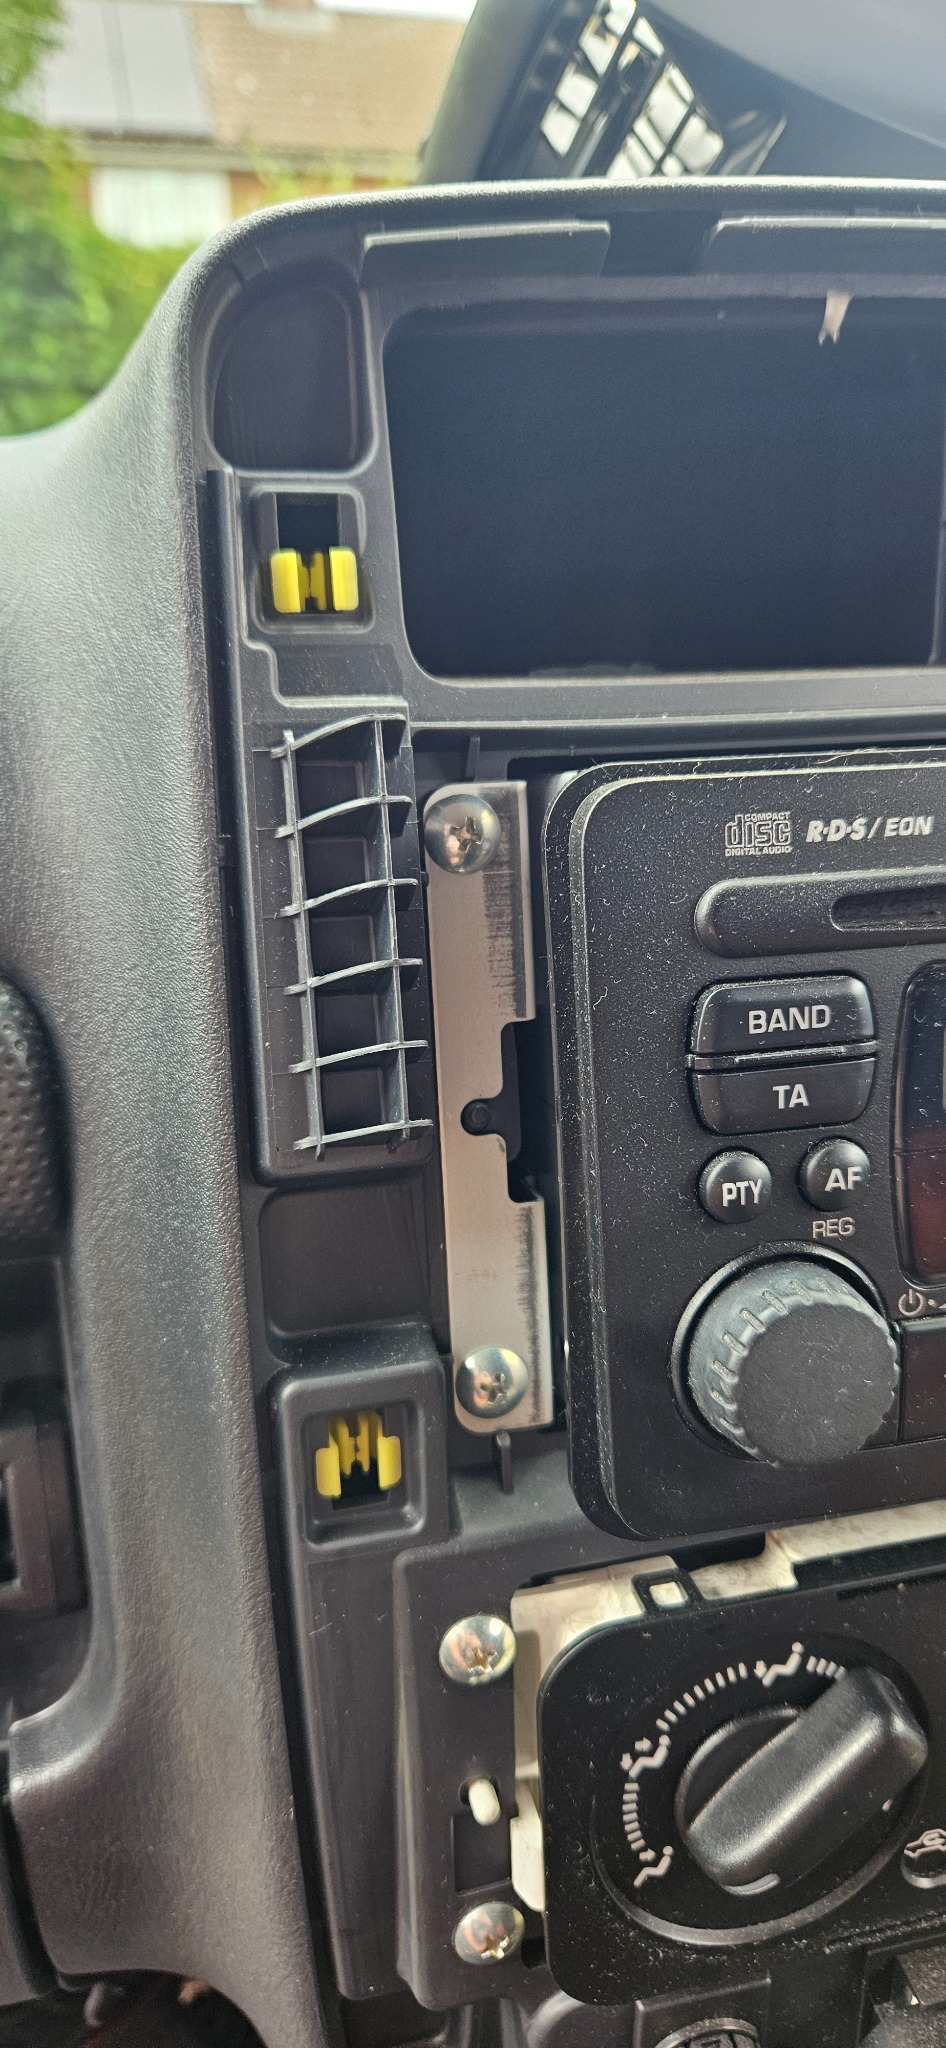
The first thing you are going to need to do is remove the ash tray/bin and take out these three screws. After doing this you will be able to use your trim tools to take off the whole front facia. There are three clips down both the left and the right hand side, which will come out quick easily with a little persuasion.
With the facia unclipped, you'll just need to unclip the hazard light and the cigarette lighter, again they are tiny clips but will release with some persuasion.
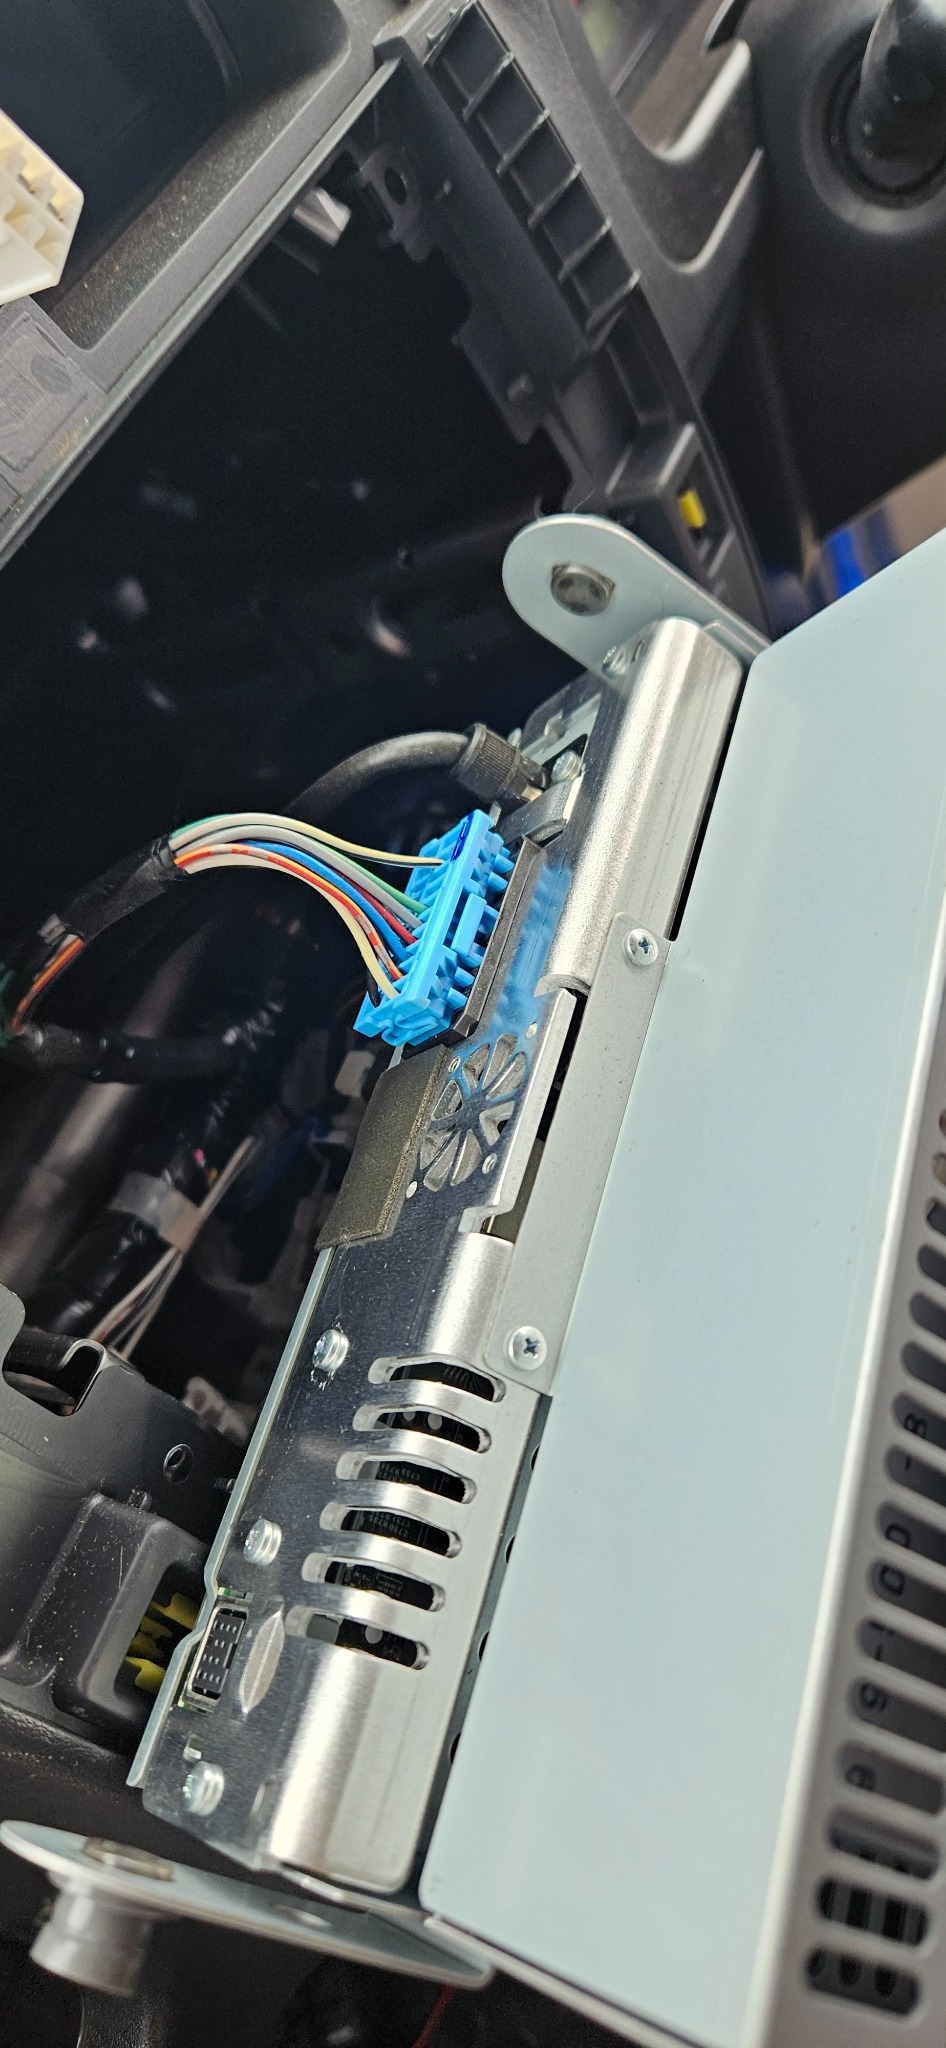
Next we need to slide out the old unit, this is held in by 4 screws and then will pull out. It sits within a carrier that follows along some tracks.
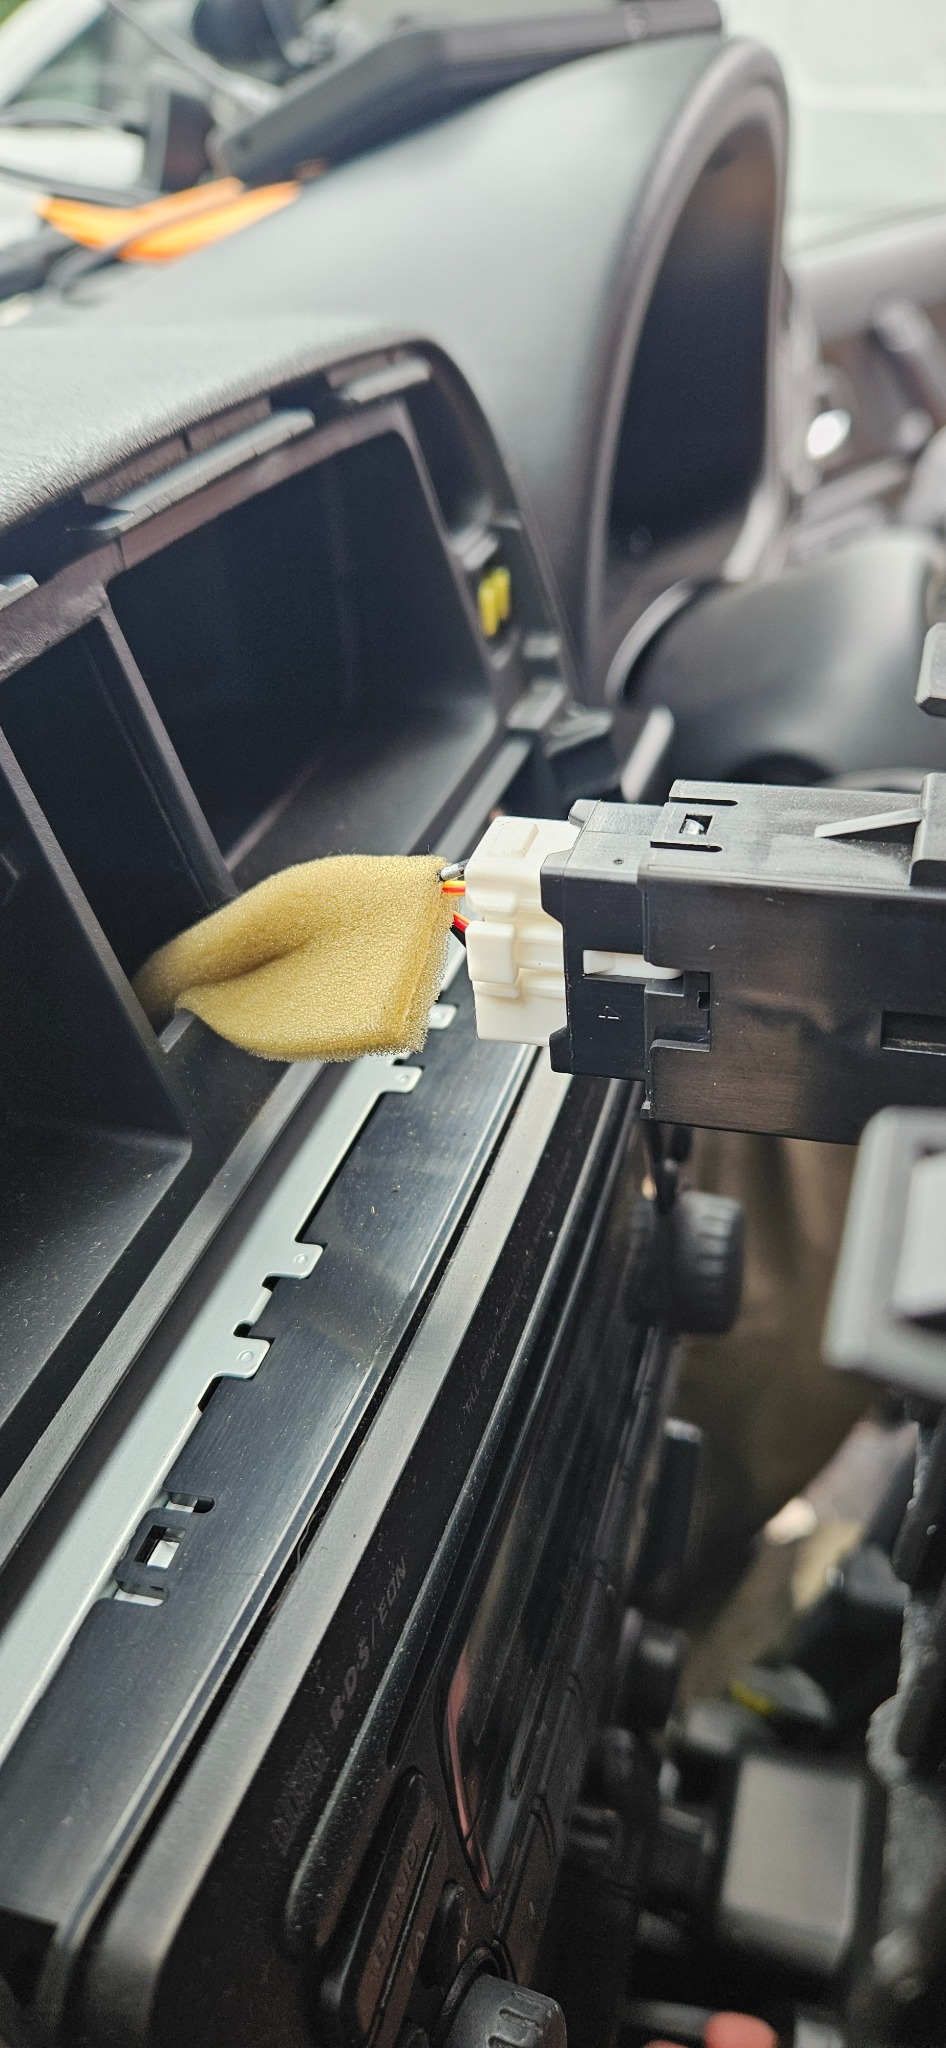
Once this is out you'll need to unplug the unit, mine was both the power and the radio.
From here my patience was tested and as a result the number of photos drops, apologies.
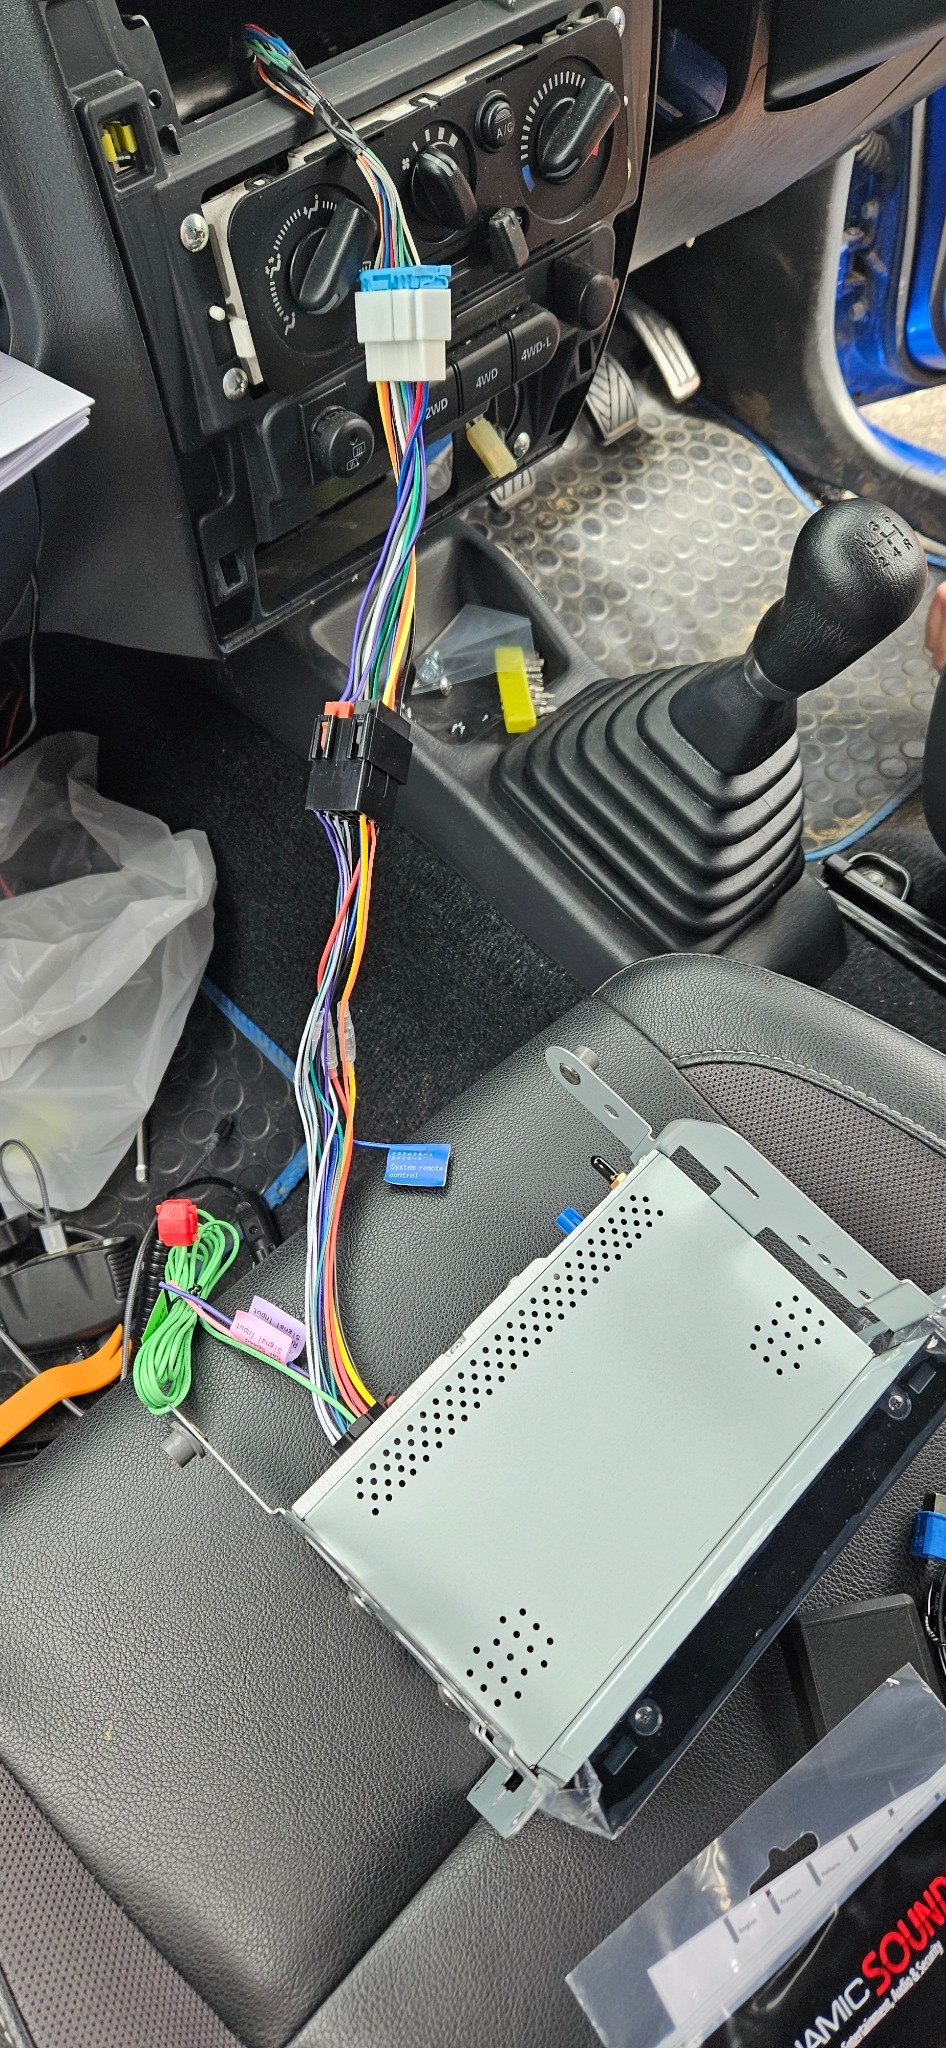
The Pioneer Unit comes with a carrier already attached, as I needed to utilise the carrier for the old unit I undid all the screws from the old and moved everything over to the new. I think I got lucky here as I didn't measure how inset the unit needed to be in the carrier. but instead lined it up with both the back of the carrier and some matching screw holes. You can then attach the wiring harness to the power cable of your old unit and the cables of your new unit and leave to the side.
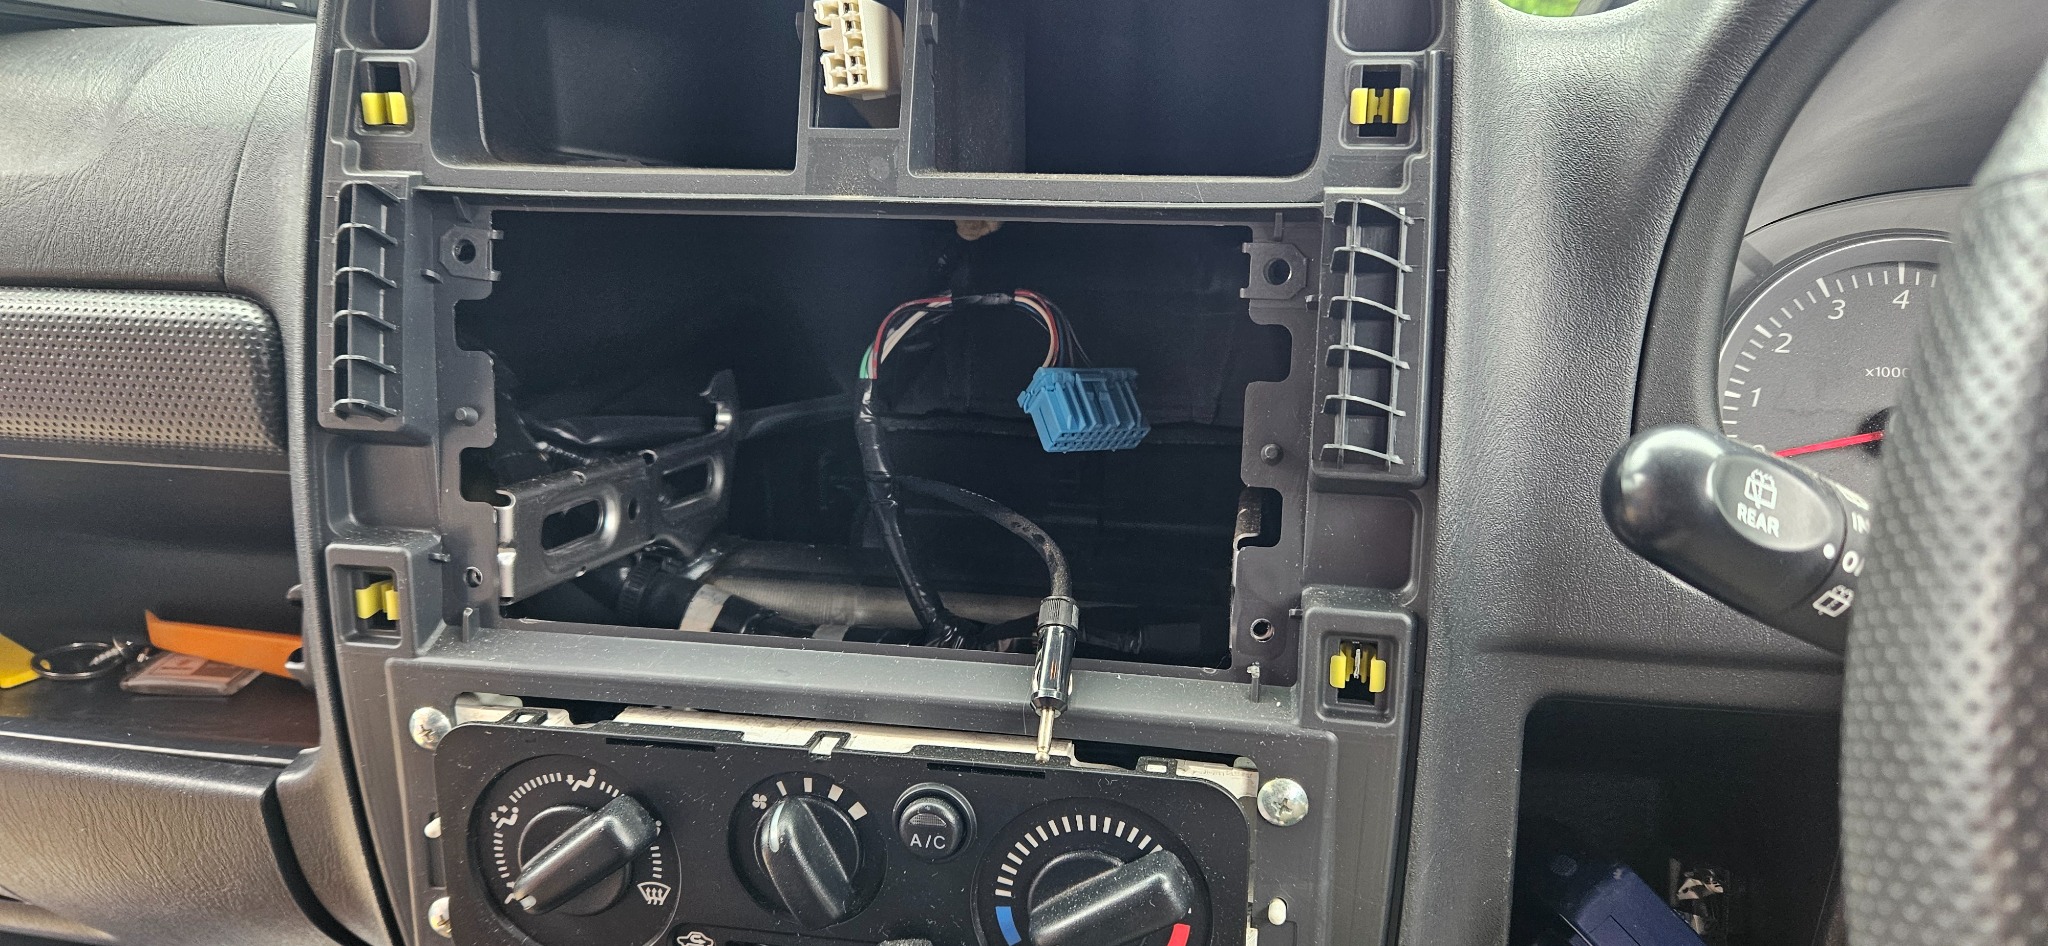
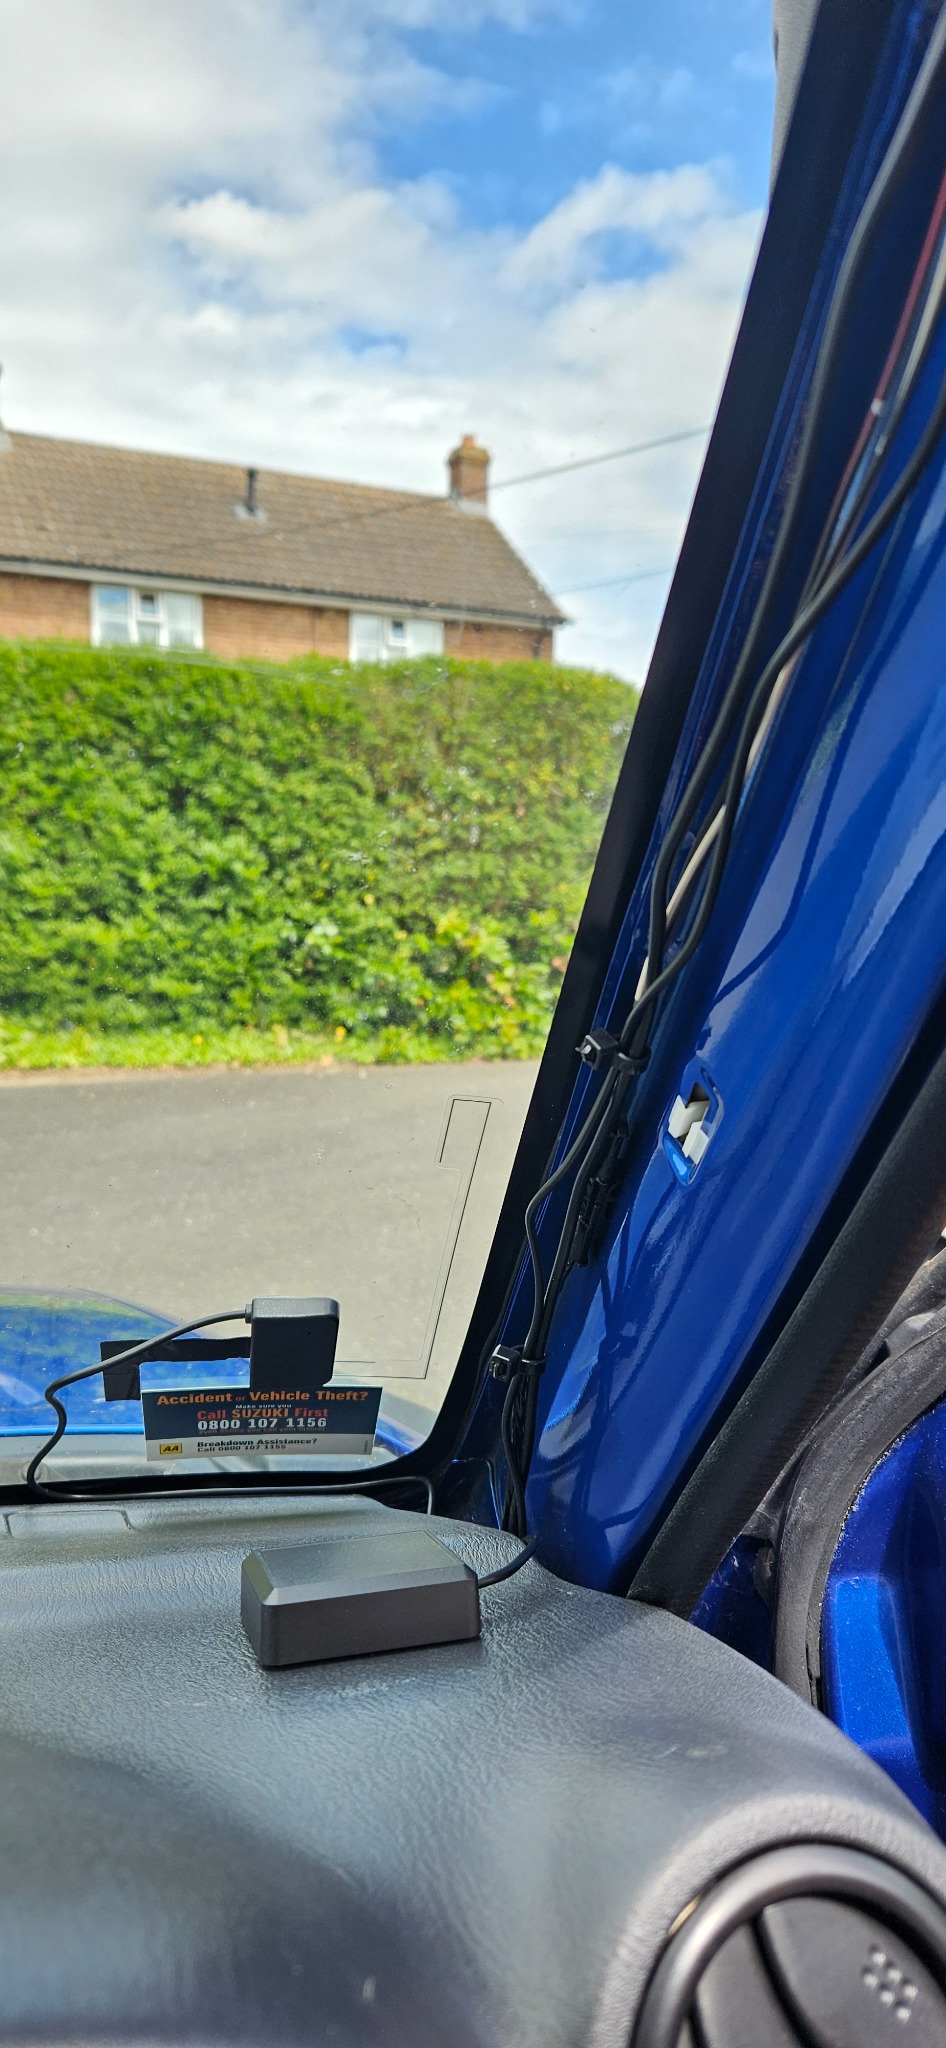
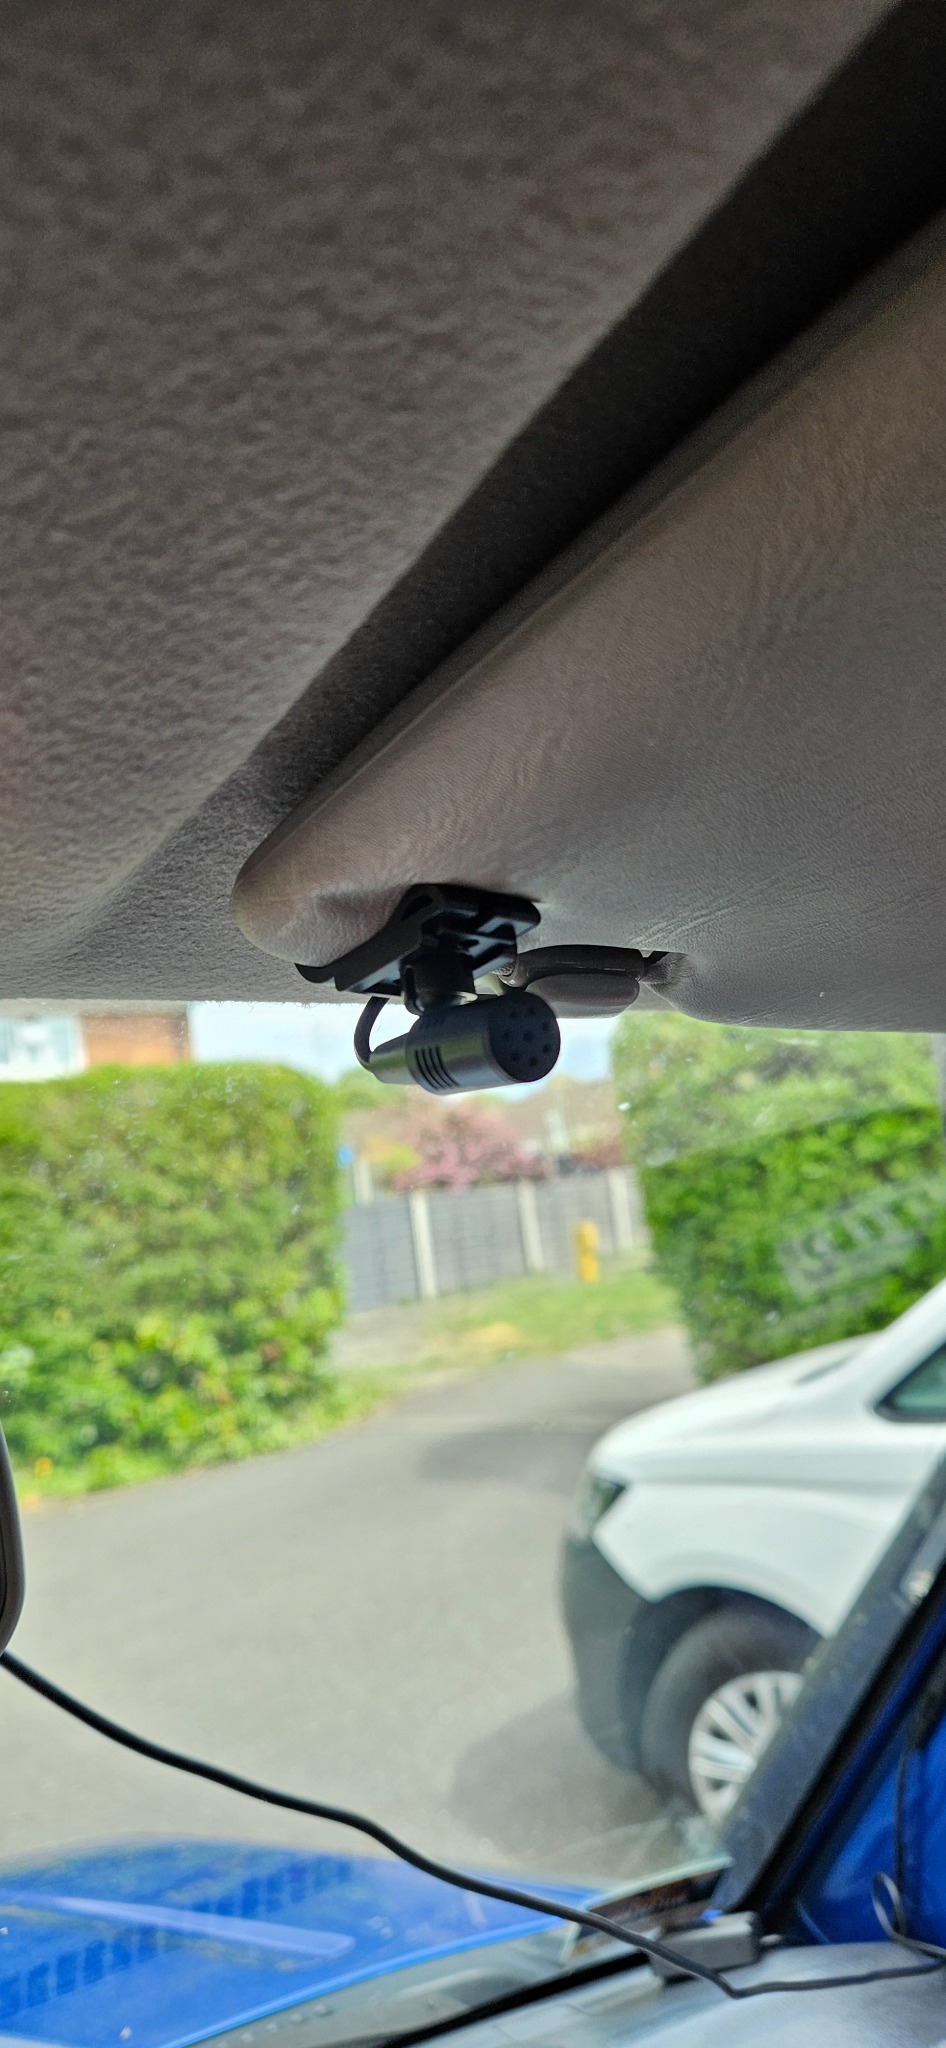
Now onto the cable management. This will all depend on what features your new unit comes with, and which of those you want to utilise. I took this opportunity to also run a cable for my dashcam, which was previously an eyesore. I decided to use the column on the drivers side as my place to hide wires, which comes off using the trim removal tools and is held on by two clips. The Pioneer comes with a microphone, which has an attachment to hook over your sun visors. I coupled this with the wire from my dashcam and pushed it into the roof liner and then cable tied to the existing wiring in the column.
I then attached the DAB antenna to the front screen and attached the GPS to the dash as shown in the photo. All the wires went through the opening at the bottom of the column and after some wigging and hanging upside down by the pedals, we got them through to the hole in the head unit. I opted to cable tie them together and then also tie them onto one of the support bars, this was so they didn't rub on the steering column or have too much movement. Then you plug all the cables into their relevant spots and I ran the dashcam down to the 12v.
I opted to not connect the USB or AUX as i'm happy with wireless, but the compatibility is there for the future if needed.
If switching the facia:
This is where my patience was really tested, you will need to strip everything off the old facia and move it onto the new. Hazard switch, 12v, air vents and the two silver side panels. You can get a special tool to remove the 12v which will make your life much easier, but we managed to get it with an allen key and a YouTube video.
The last stretch!
Now it's just a case of putting everything back together, I did start her up at this point to make sure all the wiring was correct before screwing everything back in. The new unit should go back in easily if you are utilising the original carrier. The Pioneer came with black plastic surround, but this wasn't needed with the new facia. The clips for the facia can be a bit fiddly to get back in and i'm glad none snapped in the process. But if they do you can get some quite cheap on eBay.
And there you have it!
Hopefully this has been useful for some, and is easy enough to follow. Happy to answer any questions if people have any.
p.s. This is my first ever post so fingers crossed it works
Please Log in or Create an account to join the conversation.
Less
More
- Posts: 2328
- Thank you received: 664
27 May 2025 16:30 #260623
by DrRobin
2020 blue SZ5 (one of the last to be registered in the UK)
Ex 2011 Blue Jimny SZ4
Northumberland Jimny Blog
Replied by DrRobin on topic Replacing Gen 3 Head Unit - Android Auto, Apple Carplay, DAB, Reversing Camera..
Nice work. Very similar to the setup I had in my old Gen 3, right down to the tiny cb, which I managed to fit in place of the ash tray.
www.bigjimny.com/forum/6-jimny-chat/6895...-stereo-2006-onwards
www.bigjimny.com/forum/6-jimny-chat/68843-the-ash-tray-cb
Robin
www.bigjimny.com/forum/6-jimny-chat/6895...-stereo-2006-onwards
www.bigjimny.com/forum/6-jimny-chat/68843-the-ash-tray-cb
Robin
2020 blue SZ5 (one of the last to be registered in the UK)
Ex 2011 Blue Jimny SZ4
Northumberland Jimny Blog
The following user(s) said Thank You: jimny.mud
Please Log in or Create an account to join the conversation.
- Darthblaker7474
-

- Offline
- Elite Member
-

Registered
Less
More
- Posts: 263
- Thank you received: 37
29 May 2025 20:10 #260645
by Darthblaker7474
Replied by Darthblaker7474 on topic Replacing Gen 3 Head Unit - Android Auto, Apple Carplay, DAB, Reversing Camera..
Did you lose any clips into the infinite void that is the dashboard.
Please Log in or Create an account to join the conversation.
30 May 2025 10:09 #260650
by jimny.mud
Replied by jimny.mud on topic Replacing Gen 3 Head Unit - Android Auto, Apple Carplay, DAB, Reversing Camera..
Thanks Robin. As I bought the new facia I want to keep it neat, but might move the CB in the future.
Please Log in or Create an account to join the conversation.
30 May 2025 10:11 #260651
by jimny.mud
Replied by jimny.mud on topic Replacing Gen 3 Head Unit - Android Auto, Apple Carplay, DAB, Reversing Camera..
Thankfully no clips lost this time!
The following user(s) said Thank You: Darthblaker7474
Please Log in or Create an account to join the conversation.
30 May 2025 14:29 #260653
by yakuza
Norway -84 SJ410, 87 SJ413 lwb, 88 sammy trailer.
2005 Jimny M16A VVT, 235 Cooper Disco, 2" Trailmaster, ARB rear lck.
Replied by yakuza on topic Replacing Gen 3 Head Unit - Android Auto, Apple Carplay, DAB, Reversing Camera..
Oh those yellow clips are not my favourite parts in there.
Same setup as me as well and the CB too.
However my head unit is an old pioneer. was new a few years ago when it went in but not now.
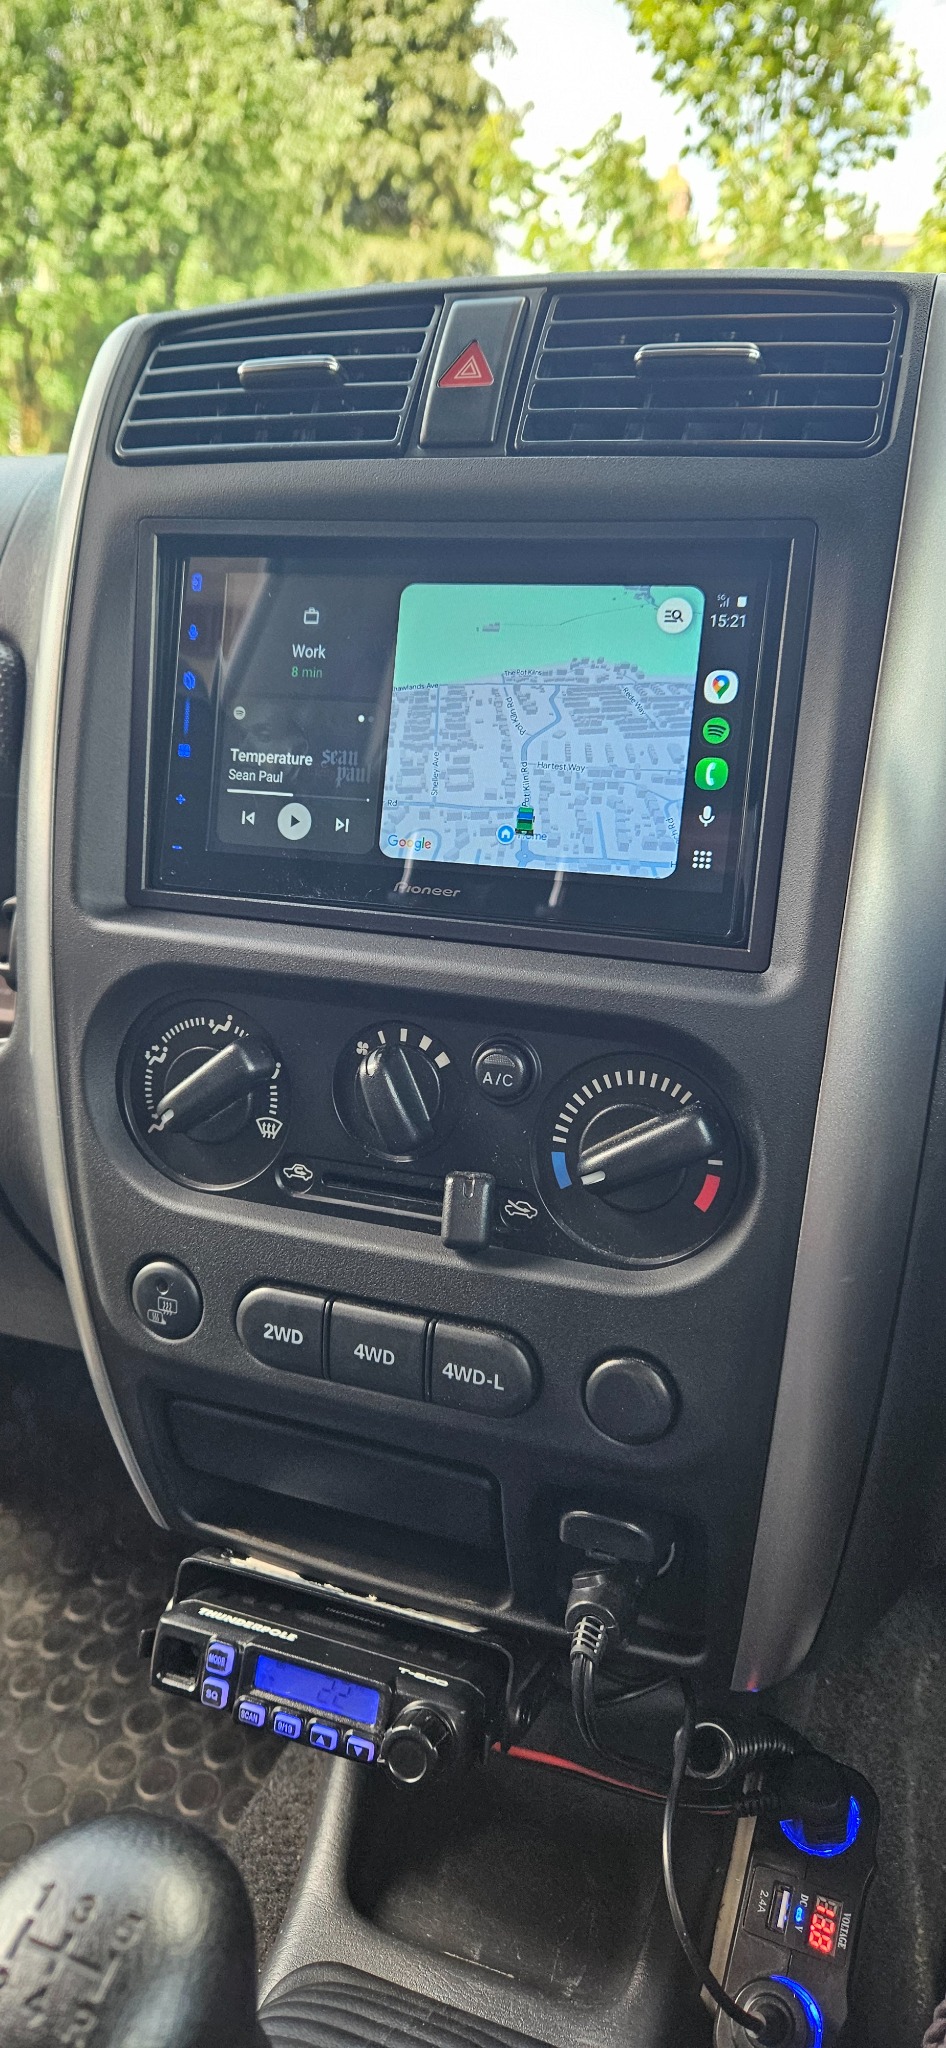
How does this or other new head units with android auto and its own GPS actually work?
Can you run a navigation app on them and still use the phone for other stuff at the same time now?
Are the head units a stand alone thing now and not only the chinese android units?
I now use the old head unit only for BT music from my phone.
And navigation apps on the phone screen.
Same setup as me as well and the CB too.
However my head unit is an old pioneer. was new a few years ago when it went in but not now.
How does this or other new head units with android auto and its own GPS actually work?
Can you run a navigation app on them and still use the phone for other stuff at the same time now?
Are the head units a stand alone thing now and not only the chinese android units?
I now use the old head unit only for BT music from my phone.
And navigation apps on the phone screen.
Norway -84 SJ410, 87 SJ413 lwb, 88 sammy trailer.
2005 Jimny M16A VVT, 235 Cooper Disco, 2" Trailmaster, ARB rear lck.
Please Log in or Create an account to join the conversation.
Time to create page: 0.394 seconds