

Are you building a Mud Monster or a Pavement Princess??
If so you can have your own thread in this section.
This section on other websites has led to arguments and contention. People are posting pictures of their pride and joy and therefore CONSTRUCTIVE comments only please!
If so you can have your own thread in this section.
This section on other websites has led to arguments and contention. People are posting pictures of their pride and joy and therefore CONSTRUCTIVE comments only please!
Dave's la(te)st buggy build...
Less
More
- Posts: 3727
- Thank you received: 923
24 May 2020 21:07 - 25 May 2020 10:10 #222797
by X8GGY
Replied by X8GGY on topic Dave's la(te)st buggy build...
Excellent day today... I started by sleaving the other front recovery point / shackle link, and setup for grinding the rear hoop of the body...
And then the wife called me in for breakfast, a bacon, egg and mushroom bagel and a cuppa")
And then it was 10 o'clock so a decent hour on a Sunday morning to fire up the angle grinder without upsetting the neighbours
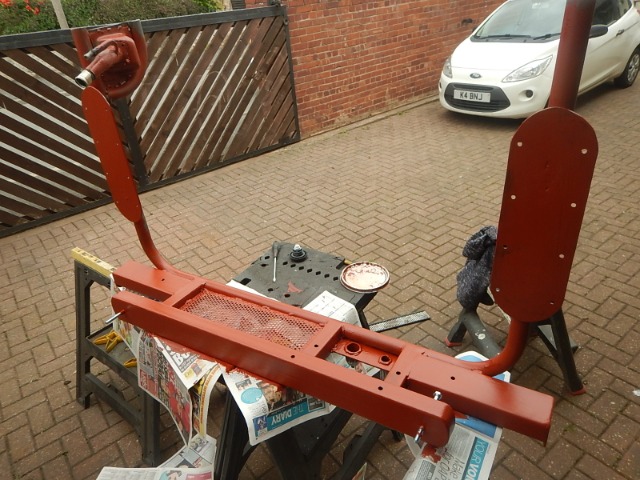
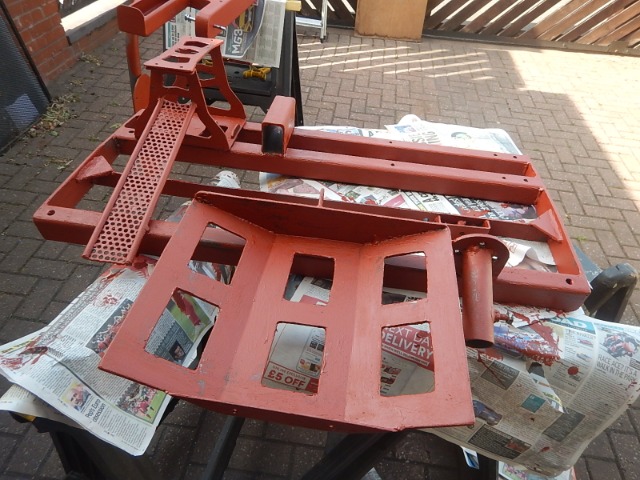
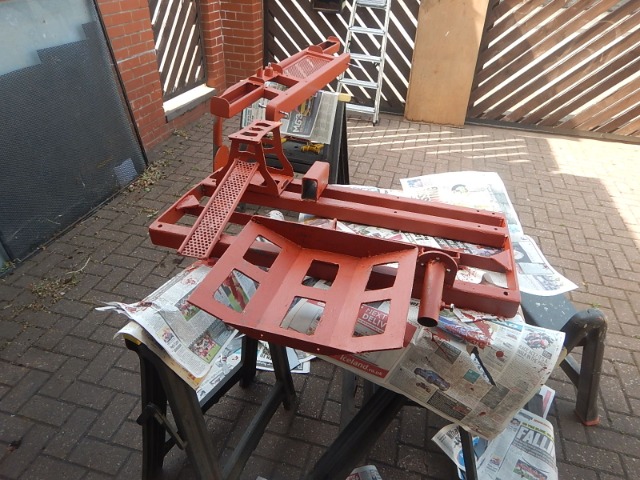
All ground and sanded back, and out came the Red-Oxide paint...
I then made some bits for the rear chassis tray while the paint dried, and then turned it over and did the otherside...
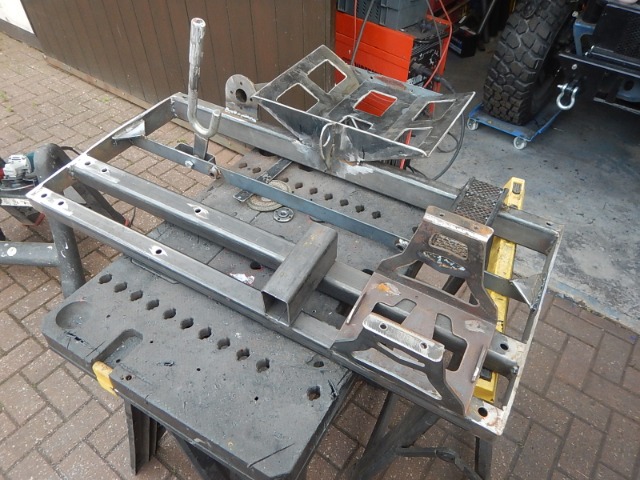
I then welded the new bits to the chassis tray - the winch rope guide handle, some triangulation, the end of the winch rope tube with the fairlead mount on the end, and a small guide for the battery cables...
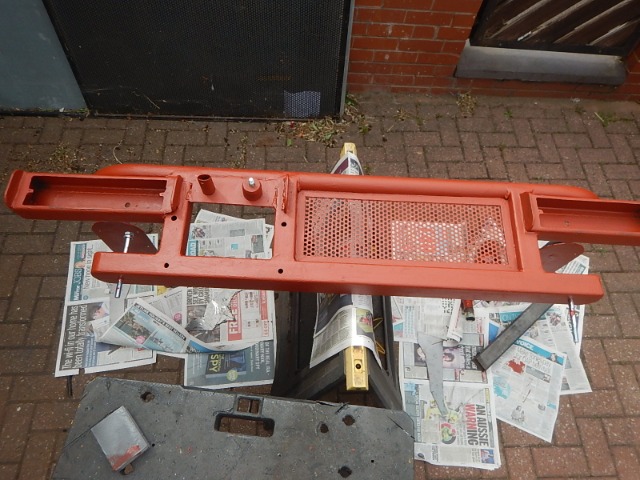
You can see that better in this photo as it's been turned round for painting...
So with those two bits completed and painted - which feels like real progress now - I set them aside to dry, and began thinking about the upcoming "quite quiet" Wednesday work...
Which will be paint the chassis tray black smoothrite and start reassembling... so that meant -
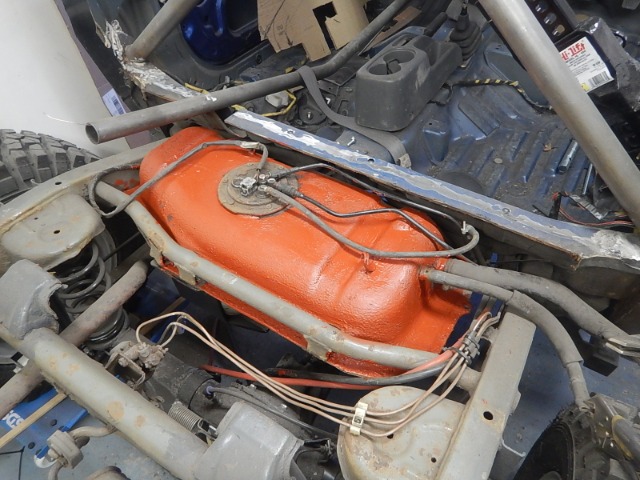
The chassis will need painting (grey), so I thought I;d paint the fuel tank "ready" for then...
One last component -
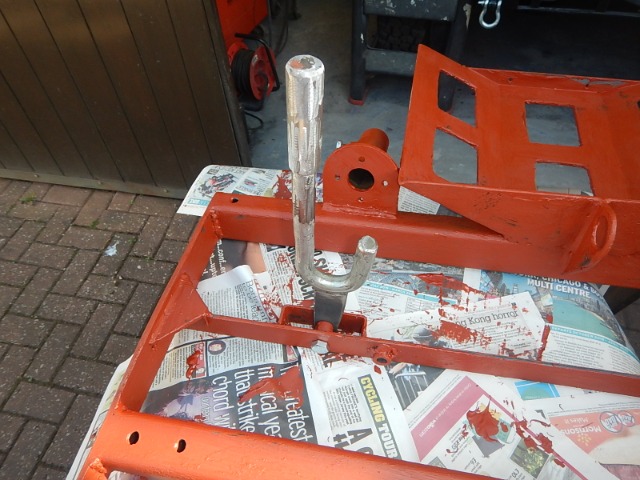
The winch rope guide handle... that will be passed to my mate Rich who runs FloFlex Polyurethane to go in their next batch of zinc plating (as the U in the guide will have the rope rubbing against it, paint would wear off)... and then a bicycle handlebar rubber grip will go on the wider diameter bit at the top") Along with the top plate of the winch snatch block mount, as that will be matching zinc plated too... (I'm still waiting for a few oversize wing nuts to arrive from China for that too)
Along with the top plate of the winch snatch block mount, as that will be matching zinc plated too... (I'm still waiting for a few oversize wing nuts to arrive from China for that too)
So I'm looking forward to reassembly on Wednesday... I'll see if I can sneak out Tuesday afternoon to paint the chassis in readiness ...
And then the wife called me in for breakfast, a bacon, egg and mushroom bagel and a cuppa
And then it was 10 o'clock so a decent hour on a Sunday morning to fire up the angle grinder without upsetting the neighbours
All ground and sanded back, and out came the Red-Oxide paint...
I then made some bits for the rear chassis tray while the paint dried, and then turned it over and did the otherside...
I then welded the new bits to the chassis tray - the winch rope guide handle, some triangulation, the end of the winch rope tube with the fairlead mount on the end, and a small guide for the battery cables...
You can see that better in this photo as it's been turned round for painting...
So with those two bits completed and painted - which feels like real progress now - I set them aside to dry, and began thinking about the upcoming "quite quiet" Wednesday work...
Which will be paint the chassis tray black smoothrite and start reassembling... so that meant -
The chassis will need painting (grey), so I thought I;d paint the fuel tank "ready" for then...
One last component -
The winch rope guide handle... that will be passed to my mate Rich who runs FloFlex Polyurethane to go in their next batch of zinc plating (as the U in the guide will have the rope rubbing against it, paint would wear off)... and then a bicycle handlebar rubber grip will go on the wider diameter bit at the top
Along with the top plate of the winch snatch block mount, as that will be matching zinc plated too... (I'm still waiting for a few oversize wing nuts to arrive from China for that too)So I'm looking forward to reassembly on Wednesday... I'll see if I can sneak out Tuesday afternoon to paint the chassis in readiness ...
Last edit: 25 May 2020 10:10 by X8GGY.
Please Log in or Create an account to join the conversation.
Less
More
- Posts: 3727
- Thank you received: 923
25 May 2020 16:31 - 25 May 2020 16:36 #222818
by X8GGY
Replied by X8GGY on topic Dave's la(te)st buggy build...
The joys of being your own boss (well, as long as the wife agrees!)... our member of staff that works Monday afternoons doesn't normally do bank holidays, but unexpectedly turned in this afternoon, so I volunteered to sneak off, as you do, well, there was no point the three of us being there was there?!
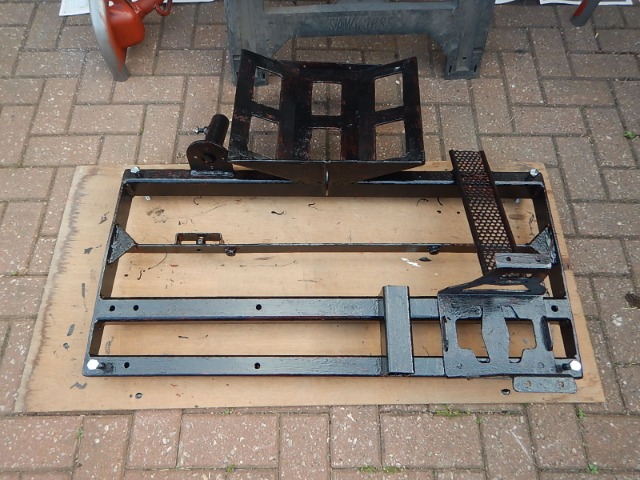
Chassis (winch) tray painted black smoothrite...

Chassis painted grey (I'd already done underneath and inside the spring and bump mounts when rebuilding the suspension), and the end of the winch rope tube painted black (the bit in the cab will be black bedliner to match the floor)... and the exhaust painted heat proof silver to revitalise it!... :lol:

Finally, painted around the "body" mount areas and underneath, as they won't be easy to get to after assembly...
So,... all ready for bolting back together on Wednesday?
Chassis (winch) tray painted black smoothrite...
Chassis painted grey (I'd already done underneath and inside the spring and bump mounts when rebuilding the suspension), and the end of the winch rope tube painted black (the bit in the cab will be black bedliner to match the floor)... and the exhaust painted heat proof silver to revitalise it!... :lol:
Finally, painted around the "body" mount areas and underneath, as they won't be easy to get to after assembly...
So,... all ready for bolting back together on Wednesday?
Last edit: 25 May 2020 16:36 by X8GGY.
Please Log in or Create an account to join the conversation.
Less
More
- Posts: 9638
- Thank you received: 1927
25 May 2020 17:11 #222822
by Lambert
Temeraire (2018 quasar grey automatic)
Pavement princess or back road menace?
Bellerophon (2024 grello van daily)
ADORJ Attention Deficit Ooooh Race Jimny!
Replied by Lambert on topic Dave's la(te)st buggy build...
Love the yellow, though it could be brighter?
Temeraire (2018 quasar grey automatic)
Pavement princess or back road menace?
Bellerophon (2024 grello van daily)
ADORJ Attention Deficit Ooooh Race Jimny!
The following user(s) said Thank You: X8GGY
Please Log in or Create an account to join the conversation.
Less
More
- Posts: 3727
- Thank you received: 923
25 May 2020 18:56 #222825
by X8GGY
Replied by X8GGY on topic Dave's la(te)st buggy build...
It’s JCB Yellow paint, so should be hard wearing, that was the main criteria.... that and being Yella! Oh, and brushable for touching up after ‘T&S’ days out... no point me spray painting it and then rubbing up against those pesky trees with it?! :woohoo:
The following user(s) said Thank You: Lambert
Please Log in or Create an account to join the conversation.
Less
More
- Posts: 9638
- Thank you received: 1927
25 May 2020 20:04 #222826
by Lambert
Temeraire (2018 quasar grey automatic)
Pavement princess or back road menace?
Bellerophon (2024 grello van daily)
ADORJ Attention Deficit Ooooh Race Jimny!
Replied by Lambert on topic Dave's la(te)st buggy build...
Ah a machine enamel. The only thing I have found that killed that stuff is the beating flails of my drum muck spreader and that is much more violent than a tight and scratchy lane.
Temeraire (2018 quasar grey automatic)
Pavement princess or back road menace?
Bellerophon (2024 grello van daily)
ADORJ Attention Deficit Ooooh Race Jimny!
Please Log in or Create an account to join the conversation.
Less
More
- Posts: 3727
- Thank you received: 923
26 May 2020 05:39 #222833
by X8GGY
Replied by X8GGY on topic Dave's la(te)st buggy build...
That's the stuff -
vAPORMATIC
machinery paint, I got some off a neighbour / customer before he retired and sold his Agricultural suppliy company locally

Please Log in or Create an account to join the conversation.
Time to create page: 0.263 seconds