

Are you building a Mud Monster or a Pavement Princess??
If so you can have your own thread in this section.
This section on other websites has led to arguments and contention. People are posting pictures of their pride and joy and therefore CONSTRUCTIVE comments only please!
If so you can have your own thread in this section.
This section on other websites has led to arguments and contention. People are posting pictures of their pride and joy and therefore CONSTRUCTIVE comments only please!
Deluxs new black Jimny, Project KZA
09 Dec 2018 15:39 #198795
by Delux
Busiest Mechanic in Scotland!
My pics (inc. pics of my latest Jimny project)...
www.flickr.com/photos/159422664@N08/albums
My ebay stuff for sale...
www.ebay.co.uk/usr/deeelux
Replied by Delux on topic Deluxs new black Jimny, Project KZA
Ann Update!
This week my Jimny has kept Paypal and the postie busy
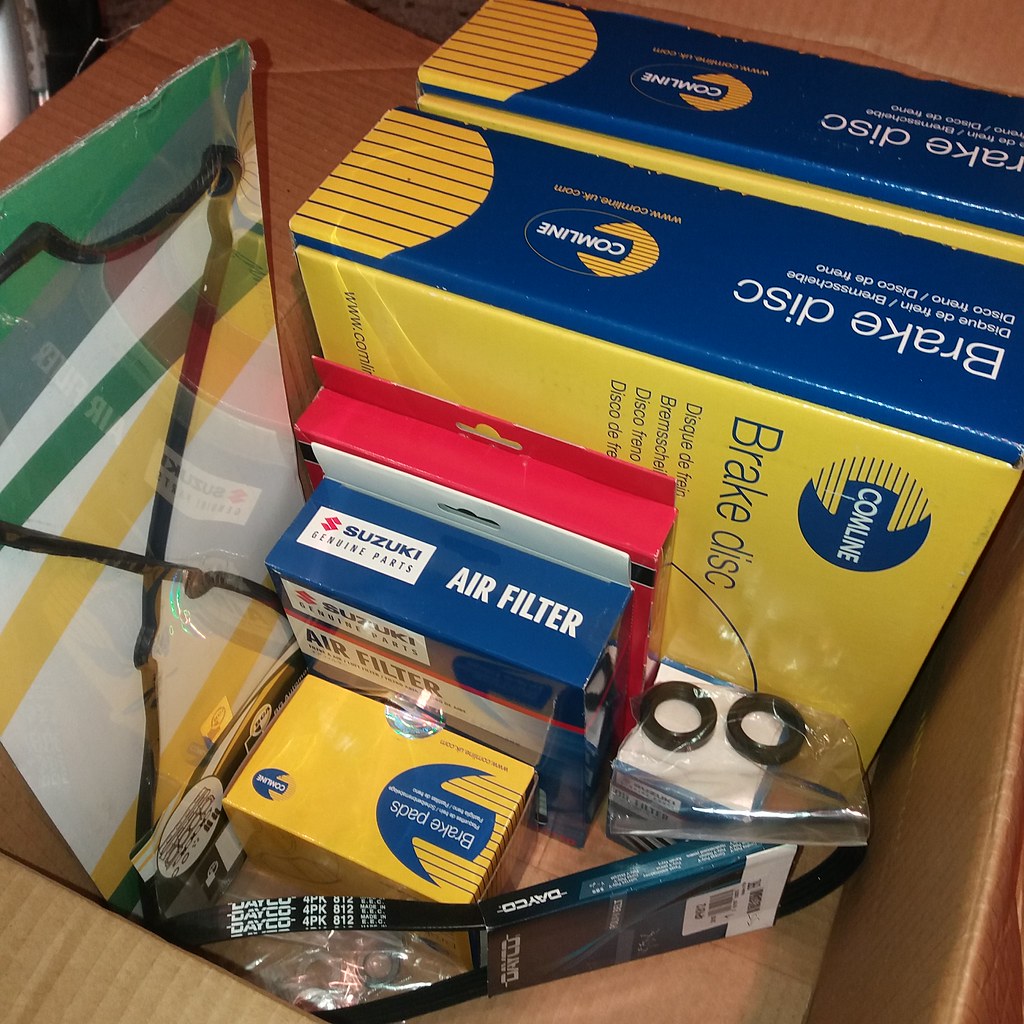 20181208_134613
by
deeelux deeelux
, on Flickr
20181208_134613
by
deeelux deeelux
, on Flickr
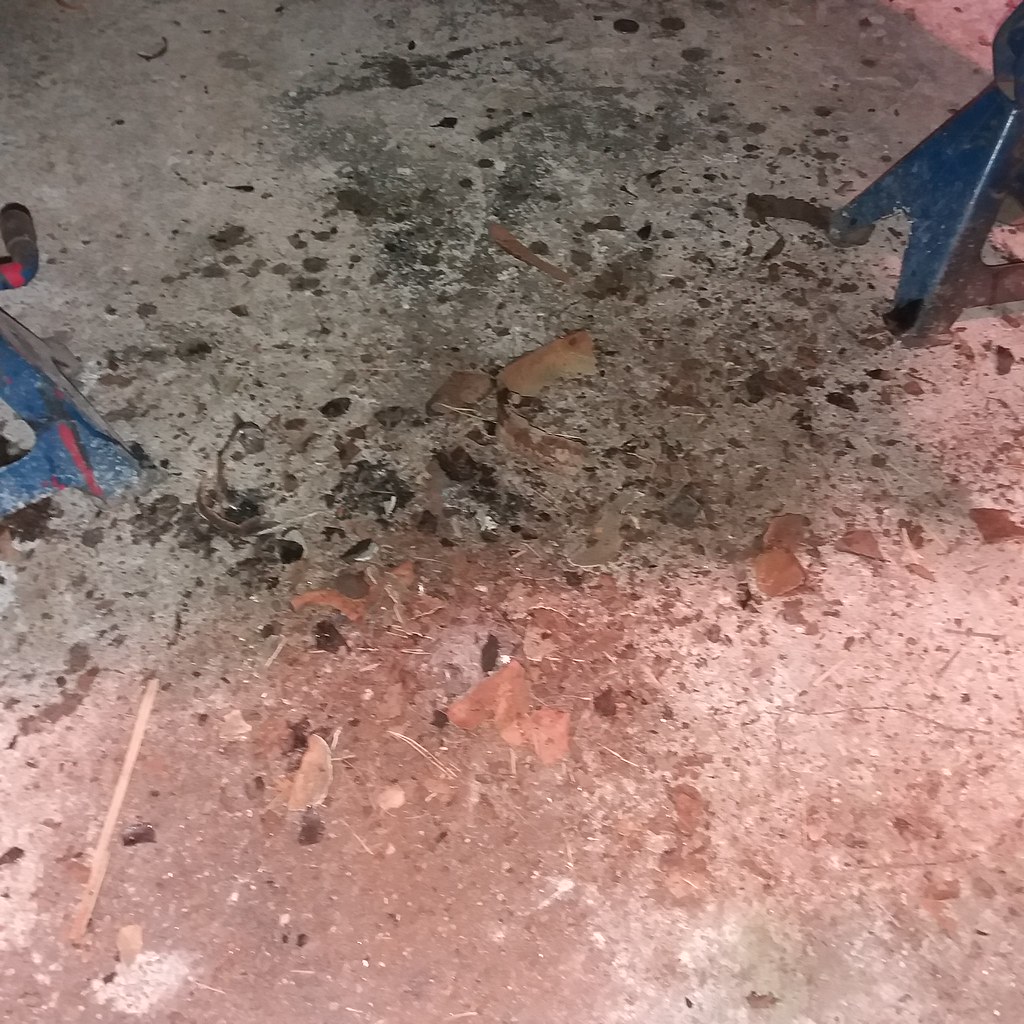
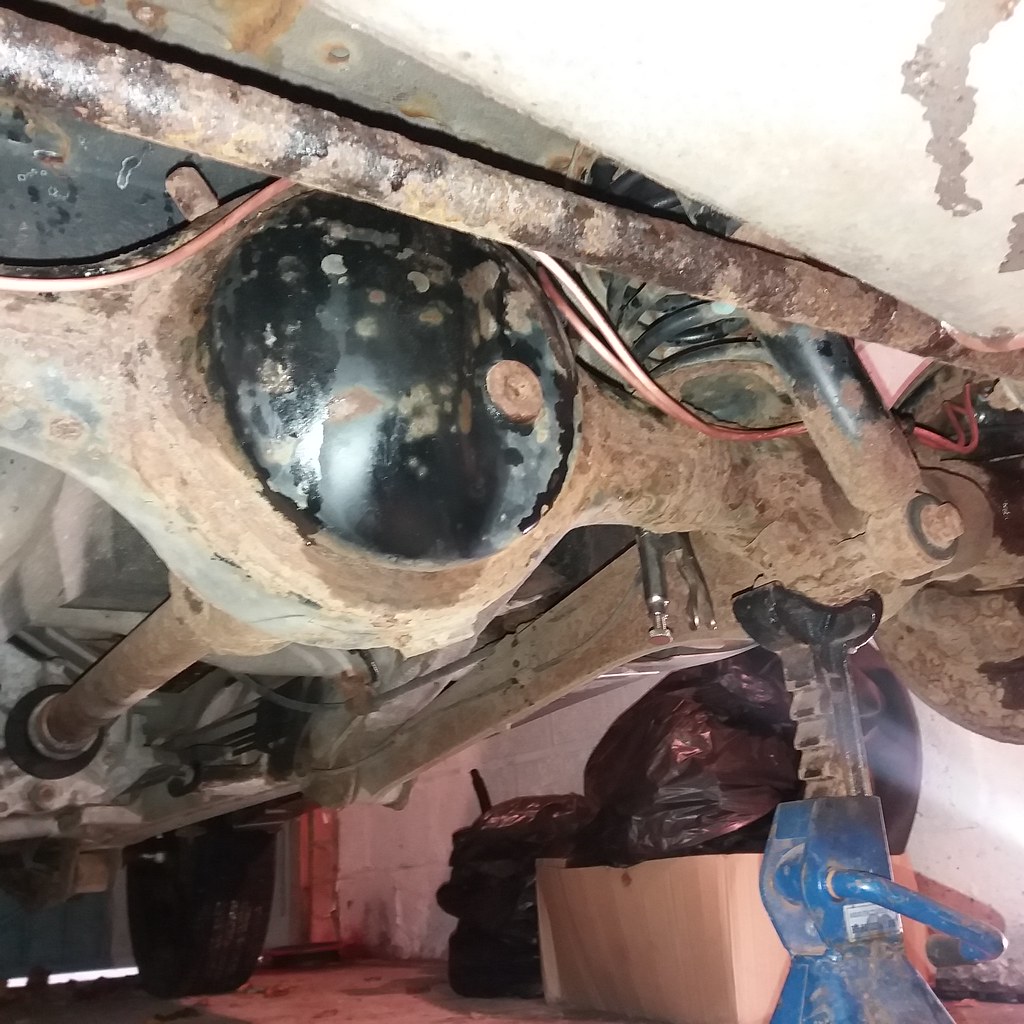
First on the agenda in the Hot rod shop was the gaping crater in the boot. My corrosion assesment tool was deployed
 20181209_123109
by
deeelux deeelux
, on Flickr
20181209_123109
by
deeelux deeelux
, on Flickr
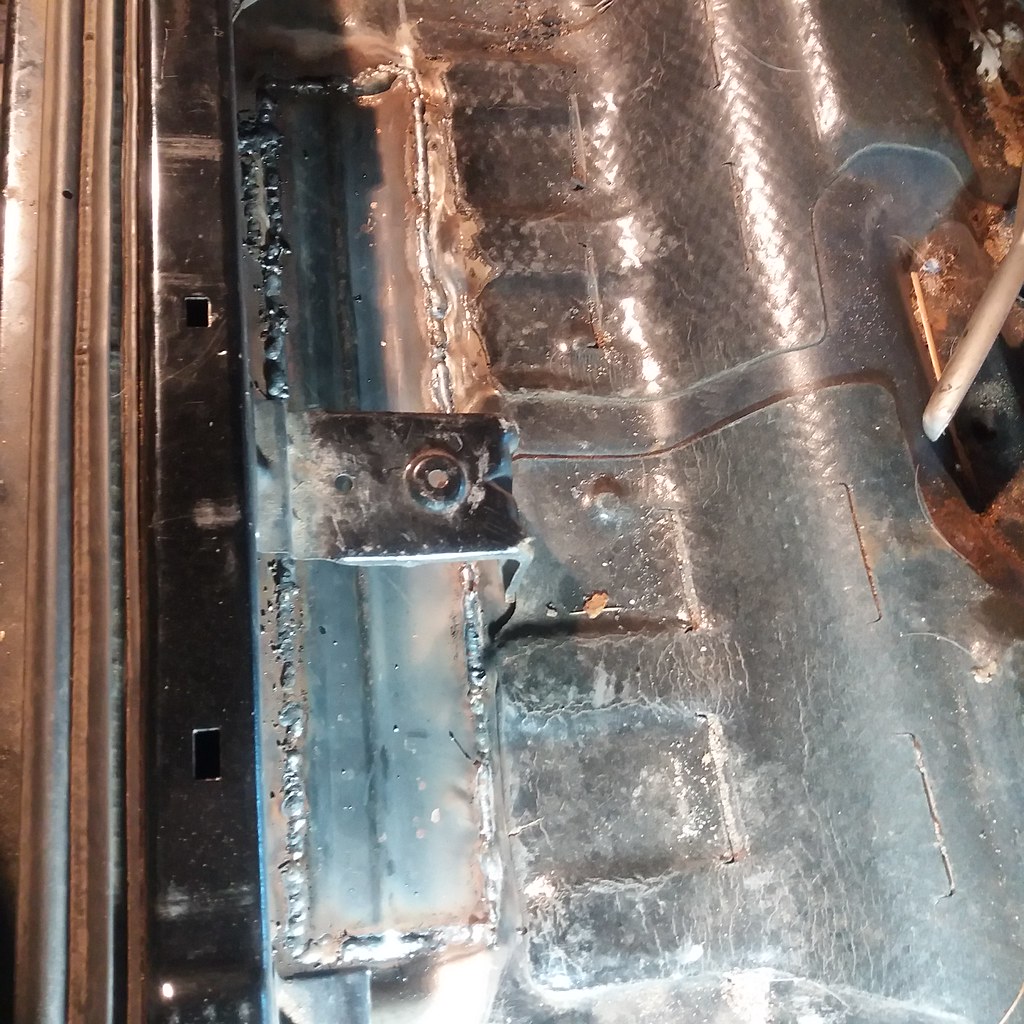
I do not claim to be a panel beater and in an ideal world I'd be lifting the body off and spot welding a new boot floor in. However, in the real world I am just a mechanic with a welder and a patch is a decent enough
 20181209_121432
by
deeelux deeelux
, on Flickr
20181209_121432
by
deeelux deeelux
, on Flickr
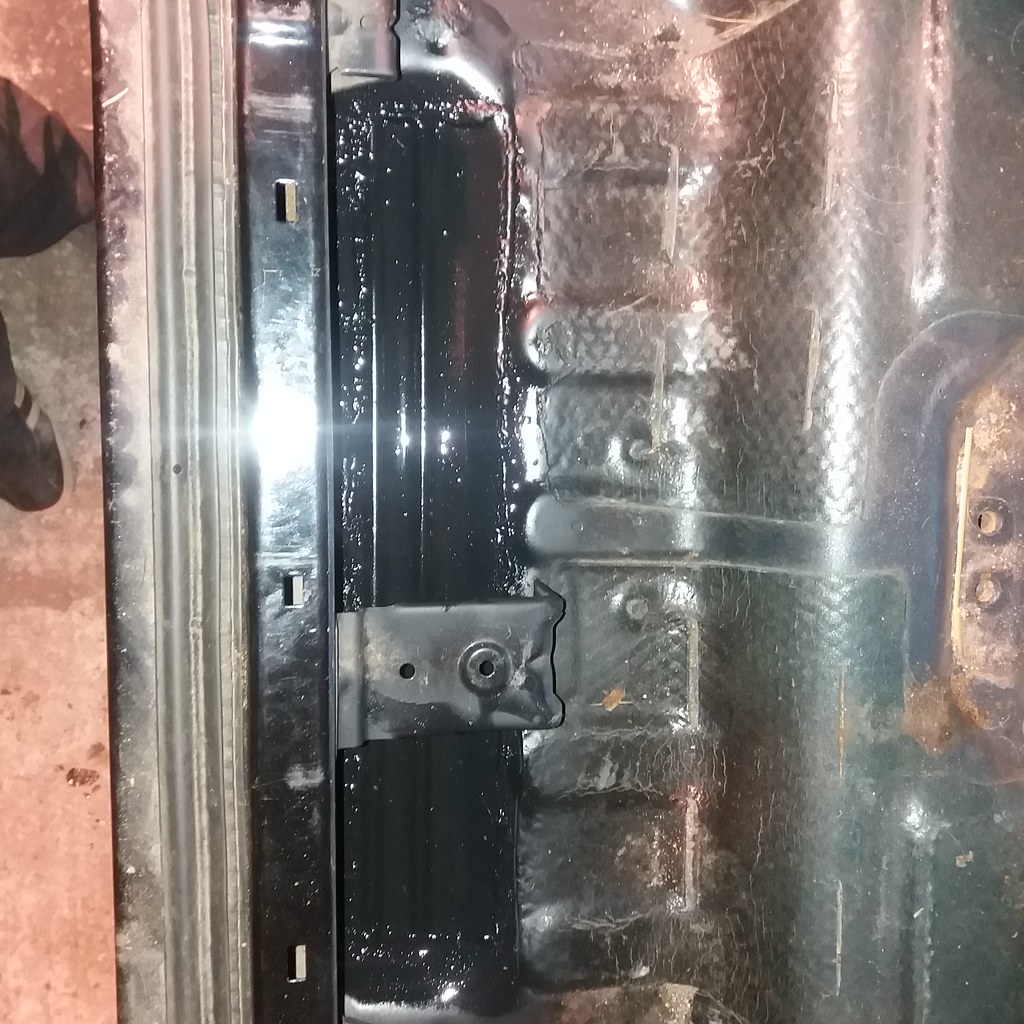
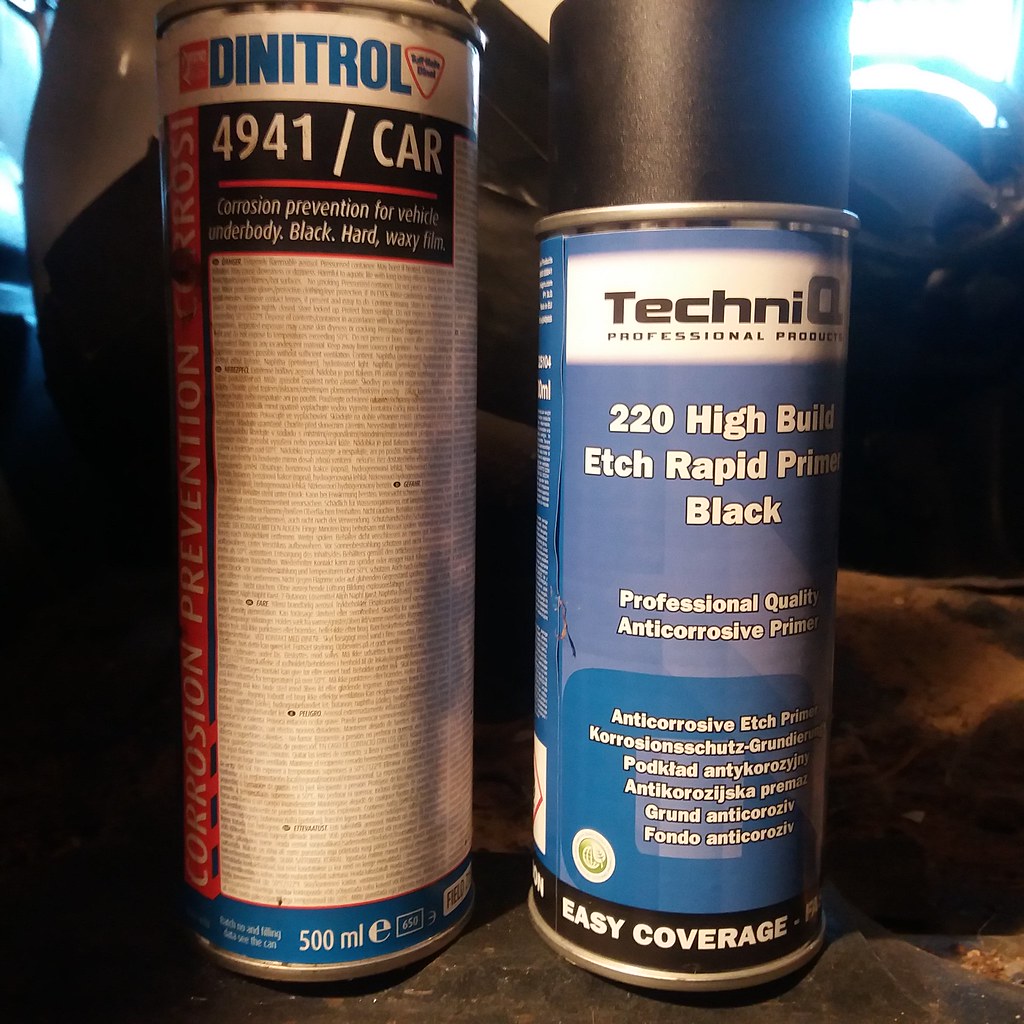
Then blasted it with some etch primer
 20181209_122054
by
deeelux deeelux
, on Flickr
20181209_122054
by
deeelux deeelux
, on Flickr
Etch primer is good for repairs like this because it has acid that eats into the metal to stop it flaking off. I'll give it a coat of something better when it is dry
 20181209_122127
by
deeelux deeelux
, on Flickr
20181209_122127
by
deeelux deeelux
, on Flickr
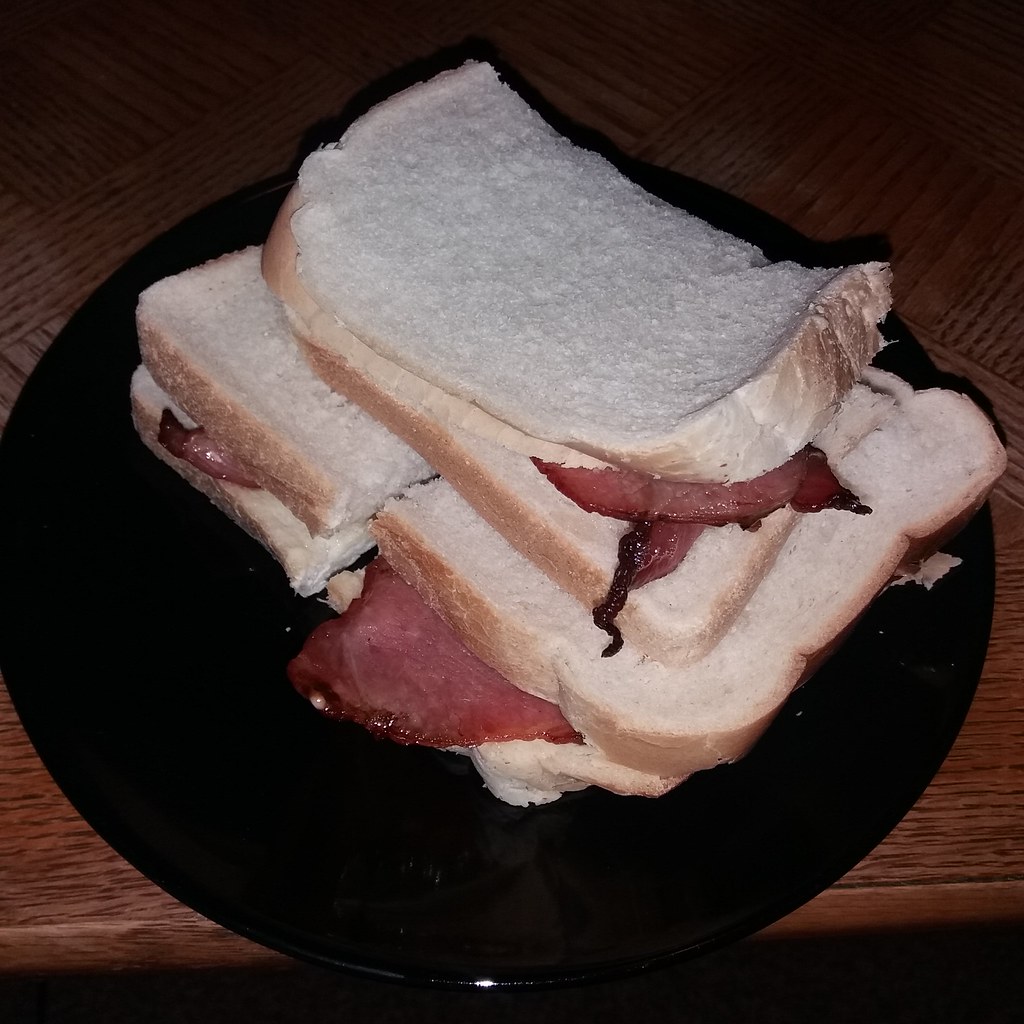
At this point I had to stop to refuel
 20181209_134631
by
deeelux deeelux
, on Flickr
20181209_134631
by
deeelux deeelux
, on Flickr
Thanks Mrs. Delux!
Part 2 to follow...
This week my Jimny has kept Paypal and the postie busy
First on the agenda in the Hot rod shop was the gaping crater in the boot. My corrosion assesment tool was deployed
I do not claim to be a panel beater and in an ideal world I'd be lifting the body off and spot welding a new boot floor in. However, in the real world I am just a mechanic with a welder and a patch is a decent enough
Then blasted it with some etch primer
Etch primer is good for repairs like this because it has acid that eats into the metal to stop it flaking off. I'll give it a coat of something better when it is dry
At this point I had to stop to refuel
Thanks Mrs. Delux!
Part 2 to follow...
Busiest Mechanic in Scotland!
My pics (inc. pics of my latest Jimny project)...
www.flickr.com/photos/159422664@N08/albums
My ebay stuff for sale...
www.ebay.co.uk/usr/deeelux
Please Log in or Create an account to join the conversation.
09 Dec 2018 15:56 #198796
by Delux
Busiest Mechanic in Scotland!
My pics (inc. pics of my latest Jimny project)...
www.flickr.com/photos/159422664@N08/albums
My ebay stuff for sale...
www.ebay.co.uk/usr/deeelux
Replied by Delux on topic Deluxs new black Jimny, Project KZA
Deluxs guide to replacing brake pipes!
My technique is one that has been honed and fine tuned over several years as a mechanic replacing rusty, leaking brake pipes on cars so bad you wouldnt let your dog cock a leg on them. All this while some old, failed mechanic hassles me to hurry up so he can give it back to the customer who assumes they are being ripped off! :laugh:
Anyway, its brakes so you dont want to mess about. The car has a recent MOT, the brake pipes are not the worst I have seen but, using my techniques they needn't be difficult or expensive. Cheap peace of mind is always good, right?
I start by clamping off the rear brakes. I'll be bleeding the whole braking system later but doing this now maintains the fluid level in the rest of the system and lessens the chance of having air trapped somewhere.
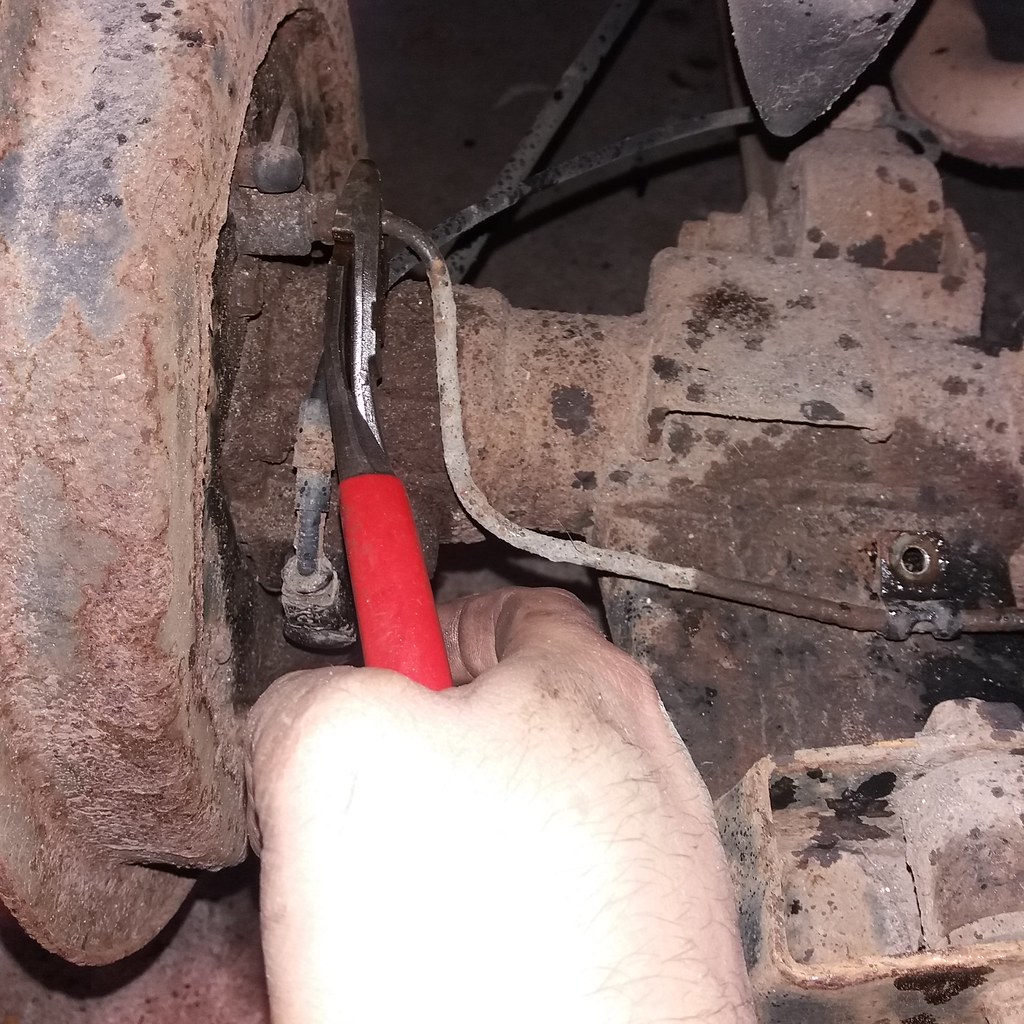
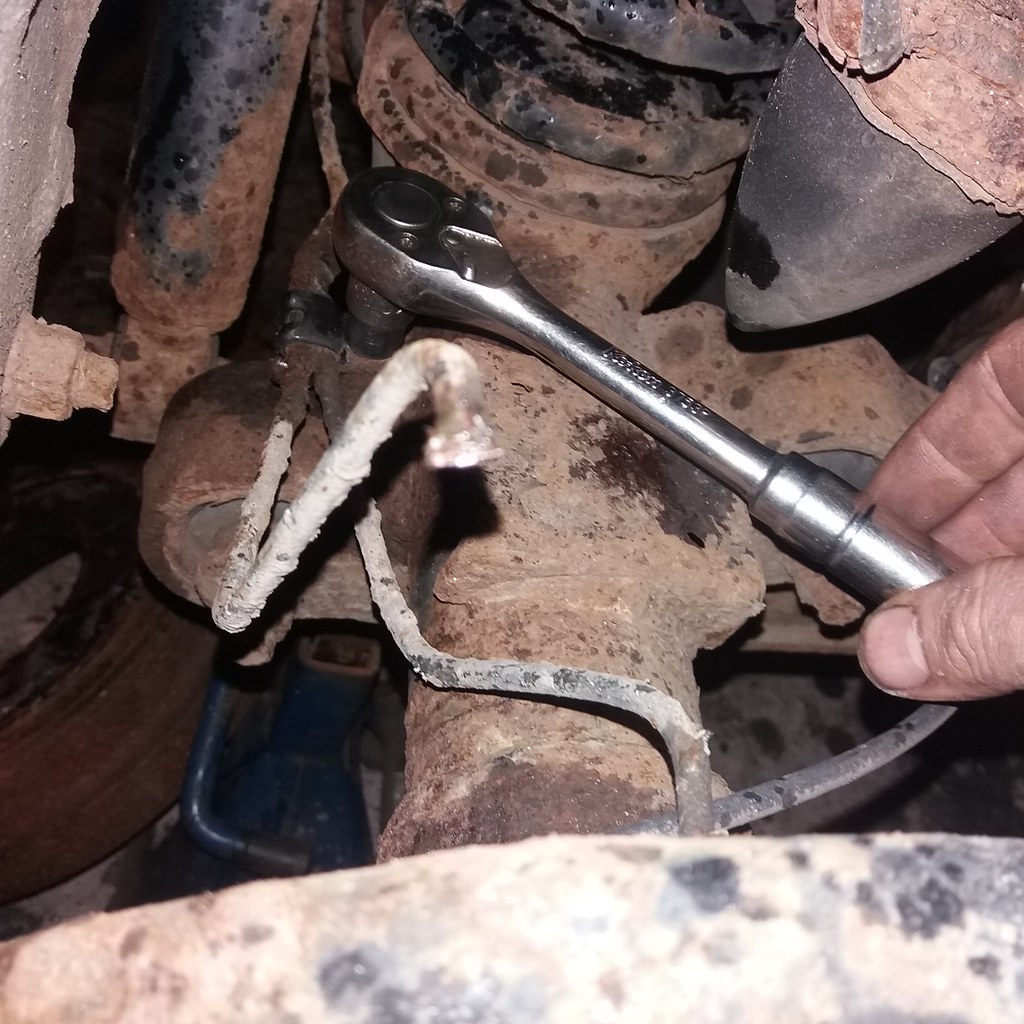
Rather than mess about I cut the old brake pipe at the brake pipe end.
 20181209_125439
by
deeelux deeelux
, on Flickr
20181209_125439
by
deeelux deeelux
, on Flickr
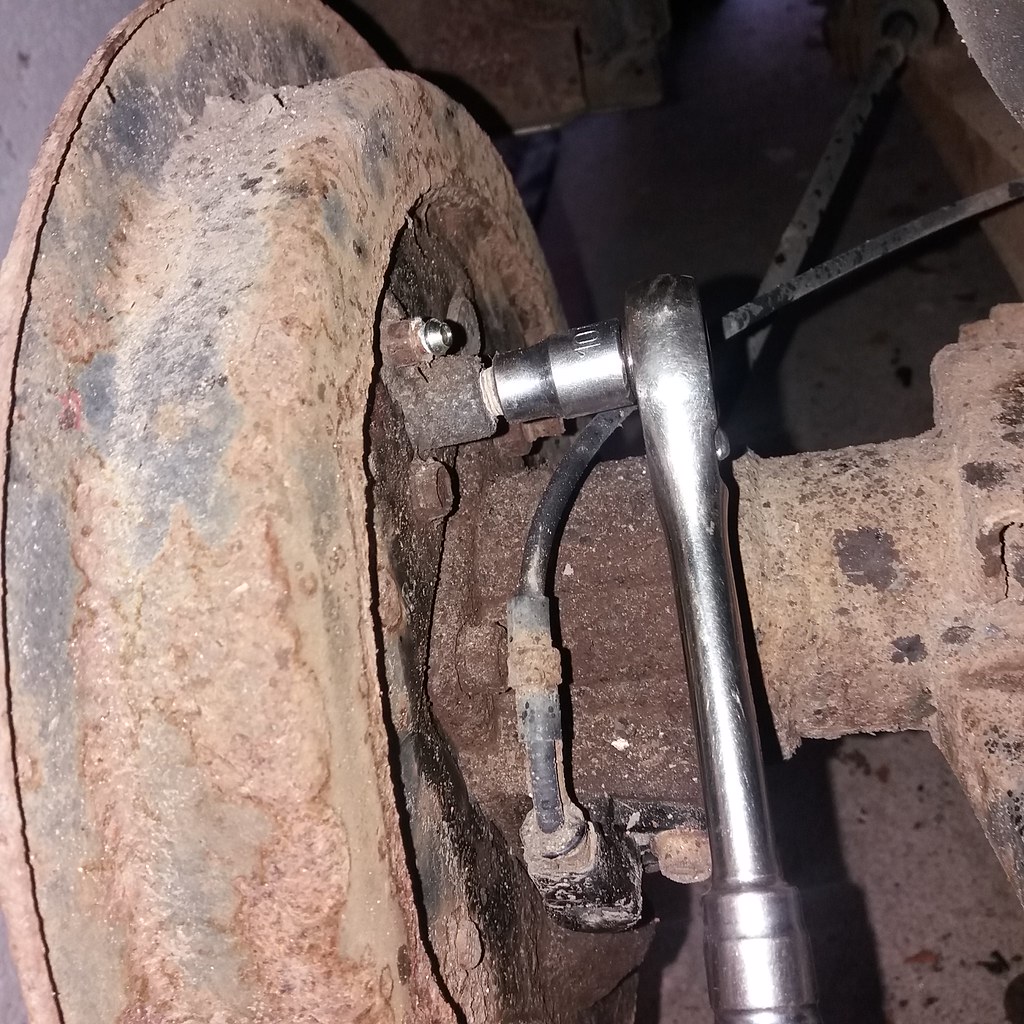
This means you can get a decent single hex socket on the end and remove it quickly. The original brake pipe ends on my 54 plate Jimny and every other Jimny I remember working on are 10mm.
 20181209_130006
by
deeelux deeelux
, on Flickr
20181209_130006
by
deeelux deeelux
, on Flickr
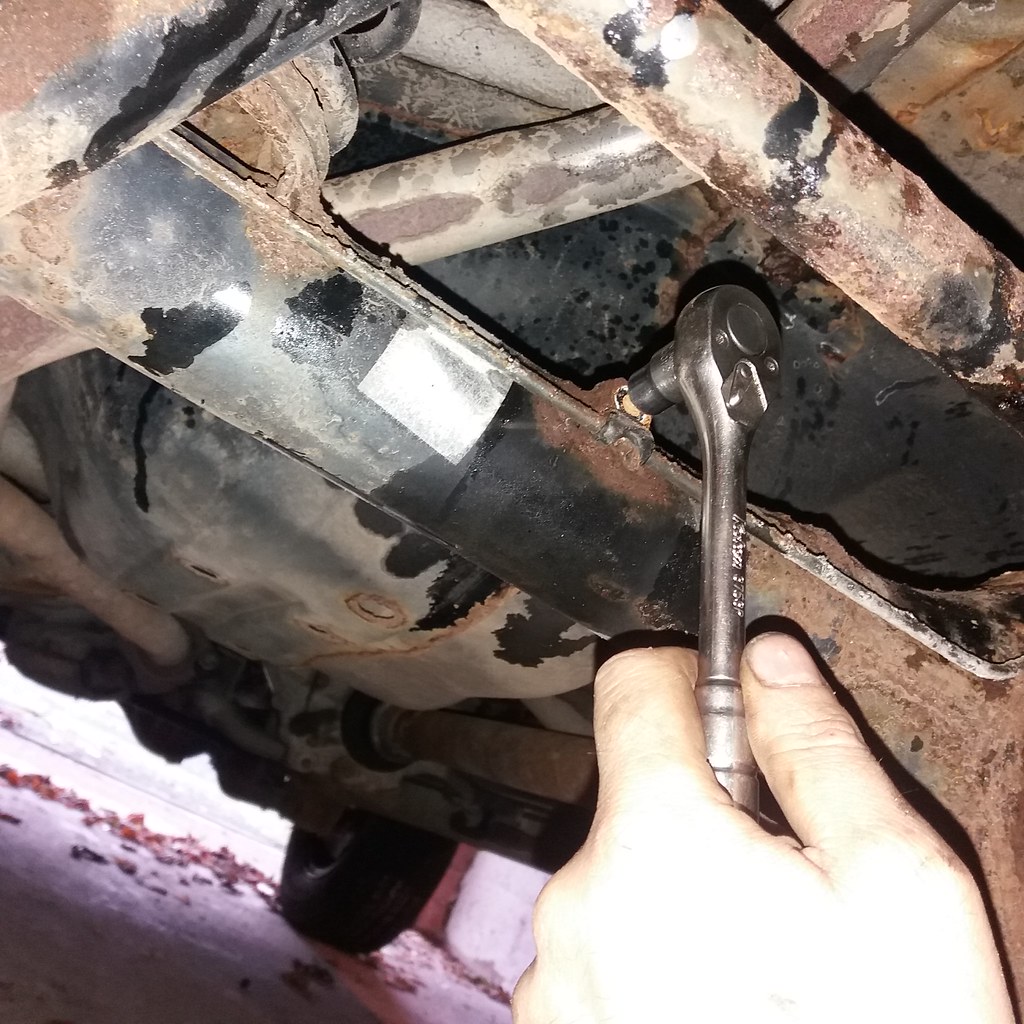
You obviously need to do this either end of the pipe. If you do it 1st, all the brake fluid will have dripped out before you remove it meaning less mess. Next remove the retaining clips
 20181209_124639
by
deeelux deeelux
, on Flickr
20181209_124639
by
deeelux deeelux
, on Flickr
 20181209_124922
by
deeelux deeelux
, on Flickr
20181209_124922
by
deeelux deeelux
, on Flickr
 20181209_125208
by
deeelux deeelux
, on Flickr
20181209_125208
by
deeelux deeelux
, on Flickr
They are 10mm self tapping bolts. If you can get them off 1st time, thats fine but a bag of 10 new ones off ebay is only a few pounds.
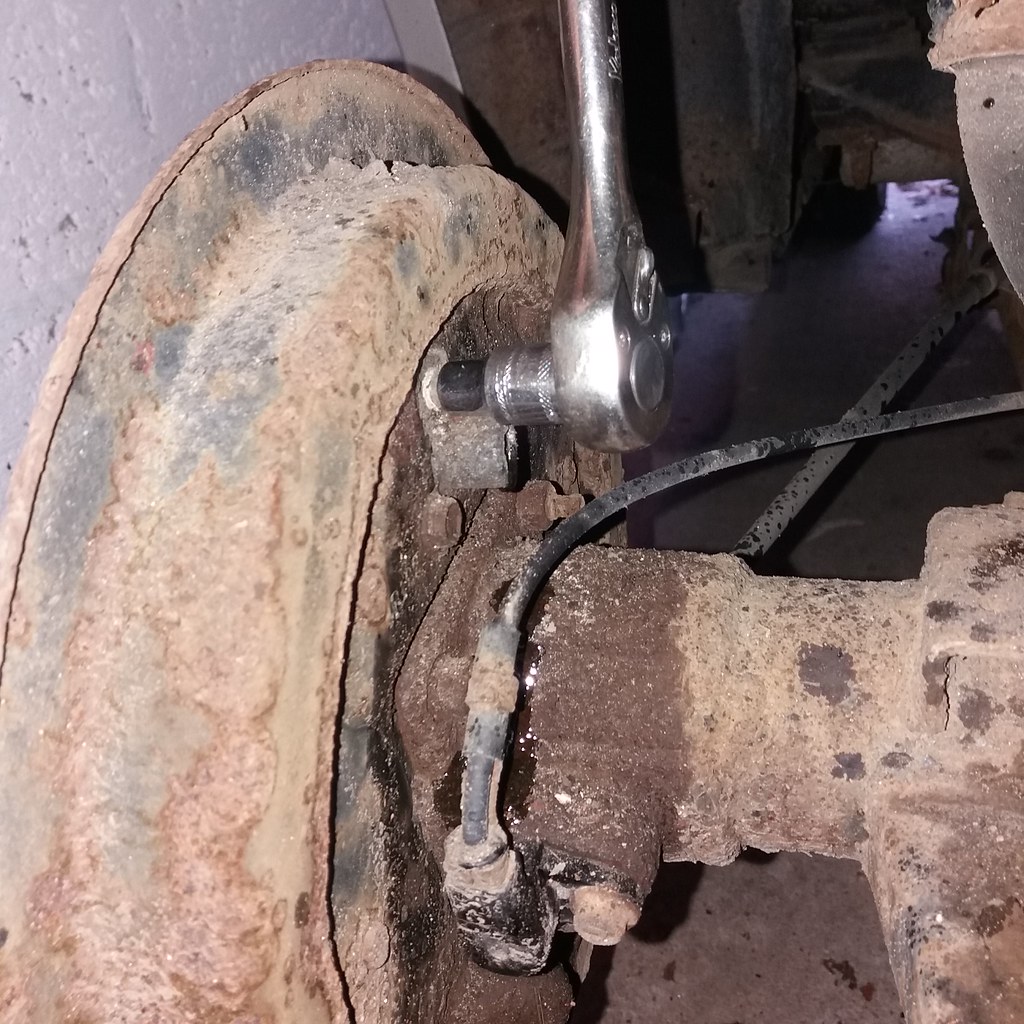
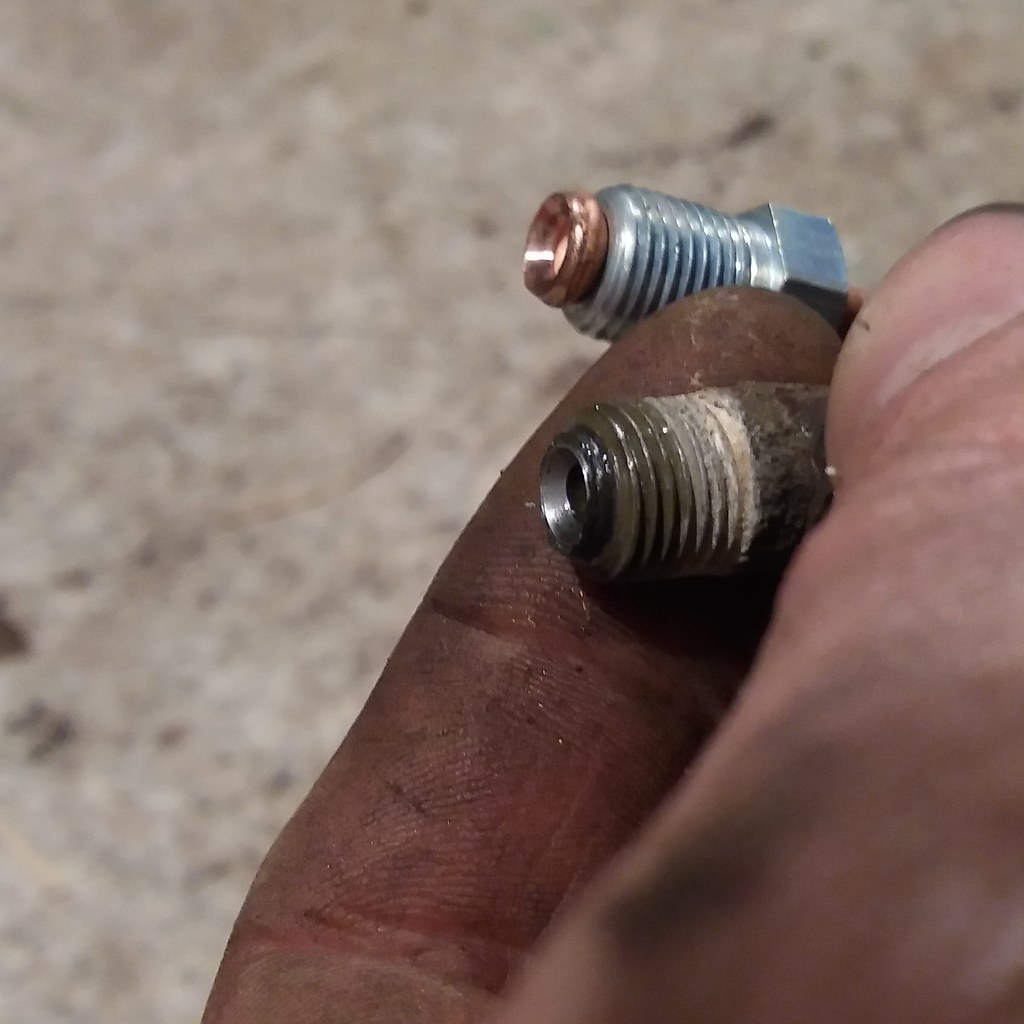
Before going any further I like to make sure the bleed screw is good enough to bleed the brakes. I have seen people replace all the brake pipes on a car only to discover one of the bleed screws is blocked/rounded off. No-one likes to see a mechanic cry!
 20181209_130220
by
deeelux deeelux
, on Flickr
20181209_130220
by
deeelux deeelux
, on Flickr
My technique is one that has been honed and fine tuned over several years as a mechanic replacing rusty, leaking brake pipes on cars so bad you wouldnt let your dog cock a leg on them. All this while some old, failed mechanic hassles me to hurry up so he can give it back to the customer who assumes they are being ripped off! :laugh:
Anyway, its brakes so you dont want to mess about. The car has a recent MOT, the brake pipes are not the worst I have seen but, using my techniques they needn't be difficult or expensive. Cheap peace of mind is always good, right?
I start by clamping off the rear brakes. I'll be bleeding the whole braking system later but doing this now maintains the fluid level in the rest of the system and lessens the chance of having air trapped somewhere.
Rather than mess about I cut the old brake pipe at the brake pipe end.
This means you can get a decent single hex socket on the end and remove it quickly. The original brake pipe ends on my 54 plate Jimny and every other Jimny I remember working on are 10mm.
You obviously need to do this either end of the pipe. If you do it 1st, all the brake fluid will have dripped out before you remove it meaning less mess. Next remove the retaining clips
They are 10mm self tapping bolts. If you can get them off 1st time, thats fine but a bag of 10 new ones off ebay is only a few pounds.
Before going any further I like to make sure the bleed screw is good enough to bleed the brakes. I have seen people replace all the brake pipes on a car only to discover one of the bleed screws is blocked/rounded off. No-one likes to see a mechanic cry!
Busiest Mechanic in Scotland!
My pics (inc. pics of my latest Jimny project)...
www.flickr.com/photos/159422664@N08/albums
My ebay stuff for sale...
www.ebay.co.uk/usr/deeelux
Please Log in or Create an account to join the conversation.
09 Dec 2018 16:16 #198798
by Delux
Busiest Mechanic in Scotland!
My pics (inc. pics of my latest Jimny project)...
www.flickr.com/photos/159422664@N08/albums
My ebay stuff for sale...
www.ebay.co.uk/usr/deeelux
Replied by Delux on topic Deluxs new black Jimny, Project KZA
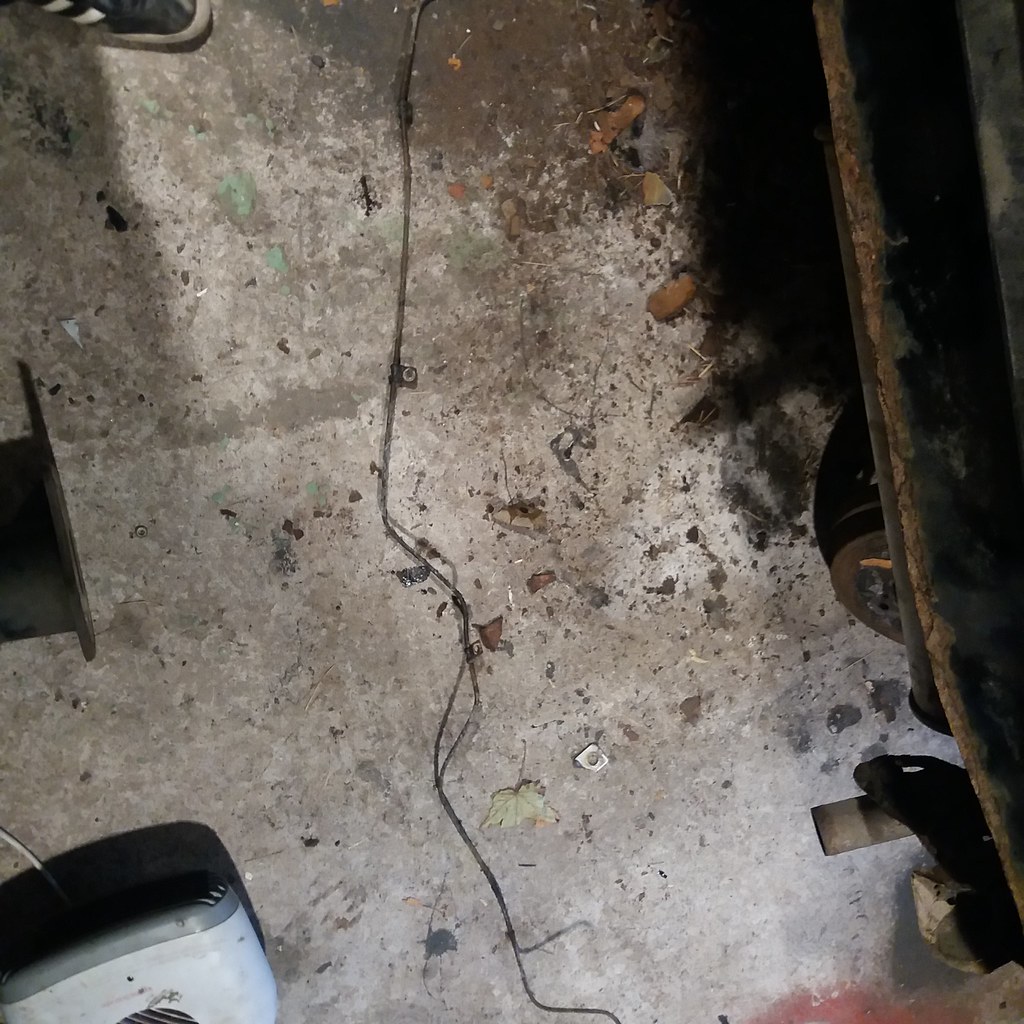
Ok, so if all went well you should have this on the floor.
 20181209_125539
by
deeelux deeelux
, on Flickr
20181209_125539
by
deeelux deeelux
, on Flickr
So now we need some shiney new pipes to fit on. Do not stress about making up a brake pipe the same length yet. We are doing a nice neat custom job rather than setting ourselves needless hurdles!
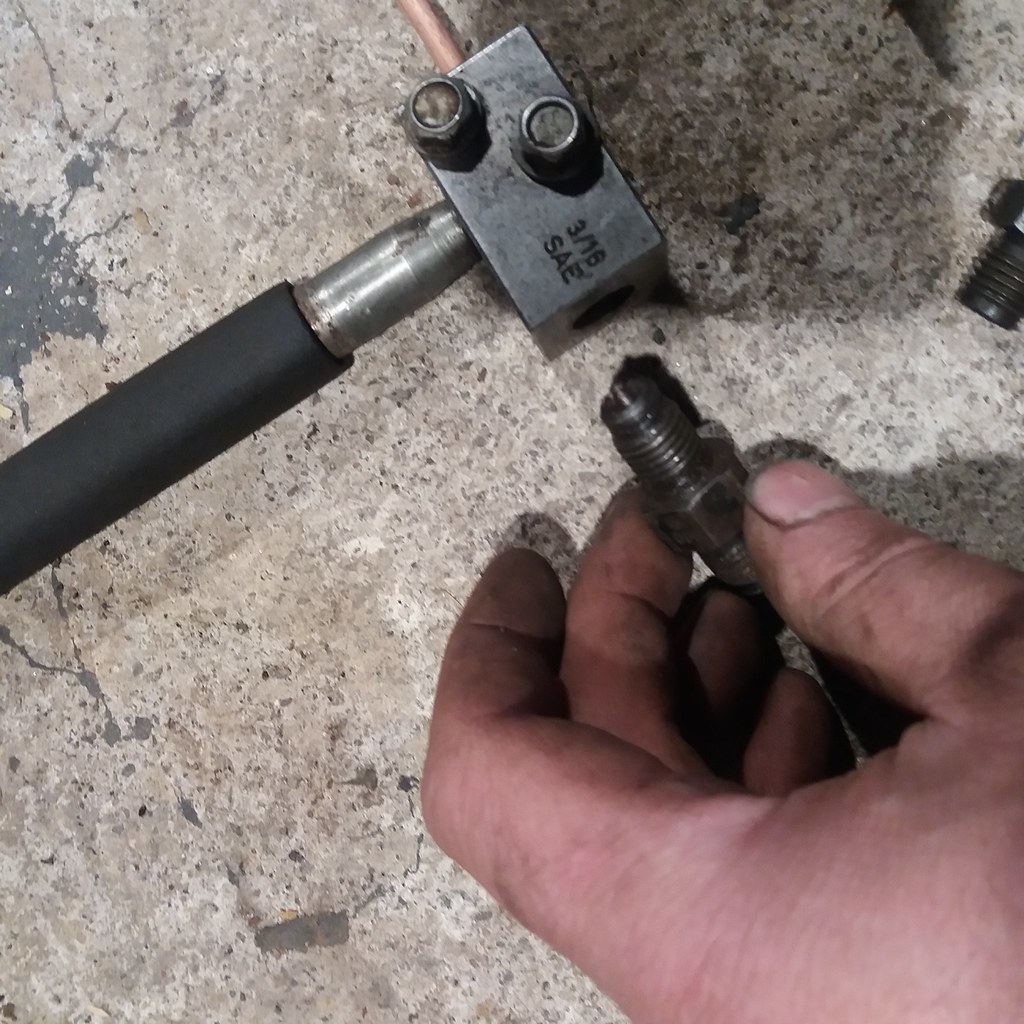
Making new brake pipes involves using one of my favourite tools. My brake pipe flaring tool was about £30 from ebay about 10 years ago. It does a great job every time, flares copper or steel pipe, has very few moving parts to go wrong and you dont need a vise.
Slide the new brake pipe end on first! You feed the new pipe in, finger tighten the 2 10mm bolts, tighten the 16mm bolt at the end. This positions the pipe to be flared. You then tighten the 10mms to clamp the pipe
 20181209_130605
by
deeelux deeelux
, on Flickr
20181209_130605
by
deeelux deeelux
, on Flickr
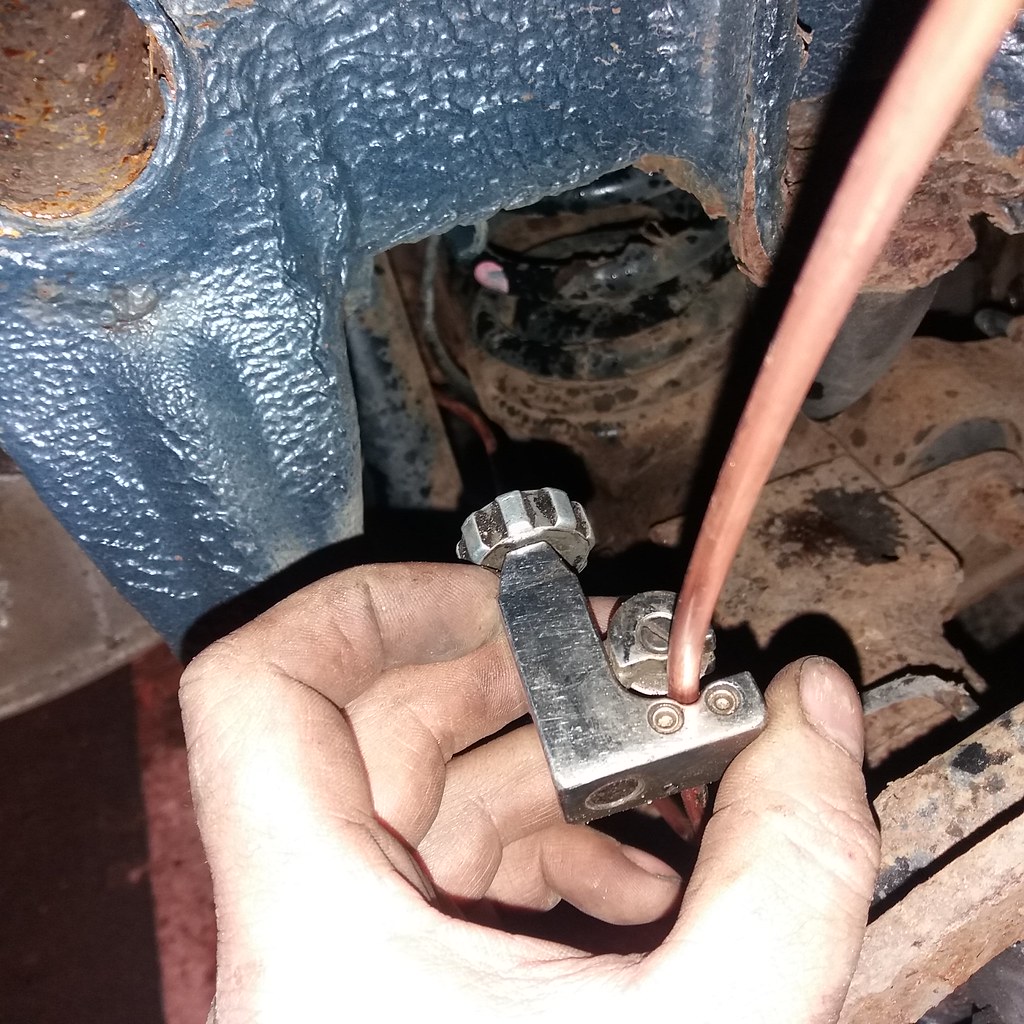
When the pipe is clamped you screw this bit in. This end gives you a male flare. On most Japanese cars the pipe has a female flare.
 20181209_130730
by
deeelux deeelux
, on Flickr
20181209_130730
by
deeelux deeelux
, on Flickr
So you unscrew it and screw the other end in, this gives the flared end a female flare
 20181209_131324
by
deeelux deeelux
, on Flickr
20181209_131324
by
deeelux deeelux
, on Flickr
Now you can refit it. Feed the pipe roughly in position ensuring it is routed the correct side of suspension components etc. Dont worry about the shape or length. Screw the end into the wheel cylinder etc with your fingers. This can be tricky on a jimny as the pipe does not fit in at right angles to the cylinder. Once its started tighten it up. I'm using a brake pipe spanner but you dont really have to. Remember you are tightning it up to compress the seal on the pipe. You dont want to tighten it up until your arm is shaking!
 20181209_131805
by
deeelux deeelux
, on Flickr
20181209_131805
by
deeelux deeelux
, on Flickr
Dont hold the spanner at this angle unless you want to punch the underside of a jimny! When this end is tight shape the pipe and fit the clamps/clips back on as you go. When you get to the other end cut the pipe. Leave a few cms of slack. Your bends are not going to be as sharp as the factory ones so your pipe needs to be a bit longer.
 20181209_132448
by
deeelux deeelux
, on Flickr
20181209_132448
by
deeelux deeelux
, on Flickr
Flare the new end on, screw it in. Tweak the position of the pipes as necessary and thats it! Easy!
 20181209_143311
by
deeelux deeelux
, on Flickr
20181209_143311
by
deeelux deeelux
, on Flickr
 20181209_143352
by
deeelux deeelux
, on Flickr
20181209_143352
by
deeelux deeelux
, on Flickr
So now we need some shiney new pipes to fit on. Do not stress about making up a brake pipe the same length yet. We are doing a nice neat custom job rather than setting ourselves needless hurdles!
Making new brake pipes involves using one of my favourite tools. My brake pipe flaring tool was about £30 from ebay about 10 years ago. It does a great job every time, flares copper or steel pipe, has very few moving parts to go wrong and you dont need a vise.
Slide the new brake pipe end on first! You feed the new pipe in, finger tighten the 2 10mm bolts, tighten the 16mm bolt at the end. This positions the pipe to be flared. You then tighten the 10mms to clamp the pipe
When the pipe is clamped you screw this bit in. This end gives you a male flare. On most Japanese cars the pipe has a female flare.
So you unscrew it and screw the other end in, this gives the flared end a female flare
Now you can refit it. Feed the pipe roughly in position ensuring it is routed the correct side of suspension components etc. Dont worry about the shape or length. Screw the end into the wheel cylinder etc with your fingers. This can be tricky on a jimny as the pipe does not fit in at right angles to the cylinder. Once its started tighten it up. I'm using a brake pipe spanner but you dont really have to. Remember you are tightning it up to compress the seal on the pipe. You dont want to tighten it up until your arm is shaking!
Dont hold the spanner at this angle unless you want to punch the underside of a jimny! When this end is tight shape the pipe and fit the clamps/clips back on as you go. When you get to the other end cut the pipe. Leave a few cms of slack. Your bends are not going to be as sharp as the factory ones so your pipe needs to be a bit longer.
Flare the new end on, screw it in. Tweak the position of the pipes as necessary and thats it! Easy!
Busiest Mechanic in Scotland!
My pics (inc. pics of my latest Jimny project)...
www.flickr.com/photos/159422664@N08/albums
My ebay stuff for sale...
www.ebay.co.uk/usr/deeelux
Please Log in or Create an account to join the conversation.
09 Dec 2018 16:36 #198799
by Delux
Busiest Mechanic in Scotland!
My pics (inc. pics of my latest Jimny project)...
www.flickr.com/photos/159422664@N08/albums
My ebay stuff for sale...
www.ebay.co.uk/usr/deeelux
Replied by Delux on topic Deluxs new black Jimny, Project KZA
Deluxs guide to replacing your aerial
I done this guide today on my 54 plate convertible but its the same procedure for hardtop and older versions.
First step is to disconnect the old aerial, or whats left of it. If your car has its original aerial you will find there is a small extension lead between the end of th aerial lead and the back of the stereo head unit. Its usually under the dash next to the centre console on the drivers side.
 20181209_143949
by
deeelux deeelux
, on Flickr
20181209_143949
by
deeelux deeelux
, on Flickr
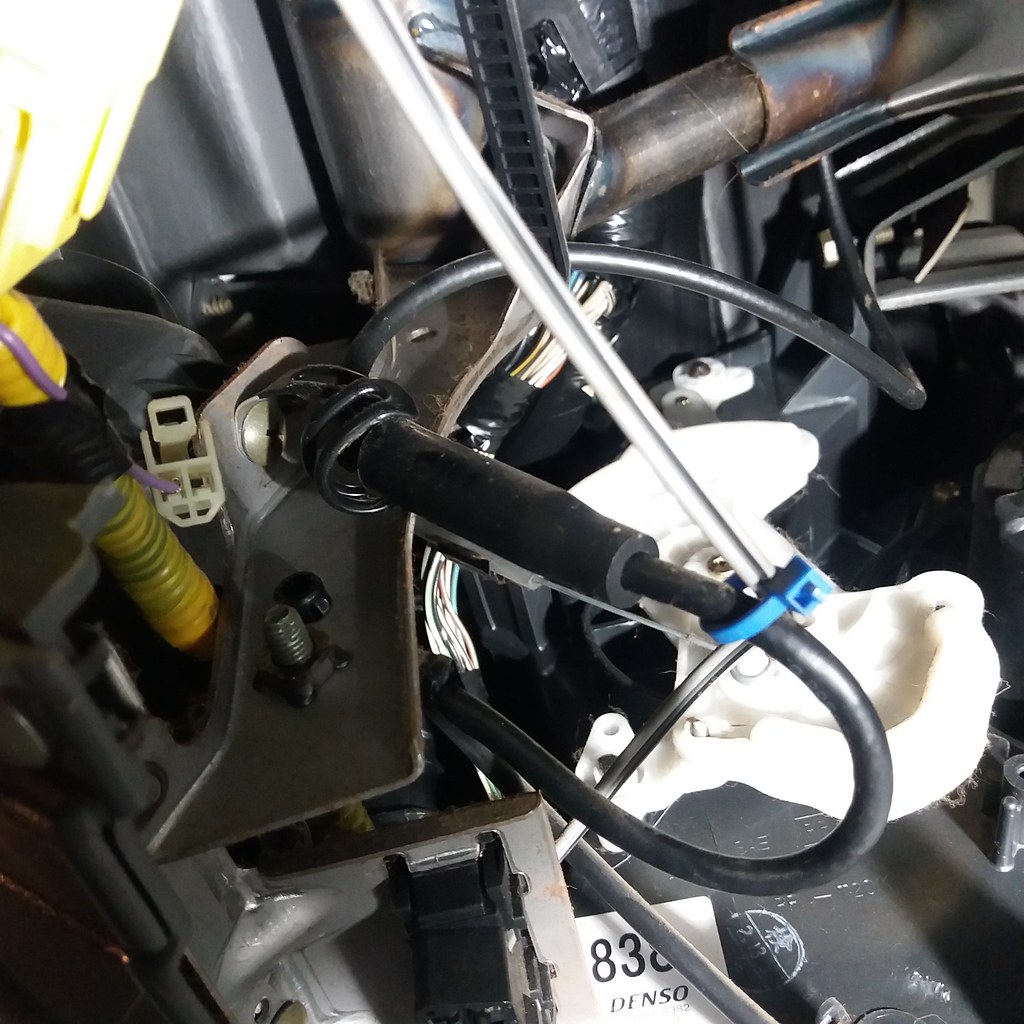
Its the fat, black cylinder in the centre of the pic. Cut the cable tie off and give it a pull, aerial lead should unplug. I mention this because someone was asking about reception problems and their aerial was ok. If corrosion is in this plug your radio reception will be rubbish! Anyway, follow it along, this one runs along the under dash bar thru some reusable cable ties. Follow it along until it disappears into the roof pillar to make sure its free all the way along.
 20181209_144318
by
deeelux deeelux
, on Flickr
20181209_144318
by
deeelux deeelux
, on Flickr
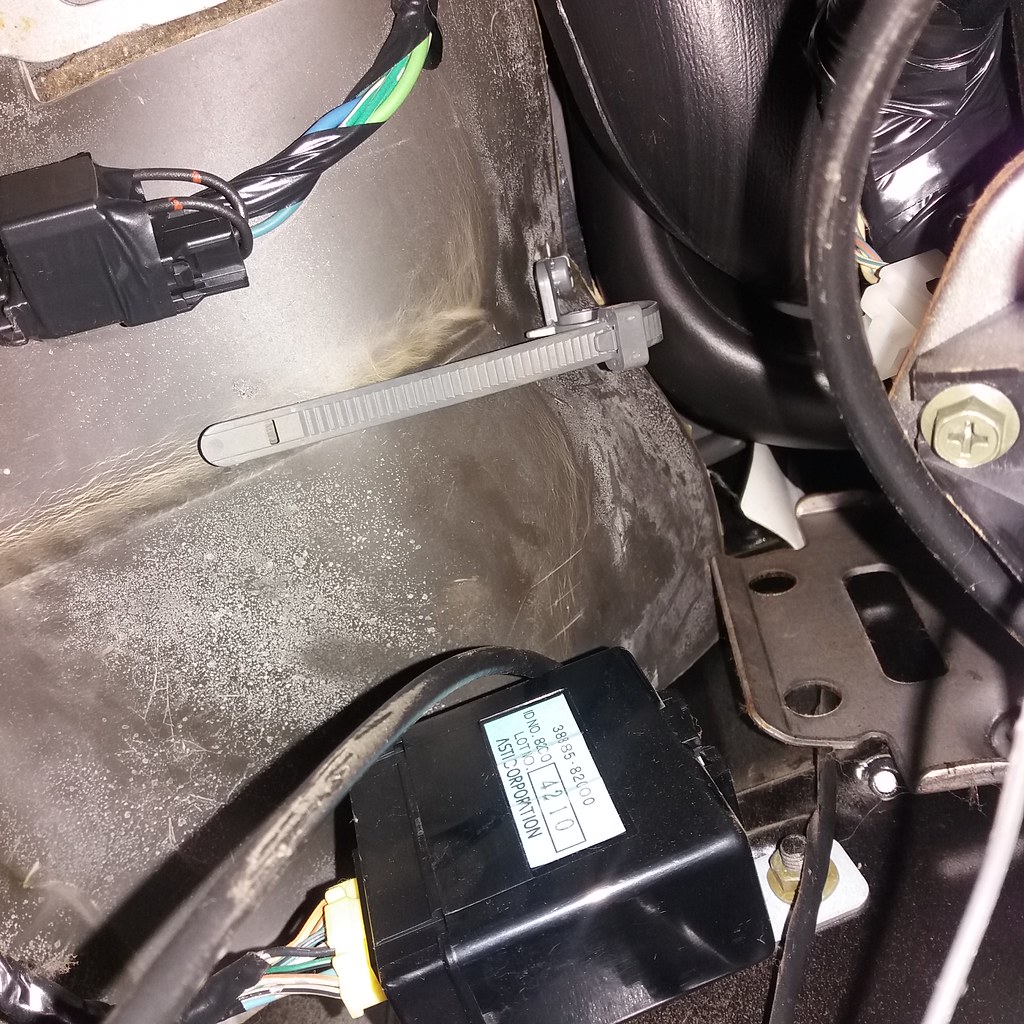
Its hard to picture, it leads over the top of that black box into the pillar. Easier to feel than show!
Next, tie a bit of string round it. You can tape a bit of wire to it but I prefer string as you can tie it and its harder to accidentally pull off!
 20181209_144556
by
deeelux deeelux
, on Flickr
20181209_144556
by
deeelux deeelux
, on Flickr
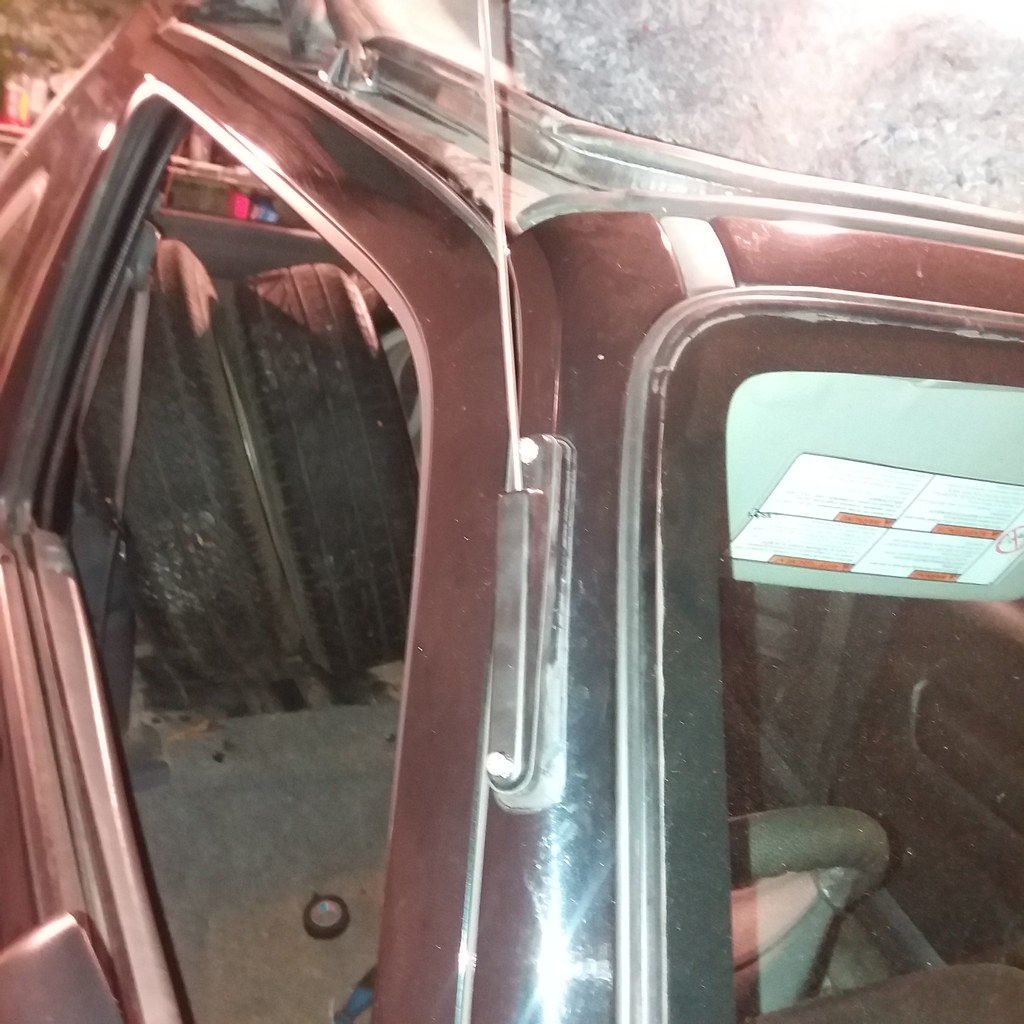
Now you can unscrew the aerial base and carefully pull it out the pillar. As mine is a convertible the aerial base is on the pillar facing forward. On the hard top the base is kinda above the front corner of the door but the procedure is the same.
 20181209_144721
by
deeelux deeelux
, on Flickr
20181209_144721
by
deeelux deeelux
, on Flickr
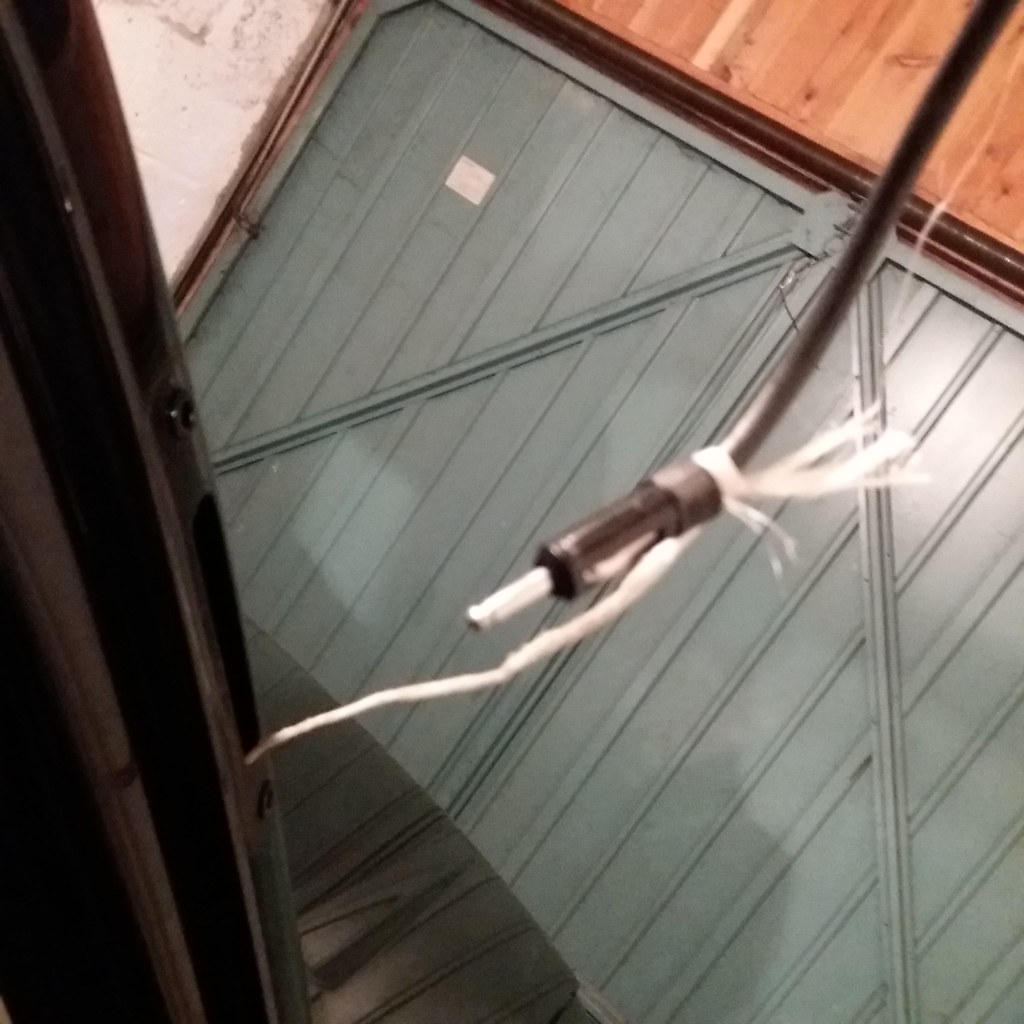
Keep going, gently until
 20181209_144739
by
deeelux deeelux
, on Flickr
20181209_144739
by
deeelux deeelux
, on Flickr
I just pulled a bit off the end of a big ball of string. If you are just using a length of string make sure you have enough length!
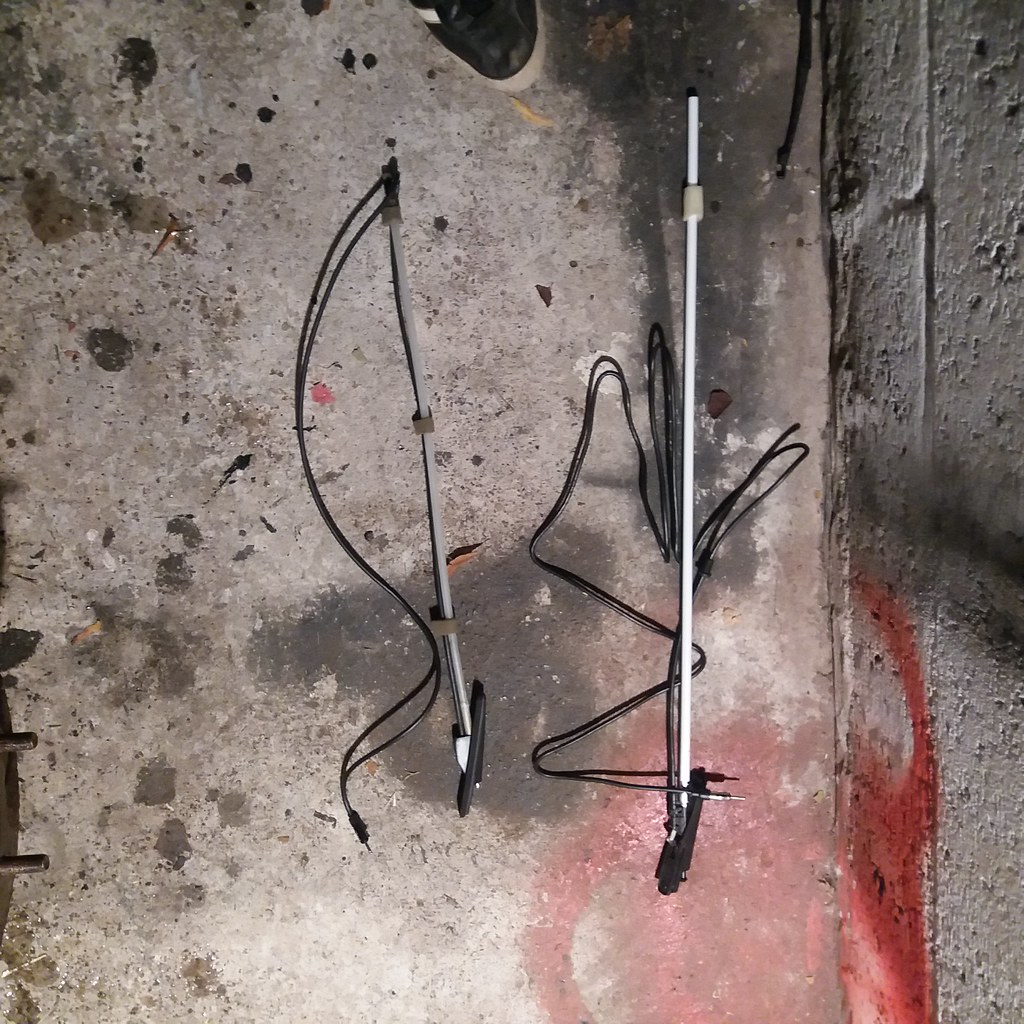
Anyway, my aerial (on the right) is off ebay (about £20) and the lead is much longer which makes it easier to refit.
 20181209_144907
by
deeelux deeelux
, on Flickr
20181209_144907
by
deeelux deeelux
, on Flickr
Feed the aerial plug in 1st gently pulling the string back thru. Dont pull too hard, some jiggling may be required. You may need to fish the new plug out the hole in the pillar. Once its thru bolt it back on. The one I bought was slightly thicker so I couldnt use the original screws, luckily it was supplied with new ones which were fine.
 20181209_145752
by
deeelux deeelux
, on Flickr
20181209_145752
by
deeelux deeelux
, on Flickr
As this aerial has a longer cable it will reach the head unit. I will remove the extension cable and run it straight into the head unit. Just not today as I forgot my radio pins!
I done this guide today on my 54 plate convertible but its the same procedure for hardtop and older versions.
First step is to disconnect the old aerial, or whats left of it. If your car has its original aerial you will find there is a small extension lead between the end of th aerial lead and the back of the stereo head unit. Its usually under the dash next to the centre console on the drivers side.
Its the fat, black cylinder in the centre of the pic. Cut the cable tie off and give it a pull, aerial lead should unplug. I mention this because someone was asking about reception problems and their aerial was ok. If corrosion is in this plug your radio reception will be rubbish! Anyway, follow it along, this one runs along the under dash bar thru some reusable cable ties. Follow it along until it disappears into the roof pillar to make sure its free all the way along.
Its hard to picture, it leads over the top of that black box into the pillar. Easier to feel than show!
Next, tie a bit of string round it. You can tape a bit of wire to it but I prefer string as you can tie it and its harder to accidentally pull off!
Now you can unscrew the aerial base and carefully pull it out the pillar. As mine is a convertible the aerial base is on the pillar facing forward. On the hard top the base is kinda above the front corner of the door but the procedure is the same.
Keep going, gently until
I just pulled a bit off the end of a big ball of string. If you are just using a length of string make sure you have enough length!
Anyway, my aerial (on the right) is off ebay (about £20) and the lead is much longer which makes it easier to refit.
Feed the aerial plug in 1st gently pulling the string back thru. Dont pull too hard, some jiggling may be required. You may need to fish the new plug out the hole in the pillar. Once its thru bolt it back on. The one I bought was slightly thicker so I couldnt use the original screws, luckily it was supplied with new ones which were fine.
As this aerial has a longer cable it will reach the head unit. I will remove the extension cable and run it straight into the head unit. Just not today as I forgot my radio pins!
Busiest Mechanic in Scotland!
My pics (inc. pics of my latest Jimny project)...
www.flickr.com/photos/159422664@N08/albums
My ebay stuff for sale...
www.ebay.co.uk/usr/deeelux
Please Log in or Create an account to join the conversation.
17 Dec 2018 21:39 #199122
by Delux
Busiest Mechanic in Scotland!
My pics (inc. pics of my latest Jimny project)...
www.flickr.com/photos/159422664@N08/albums
My ebay stuff for sale...
www.ebay.co.uk/usr/deeelux
Replied by Delux on topic Deluxs new black Jimny, Project KZA
No update this week. Not because I am lazy! Had one of those weekends where you just cant get the matches to light!
Popped in to finish something off at work on Saturday morning, ended up working until 4!
Sunday, attacked the Jimny with an angry expression and a bag of tools. Tried taking the N/S/F hub assembly off to sort the leaky seal/kingpins etc. but got stuck with a spinning track rod end nut. Tried jacking it up but the nut was having none of it! Nothing in the tool bag to cut the nut to bits.
Decided to get stuck into the service instead. Drained the oil, realised I had nothing to take the oil filter off, or take the spark plugs out.
Switched to the timing belt. Removed the fan, radiator, fan belts. Realised I didnt have an 8mm socket with me so stormed off in the huff. Rest of the day was taken up with Tesco, top gear and candy crush. I promise a better update next week!
Busiest Mechanic in Scotland!
My pics (inc. pics of my latest Jimny project)...
www.flickr.com/photos/159422664@N08/albums
My ebay stuff for sale...
www.ebay.co.uk/usr/deeelux
Please Log in or Create an account to join the conversation.
Less
More
- Posts: 9160
- Thank you received: 1837
18 Dec 2018 05:25 #199131
by Lambert
Temeraire (2018 quasar grey automatic)
One of the last 200ish of the gen3s, probably.
ADOS Attention Deficit Ooooh Shiny!
Replied by Lambert on topic Deluxs new black Jimny, Project KZA
Been there, done that!
Temeraire (2018 quasar grey automatic)
One of the last 200ish of the gen3s, probably.
ADOS Attention Deficit Ooooh Shiny!
Please Log in or Create an account to join the conversation.
Time to create page: 0.181 seconds