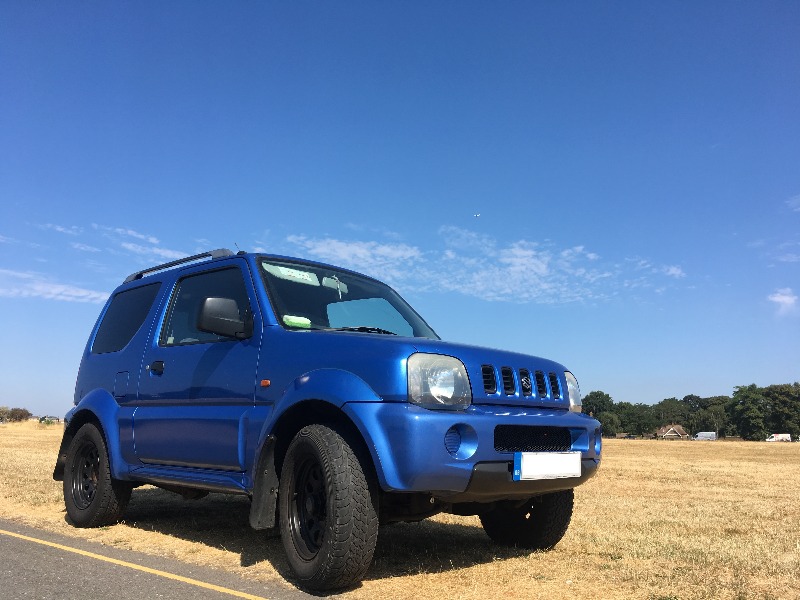
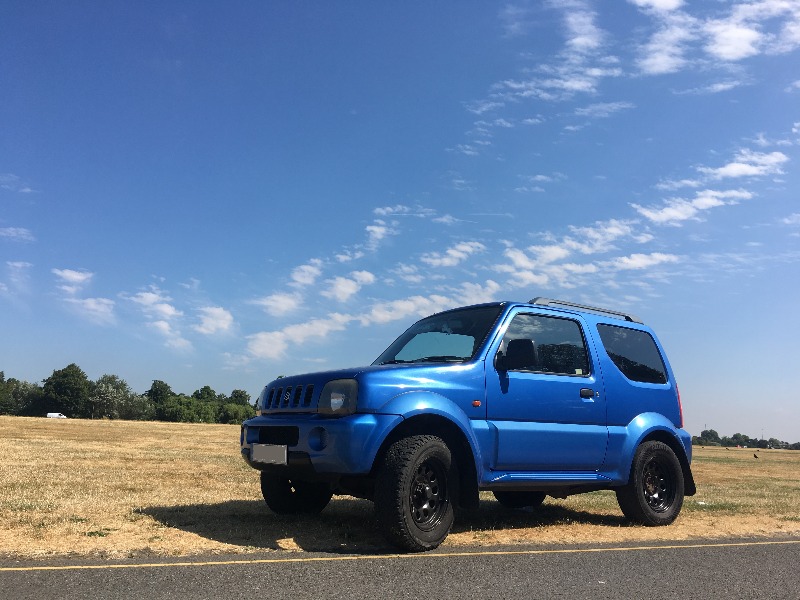
Tell us about your Jimny and post some pictures! Please make sure you post in the correct section on the site, this way it keeps the site tidy AND ensures you get a more relevant answer.
Yoshi
- ChrisW
- Topic Author
- Visitor
-

Public
24 Jul 2018 13:26 - 24 Jul 2018 13:28 #194607
by ChrisW
Yoshi was created by ChrisW
Hey All,
Thought it would be a good idea to get a thread started to not only get some advice but also share a journey and track the progress of my little Jimny. Hopefully something here will help others looking to do the same thing.
History:
Named Yoshi by my misses as its a little Japanese Jimny from 2003. Purchased in August last year, so coming up to 1 year of ownership. Drove up to Skipton, from Kent to collect where I traded in a Corsa Van and some cash to get the car. 63,125 miles on the clock at purchase and now at 83,300.
Everything internally works, no issues there at all. There is the usual rust, which at times worries me a lot. Other times I think its all manageable. I dont have the space or tools to do any welding, and get the feeling I am going to have to take the car in to get some rust properly managed over the next 12 months.
Intended Purpose:
The reason I wanted a Jimny is that I love camping, and wanted a car that I could take and go anywhere with. I also wanted something that could be a little bit of a dog taxi when the time comes (look after a lot of friends dogs and will be getting my own at some point in the near future). A mud car as such. Something I didnt mind getting dirty, and stepping into with muddy boots from hiking in the rain ect.
Something small and a challenge was also a must.
In order to make this the perfect camping car, I had thought about roof top tents but don't really want to have to store a tent (don't have space anyway), so have decided to instead work on making it so that I can sleep in the car. I have done a couple nights inside before when the rear seats were in. Other than the annoying back rest it was comfy. With the rear seats out and a way to level it all off it would be perfect for my use case.
Full details will be posted later in this thread, as works get done.
Pictures:
Work to do:
Servicing, every 9,000 miles.
[strike]Replace battery[/strike]
[strike]Upgrade front speakers[/strike]
[strike]Replace disks and brake shoes (calipers done as well due to rust)[/strike]
[strike]Remove rear seats[/strike]
[strike]Paint Rims black[/strike]
[strike]Tint rear windows[/strike] - Kevlon Auto Film in Kent - £95
Upgrade front seats
Replace Kingpin Bearings
Replace Radiator
Sort rust in wheel arches
Get the underside Waxoyl'ed
Full set of BFG AT tyres with new rims
2" Trail master lift kit - with all mounts checked
Camping system: - conscious of weight and what can be installed
Rear storage / sleeping surface
Cooking surface drawer / slide
Secondary battery (Jimnybits part)
Electronics, power distribution
Compartment lights
Rear door down lights
Cig lighter power points + USB points
Internal roof cargo net system (requires additional handle)
270 deg awning (TBD, custom system currently in the brain)
Last edit: 24 Jul 2018 13:28 by ChrisW.
Please Log in or Create an account to join the conversation.
Less
More
- Posts: 3727
- Thank you received: 923
Less
More
- Posts: 9115
- Thank you received: 1827
- Daniel30
- Visitor
-

Public
24 Jul 2018 18:06 #194616
by Daniel30
Replied by Daniel30 on topic Yoshi
Welcome 
Please Log in or Create an account to join the conversation.
Less
More
- Posts: 1934
- Thank you received: 554
24 Jul 2018 19:04 #194620
by Riccy
J999 MNY, ULYSSES M18 VVT with ITB's Dyno tested at 130hp
Pickup/tipper, R7me gearbox & 6.4 Rocklobster, 31" Toyo MT, 2x ARB air locker 3.9 diffs in braced axles, 6" total lift, Floating rear conversion, Raptor painted, CB, Recaro's, Caged, etc, etc...
www.youtube.com/user/riclemus
Nice looking jimny! welcome along 
The draw system idea sounds interesting for storage or camping...
The draw system idea sounds interesting for storage or camping...
J999 MNY, ULYSSES M18 VVT with ITB's Dyno tested at 130hp
Pickup/tipper, R7me gearbox & 6.4 Rocklobster, 31" Toyo MT, 2x ARB air locker 3.9 diffs in braced axles, 6" total lift, Floating rear conversion, Raptor painted, CB, Recaro's, Caged, etc, etc...
www.youtube.com/user/riclemus
Please Log in or Create an account to join the conversation.
Time to create page: 0.167 seconds


