Are you building a Mud Monster or a Pavement Princess??
If so you can have your own thread in this section.
This section on other websites has led to arguments and contention. People are posting pictures of their pride and joy and therefore CONSTRUCTIVE comments only please!
If so you can have your own thread in this section.
This section on other websites has led to arguments and contention. People are posting pictures of their pride and joy and therefore CONSTRUCTIVE comments only please!
Deluxs new black Jimny, Project KZA
- Max Headroom
-

- Offline
- Banned
-

Registered
- OPEN AIR MOTORING... 93 MILLION MILES OF HEADROOM
Less
More
- Posts: 1091
- Thank you received: 217
18 Dec 2018 08:07 - 18 Dec 2018 08:07 #199136
by Max Headroom
Heheh similar but different- It's a bit like that working big jets with the clowns for managment that we seem to dig up from somewhere - its like trying to work with one arm tied behind your back and blindfold.
In fact in the RAF we had a saying...
“We the willing, led by the unknowing, are doing the impossible for the ungrateful. We have done so much, with so little, for so long, we are now qualified to do anything, with nothing.”
IF IT AINT BROKE, KEEP FIXING IT UNTIL IT IS
Replied by Max Headroom on topic Deluxs new black Jimny, Project KZA
Delux wrote: ! Had one of those weekends where you just cant get the matches to light!
Heheh similar but different- It's a bit like that working big jets with the clowns for managment that we seem to dig up from somewhere - its like trying to work with one arm tied behind your back and blindfold.
In fact in the RAF we had a saying...
“We the willing, led by the unknowing, are doing the impossible for the ungrateful. We have done so much, with so little, for so long, we are now qualified to do anything, with nothing.”
IF IT AINT BROKE, KEEP FIXING IT UNTIL IT IS
Last edit: 18 Dec 2018 08:07 by Max Headroom.
Please Log in or Create an account to join the conversation.
30 Dec 2018 15:18 - 30 Dec 2018 20:29 #199712
by Delux
Busiest Mechanic in Scotland!
My pics (inc. pics of my latest Jimny project)...
www.flickr.com/photos/159422664@N08/albums
My ebay stuff for sale...
www.ebay.co.uk/usr/deeelux
Replied by Delux on topic Deluxs new black Jimny, Project KZA
Een update!
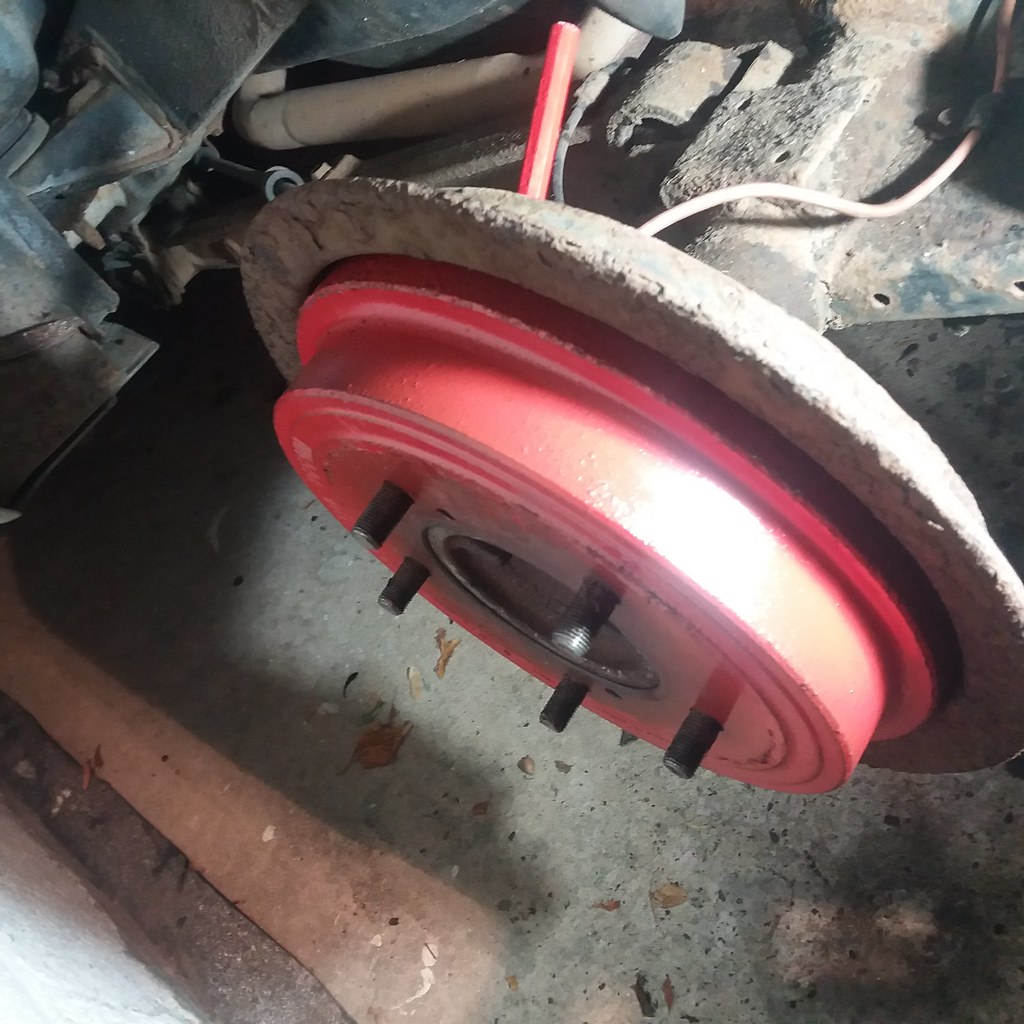
Had to turn the Jimny round, so had to refit the rear wheels. Started with giving the brake drums a splash of paint...
 20181216_102214
by
deeelux deeelux
, on Flickr
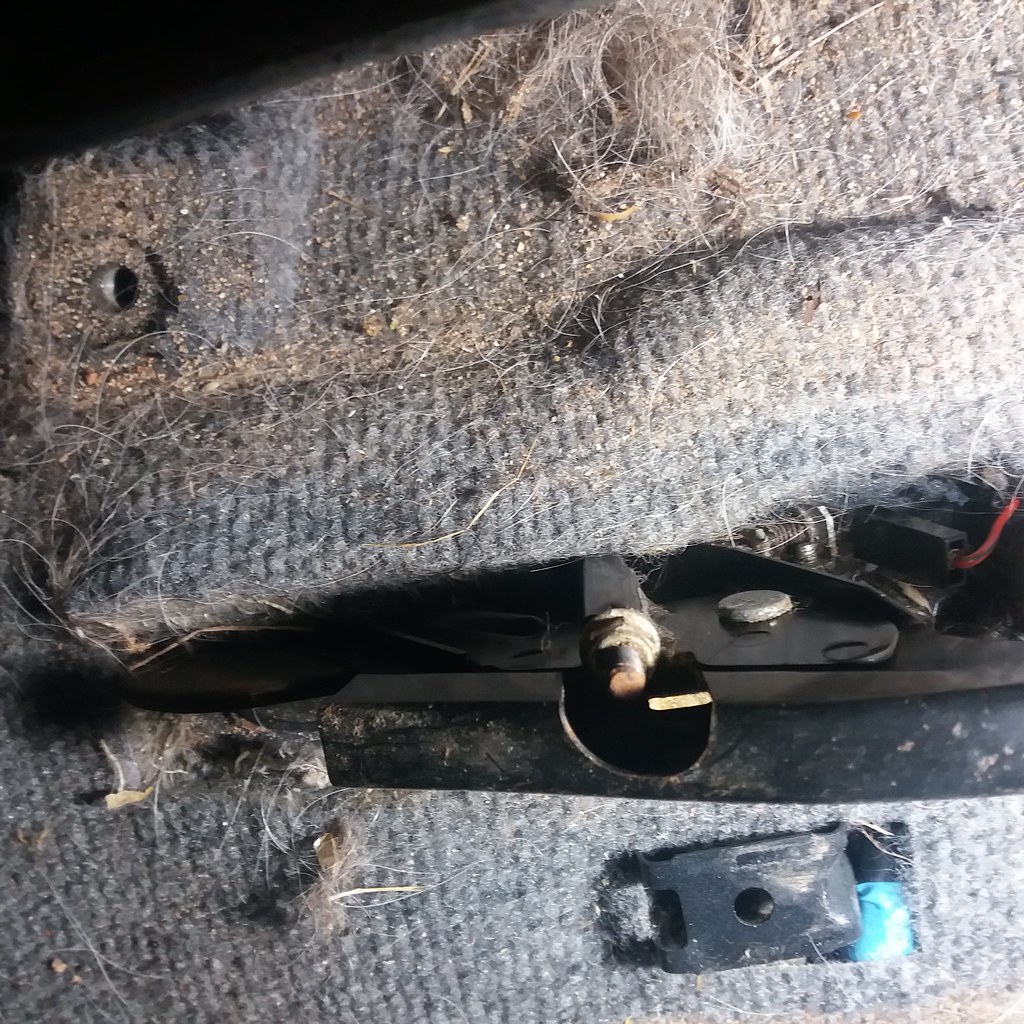
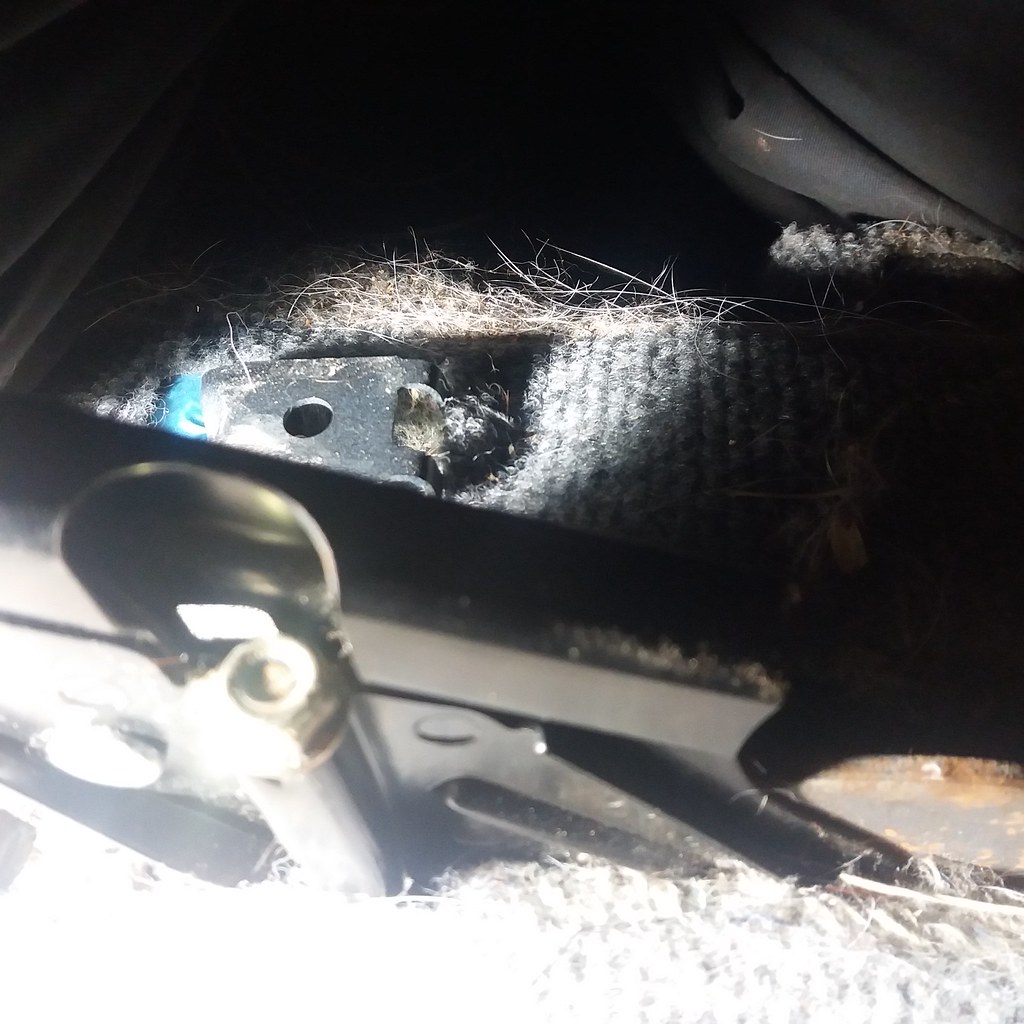
Slackened off the handbrake cable. Wound the nut off the cable to the last few threads...
 20181216_100916
by
deeelux deeelux
, on Flickr
 20181216_101005
by
deeelux deeelux
, on Flickr
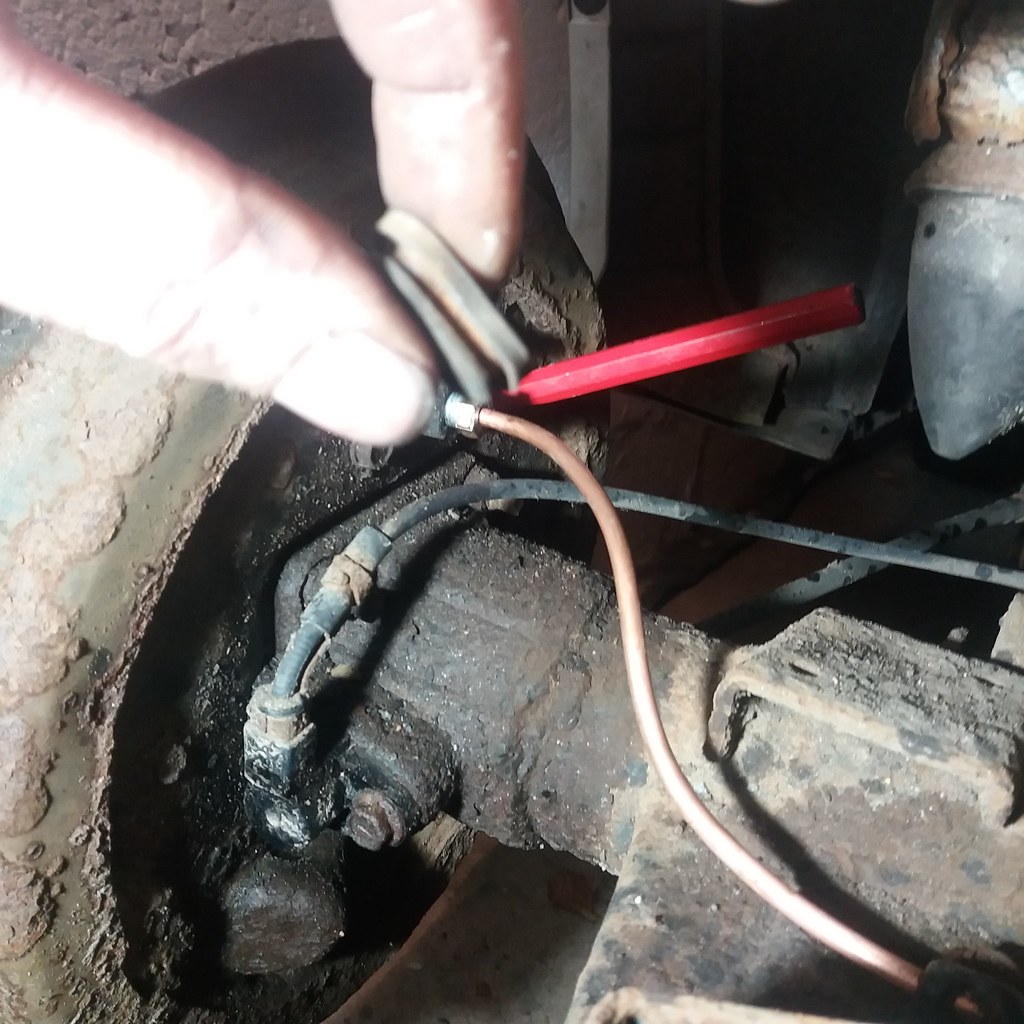
Once the cable had been slackened I removed the rubber cover and adjusted the brakes. I turned the ratchet wheel on the adjuster until a bit of resistance can be felt turning the drum. Then apply the footbrake a few times and recheck. Light resistance when spun means its ok.
 20181216_102233
by
deeelux deeelux
, on Flickr
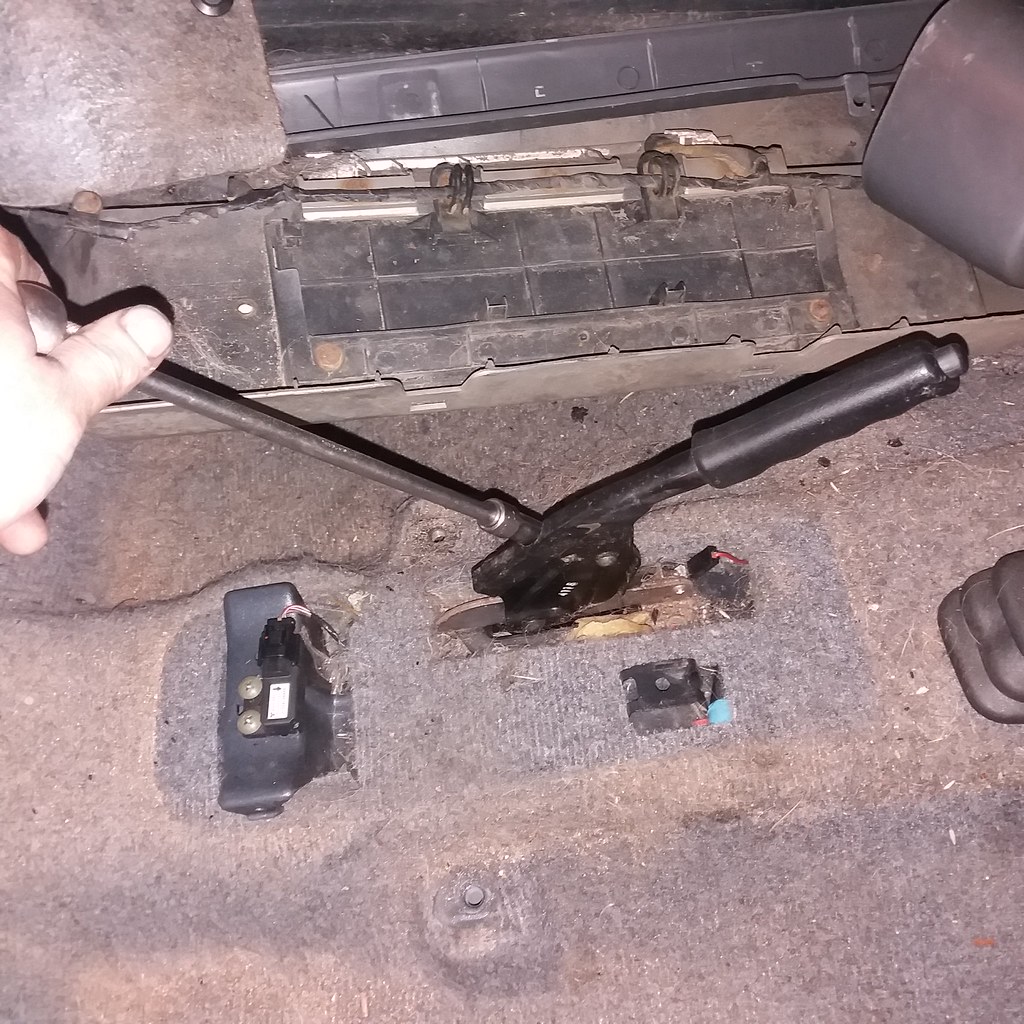
I then adjusted up the cable at the handbrake until I had 5 or 6 clicks.
 20181216_105941
by
deeelux deeelux
, on Flickr
More observant readers will have spotted I forgot my plain screwdriver and used a small chisel to adjust the brakes, LOL!
My current project is HERE!
Had to turn the Jimny round, so had to refit the rear wheels. Started with giving the brake drums a splash of paint...

Slackened off the handbrake cable. Wound the nut off the cable to the last few threads...


Once the cable had been slackened I removed the rubber cover and adjusted the brakes. I turned the ratchet wheel on the adjuster until a bit of resistance can be felt turning the drum. Then apply the footbrake a few times and recheck. Light resistance when spun means its ok.

I then adjusted up the cable at the handbrake until I had 5 or 6 clicks.

More observant readers will have spotted I forgot my plain screwdriver and used a small chisel to adjust the brakes, LOL!
My current project is HERE!
Busiest Mechanic in Scotland!
My pics (inc. pics of my latest Jimny project)...
www.flickr.com/photos/159422664@N08/albums
My ebay stuff for sale...
www.ebay.co.uk/usr/deeelux
Last edit: 30 Dec 2018 20:29 by Delux.
Please Log in or Create an account to join the conversation.
30 Dec 2018 15:35 #199713
by Delux
Busiest Mechanic in Scotland!
My pics (inc. pics of my latest Jimny project)...
www.flickr.com/photos/159422664@N08/albums
My ebay stuff for sale...
www.ebay.co.uk/usr/deeelux
Replied by Delux on topic Deluxs new black Jimny, Project KZA
Now the Jimny was facing the other way round I could get stuck into the repairs at the front. Corrosion-wise this Jimny is far less work than my last one but mechanically it is far more labour intensive!
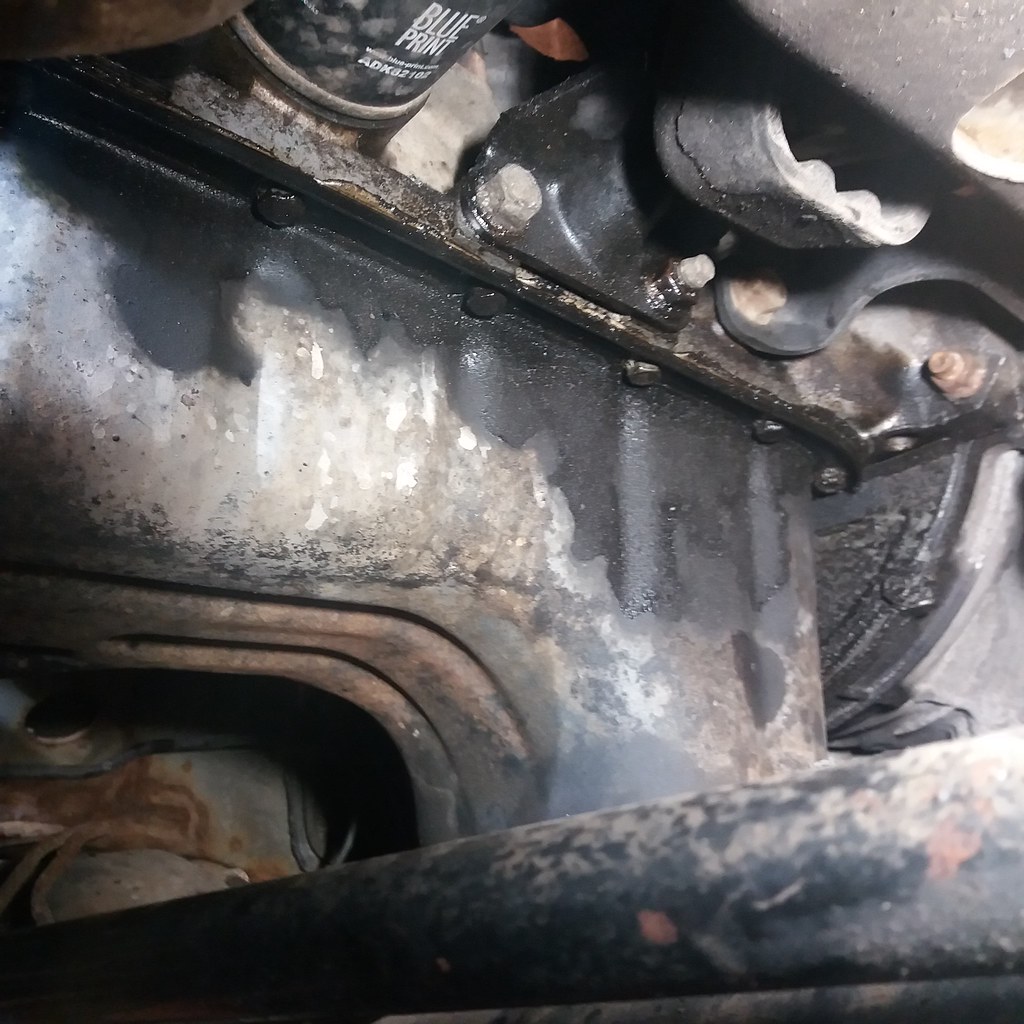
I noticed an oil leak...
 20181223_124745
by
deeelux deeelux
, on Flickr
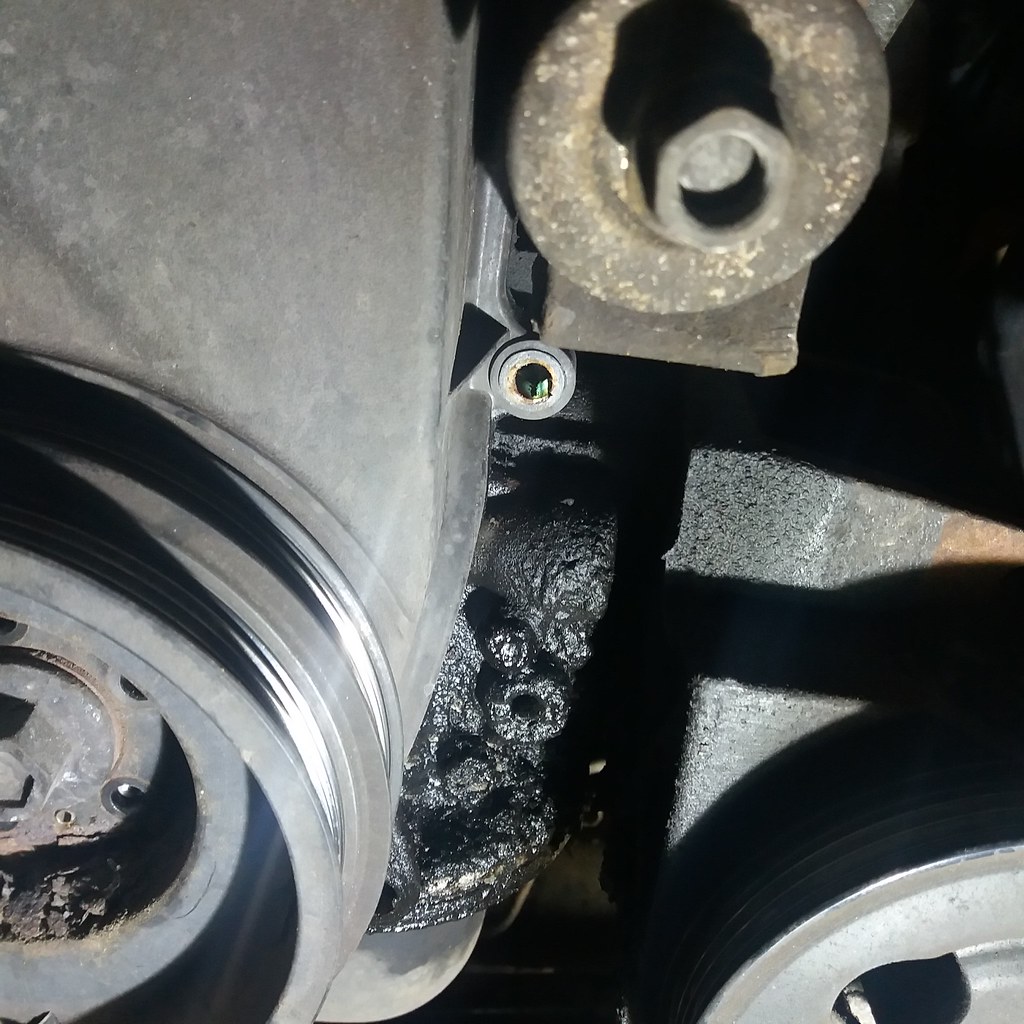
1st impression might suggest a leaky sump but leaks tend to work backwards so I need to find the signs of the leak at the frontmost point. (Is that even a word? Frontmost?)
 20181223_124810
by
deeelux deeelux
, on Flickr
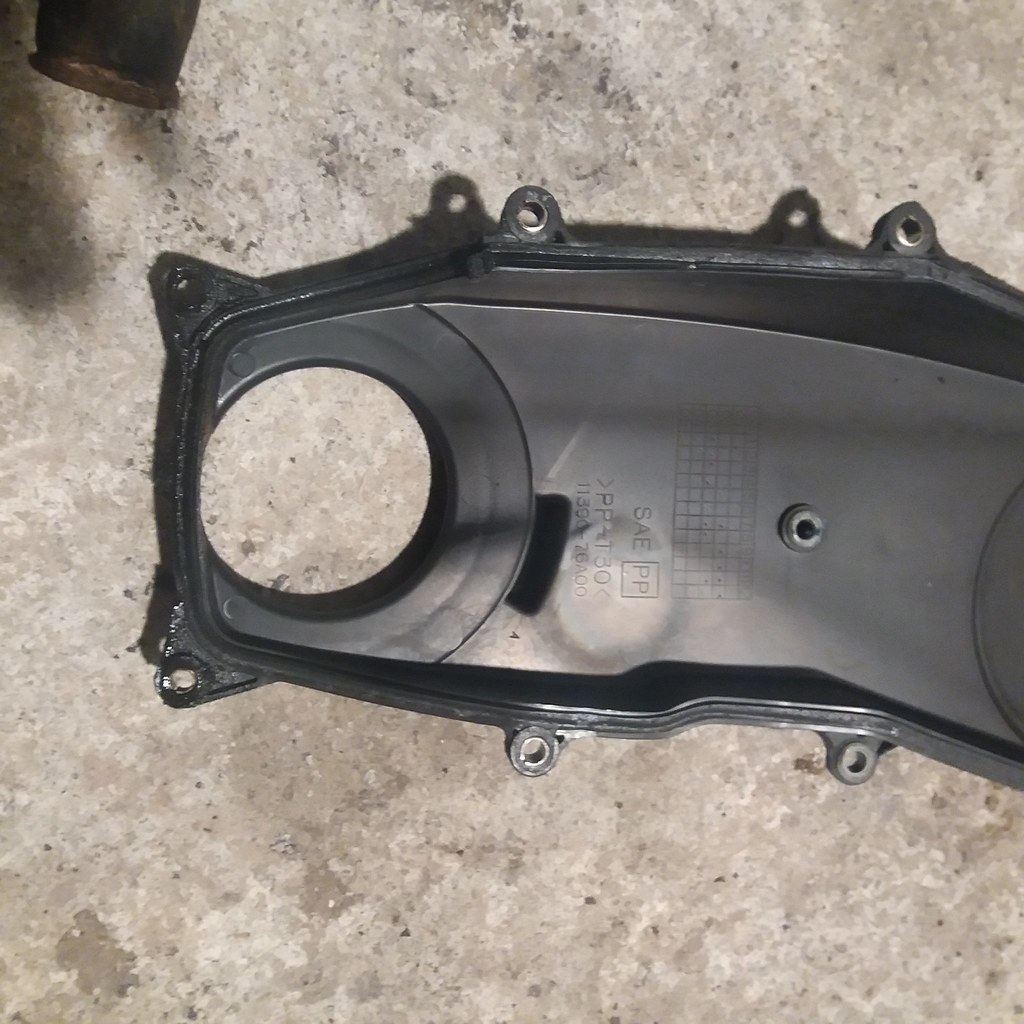
Could be the oil pump, crankshaft oil seal perhaps? I'm doing the timing belt anyway so the cover came off...
 20181223_125107
by
deeelux deeelux
, on Flickr
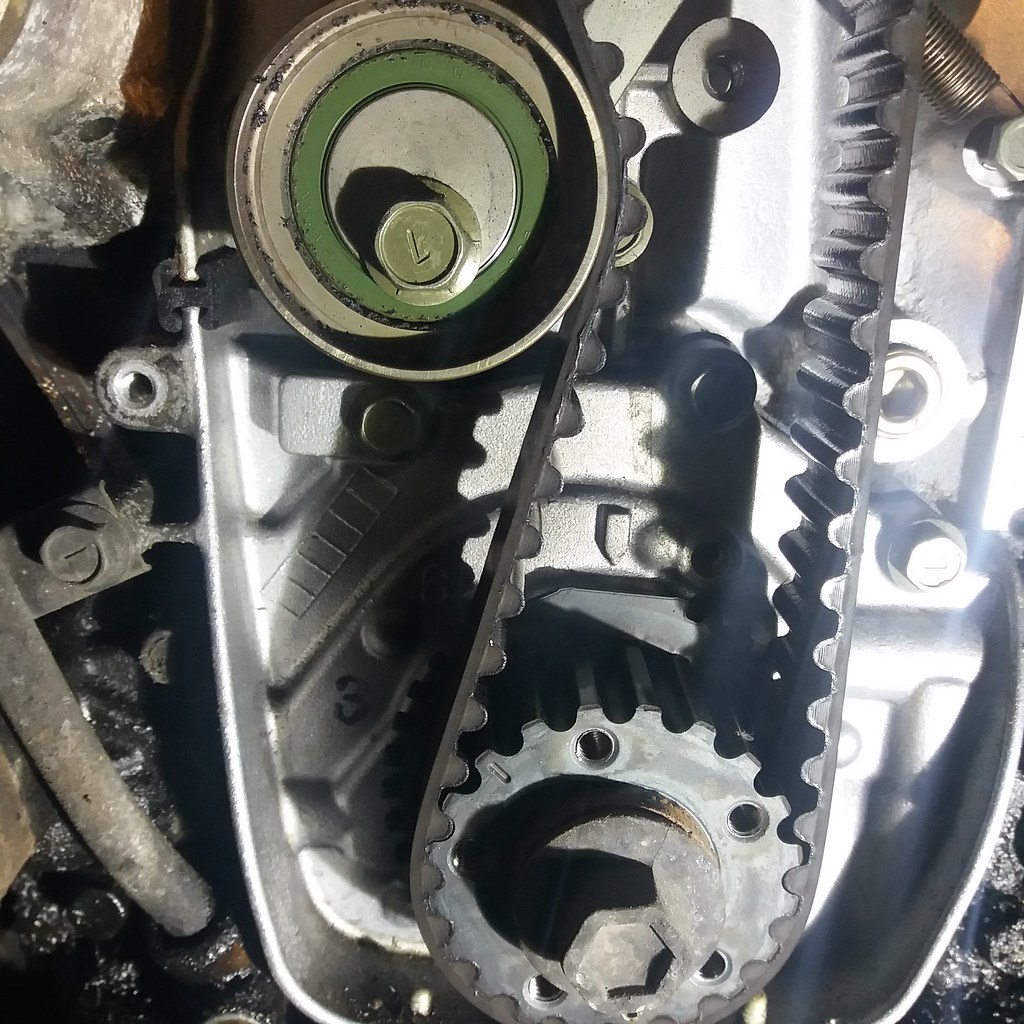
Inside the cover was pretty dry suggesting the leak is down the back of the space and not being thrown about leaking onto a pulley.
 20181223_125127
by
deeelux deeelux
, on Flickr
Not much oil on or behind the crank pulley but if you look close something is running down the engine in the background. So now we need to find the highest point of the leak...
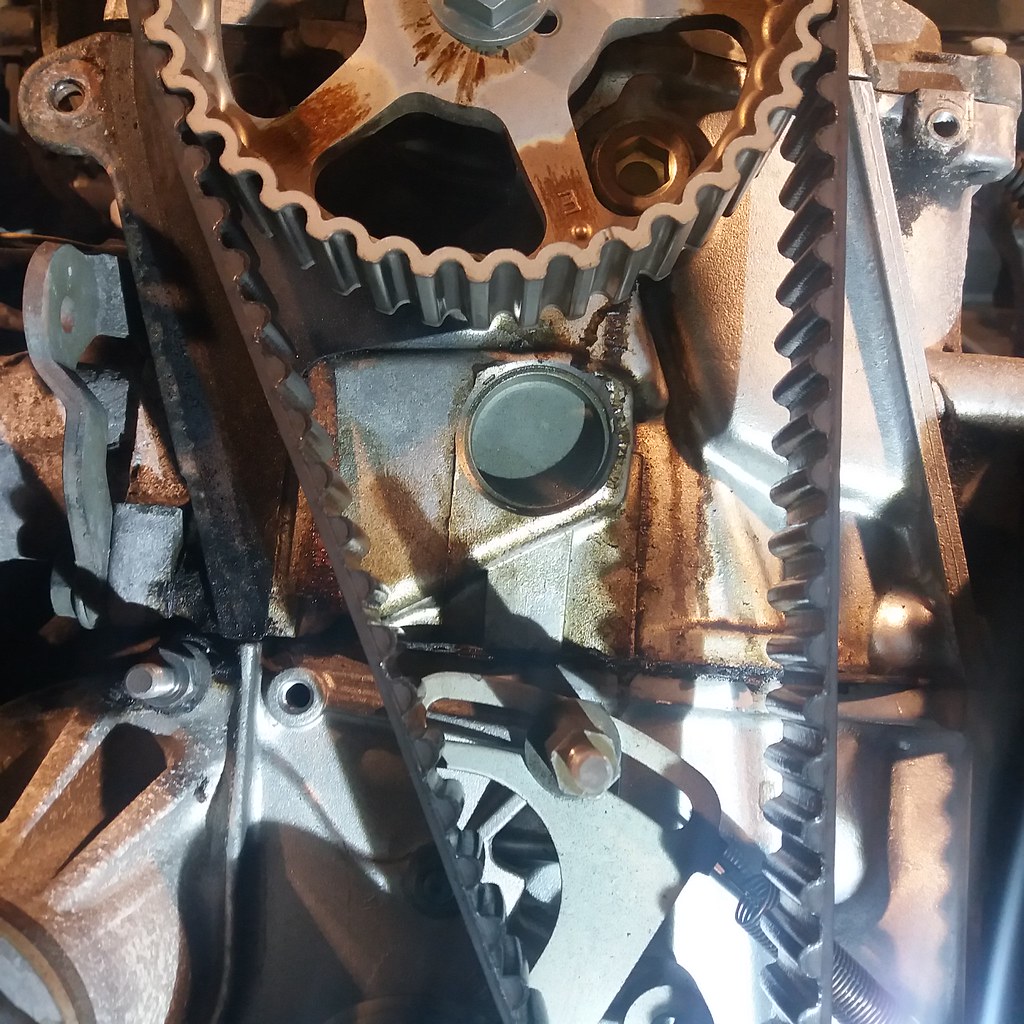 20181223_125133
by
deeelux deeelux
, on Flickr
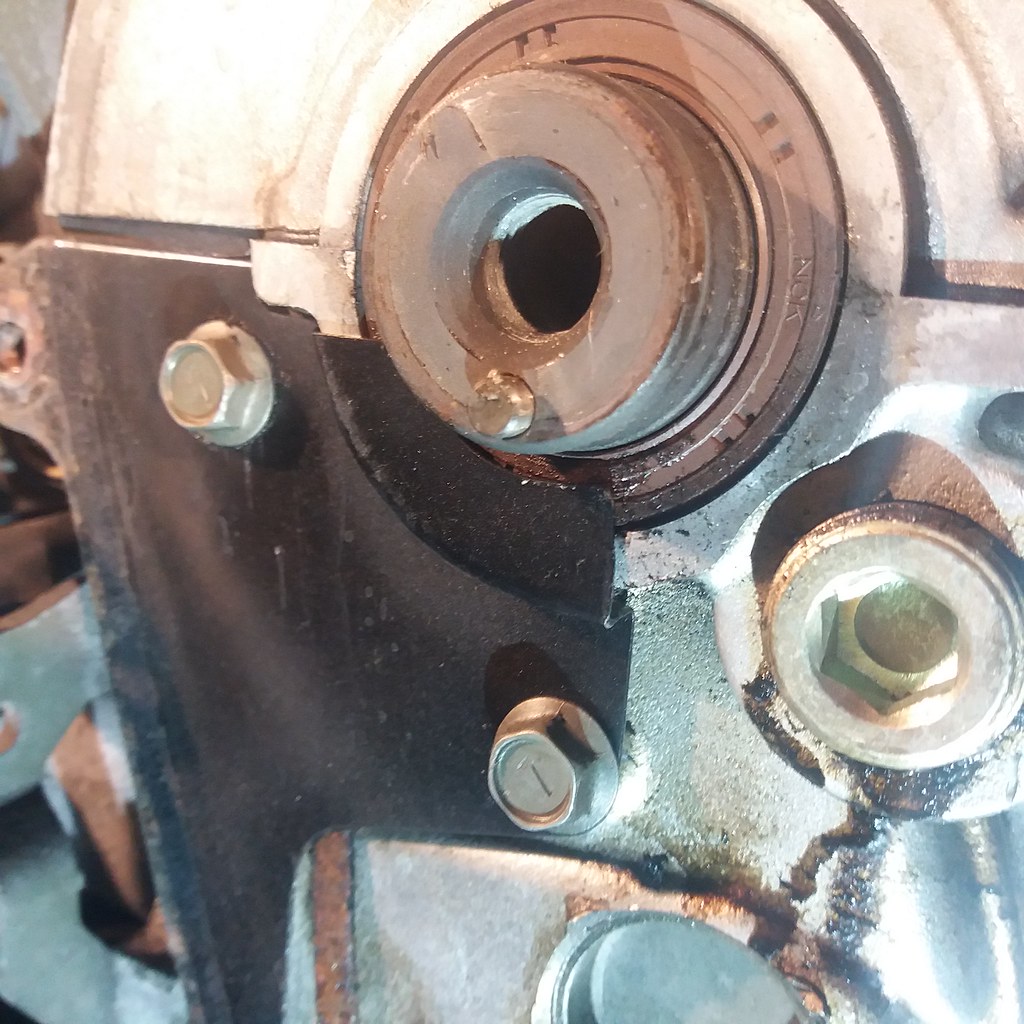
Bleurgh!
 20181223_130146
by
deeelux deeelux
, on Flickr
Highest point, above pic, is the camshaft oil seal although there is a bit round the rocker shaft plug.
So thats it! Oil leak from the camshaft oil seal! Stick a new one in, end of story.
Or is it?
Why is it leaking?
Could be wear, could be the material has hardened over time.
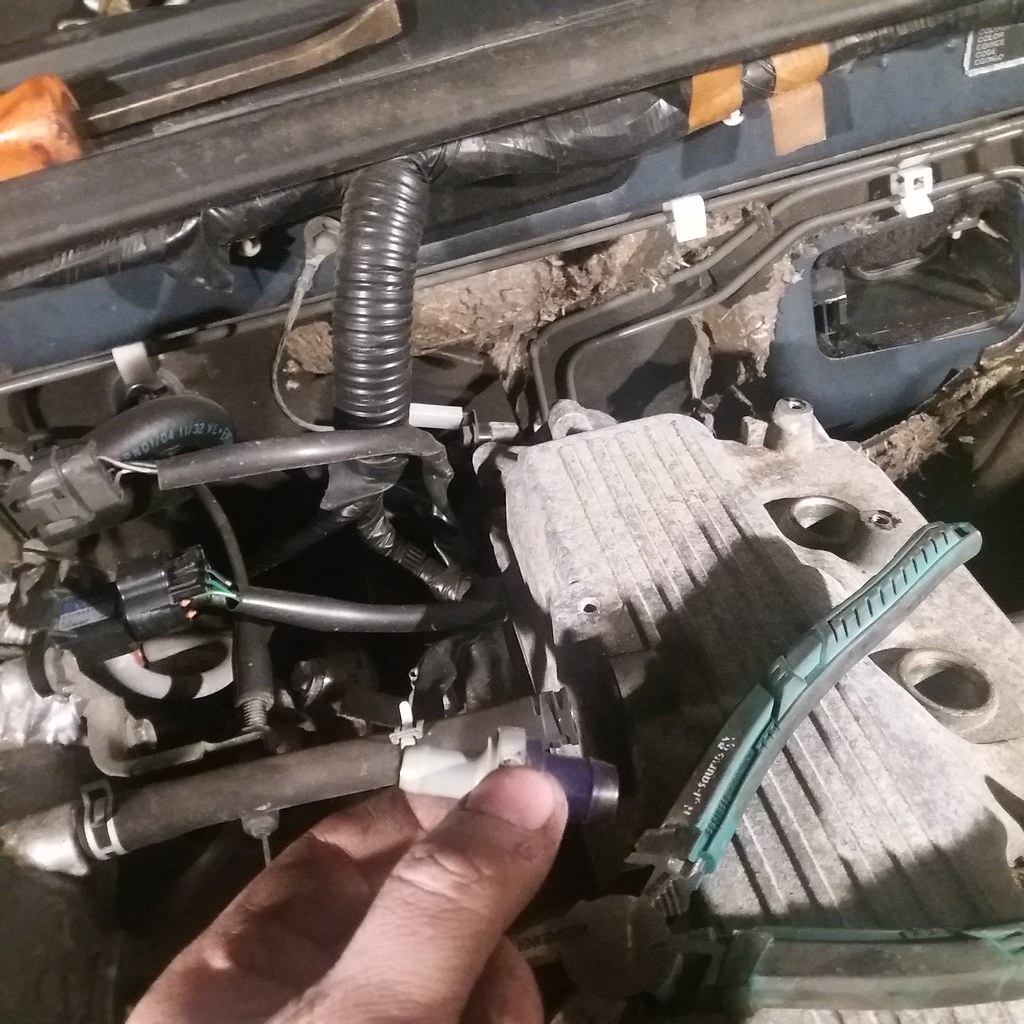
Then I found this!
 20181223_130715
by
deeelux deeelux
, on Flickr
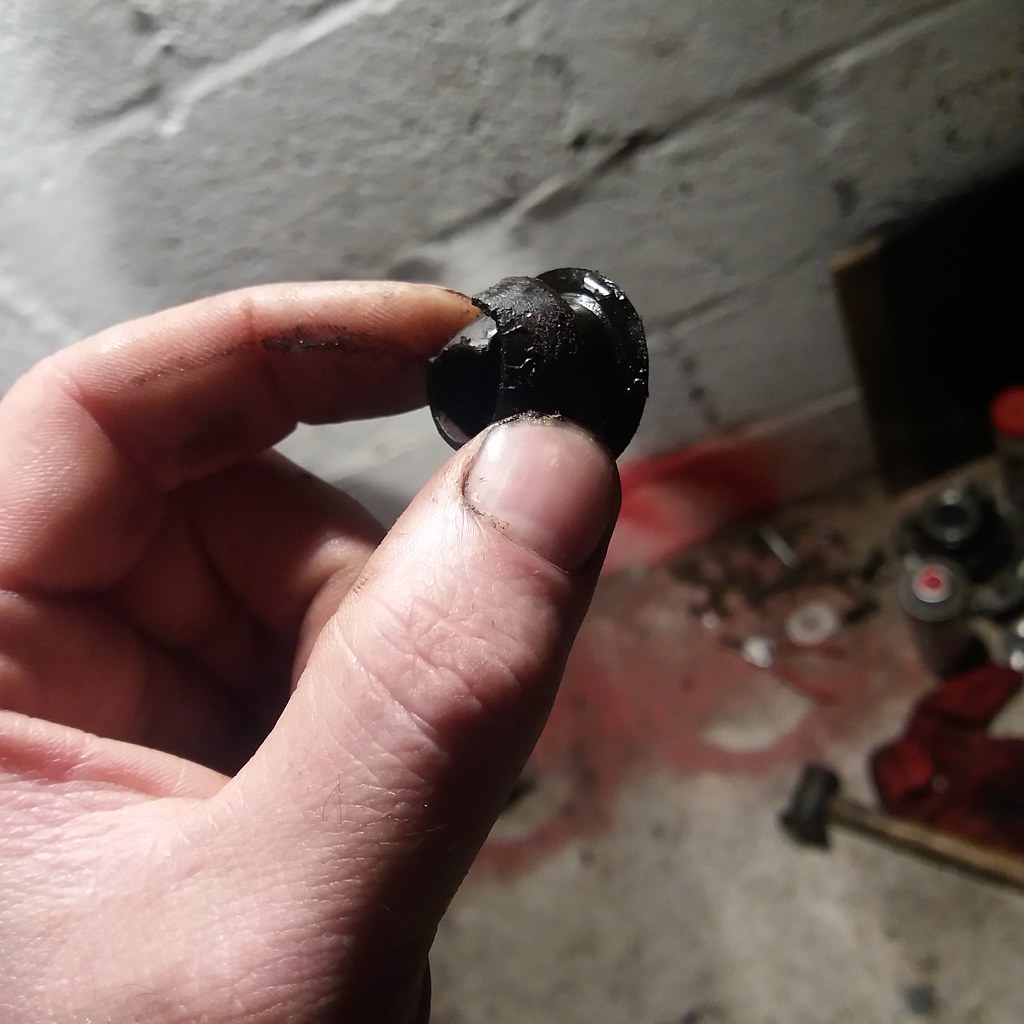
PCV valve! A blocked pcv valve increases the pressure inside the rocker cover. Excessive pressure has to go somewhere, usually escaping from the weakest point, the worn, hardened camshaft oil seal!
Removed the valve and left it soaking in some brake cleaner. Its only a small spring loaded flap inside. PCV valve seal decided to resign by falling to bits on removal...
 20181229_104605
by
deeelux deeelux
, on Flickr
I noticed an oil leak...

1st impression might suggest a leaky sump but leaks tend to work backwards so I need to find the signs of the leak at the frontmost point. (Is that even a word? Frontmost?)

Could be the oil pump, crankshaft oil seal perhaps? I'm doing the timing belt anyway so the cover came off...

Inside the cover was pretty dry suggesting the leak is down the back of the space and not being thrown about leaking onto a pulley.

Not much oil on or behind the crank pulley but if you look close something is running down the engine in the background. So now we need to find the highest point of the leak...

Bleurgh!

Highest point, above pic, is the camshaft oil seal although there is a bit round the rocker shaft plug.
So thats it! Oil leak from the camshaft oil seal! Stick a new one in, end of story.
Or is it?
Why is it leaking?
Could be wear, could be the material has hardened over time.
Then I found this!

PCV valve! A blocked pcv valve increases the pressure inside the rocker cover. Excessive pressure has to go somewhere, usually escaping from the weakest point, the worn, hardened camshaft oil seal!
Removed the valve and left it soaking in some brake cleaner. Its only a small spring loaded flap inside. PCV valve seal decided to resign by falling to bits on removal...

Busiest Mechanic in Scotland!
My pics (inc. pics of my latest Jimny project)...
www.flickr.com/photos/159422664@N08/albums
My ebay stuff for sale...
www.ebay.co.uk/usr/deeelux
Please Log in or Create an account to join the conversation.
30 Dec 2018 15:48 - 30 Dec 2018 20:32 #199715
by Delux
Busiest Mechanic in Scotland!
My pics (inc. pics of my latest Jimny project)...
www.flickr.com/photos/159422664@N08/albums
My ebay stuff for sale...
www.ebay.co.uk/usr/deeelux
Replied by Delux on topic Deluxs new black Jimny, Project KZA
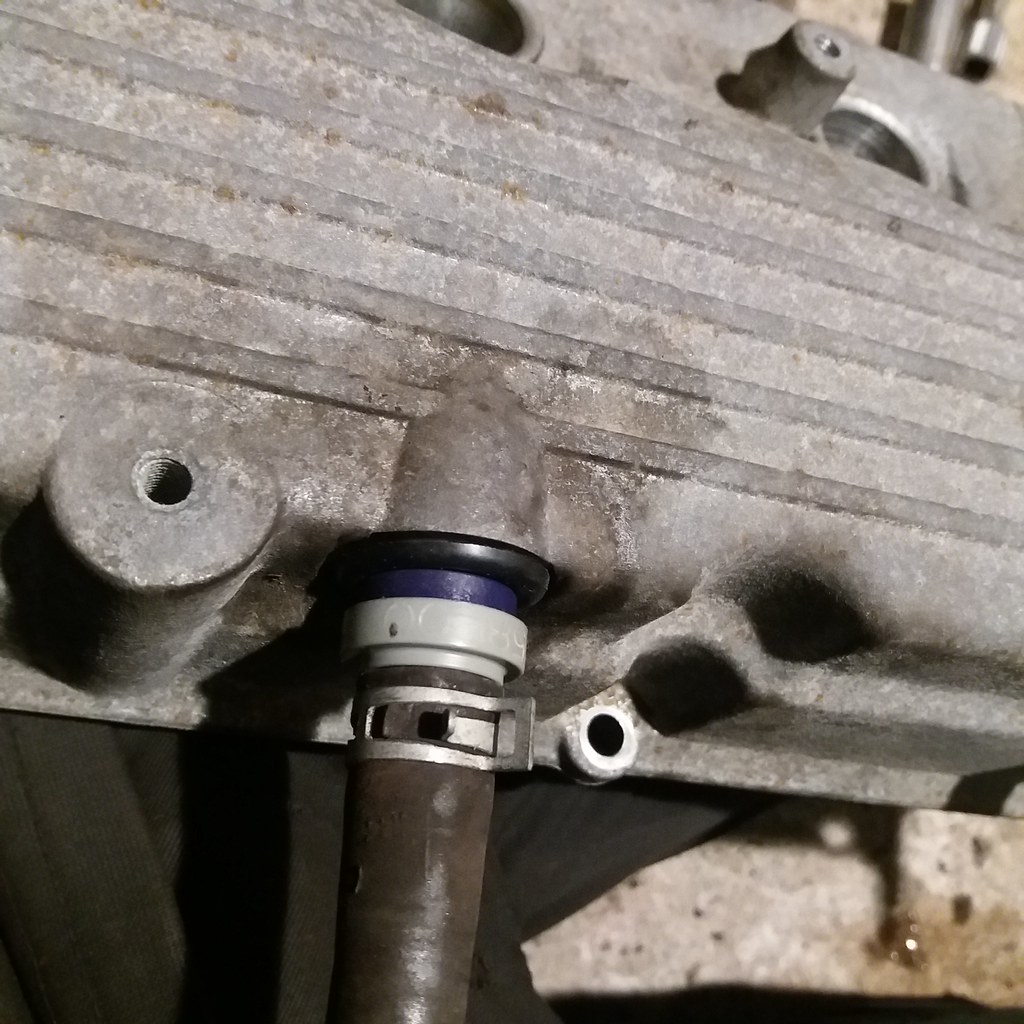
After cleaning the PCV valve was refitted with a new seal (courtesy of Bigjimy store!)
 20181229_104105
by
deeelux deeelux
, on Flickr
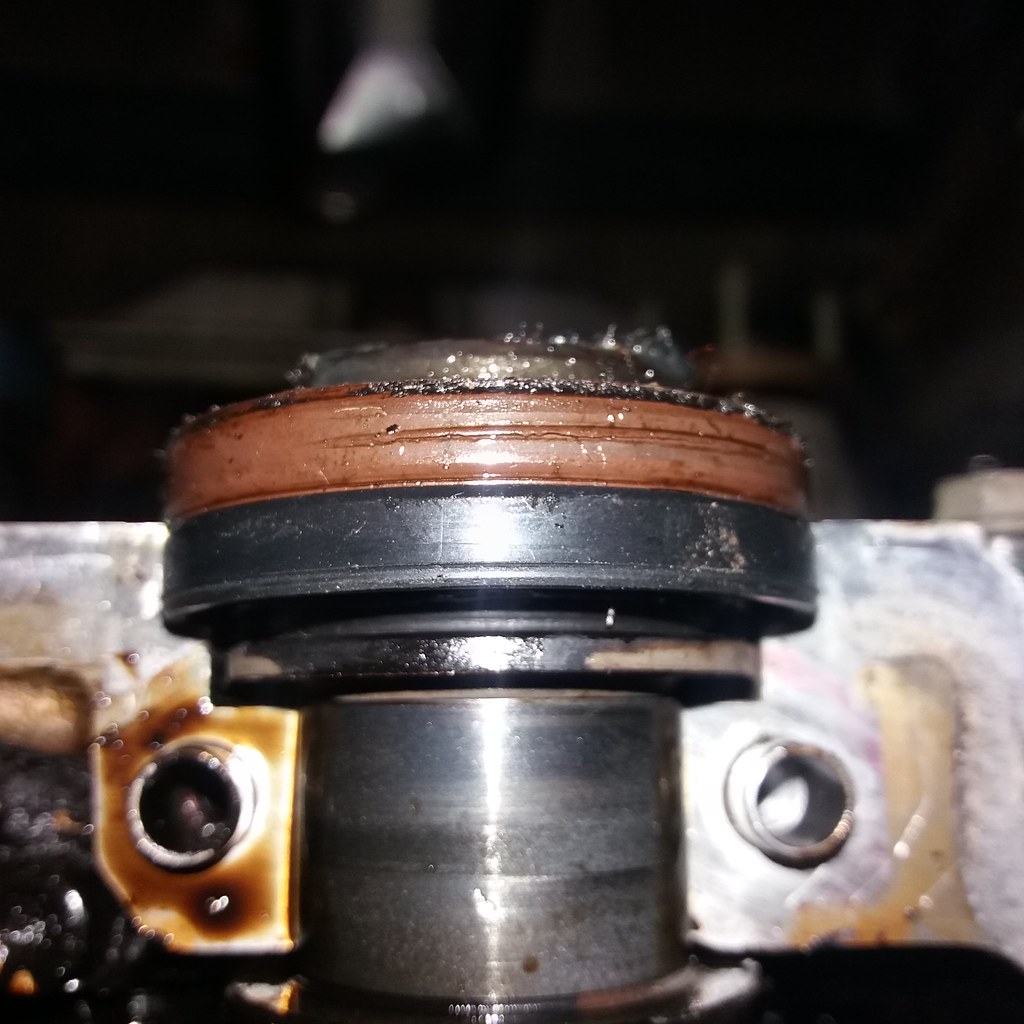
Camshaft oil seal was replaced. I removed the end camshaft cap cleaned the area. Greased the inside of the new seal and tapped it into place using the old seal as a protector.
 20181229_104623
by
deeelux deeelux
, on Flickr
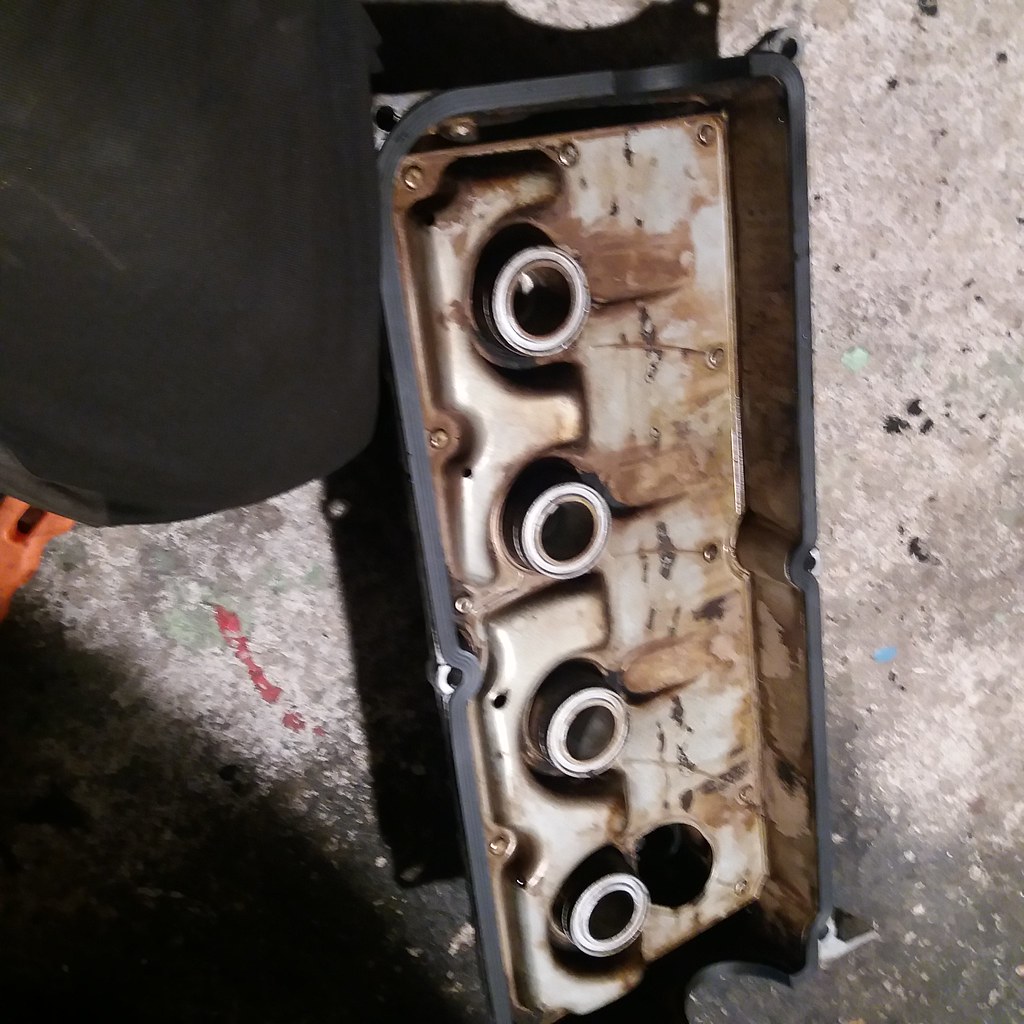
Rocker cover was thoroughly steam cleaned and treated to a new gasket.
 20181227_121745
by
deeelux deeelux
, on Flickr
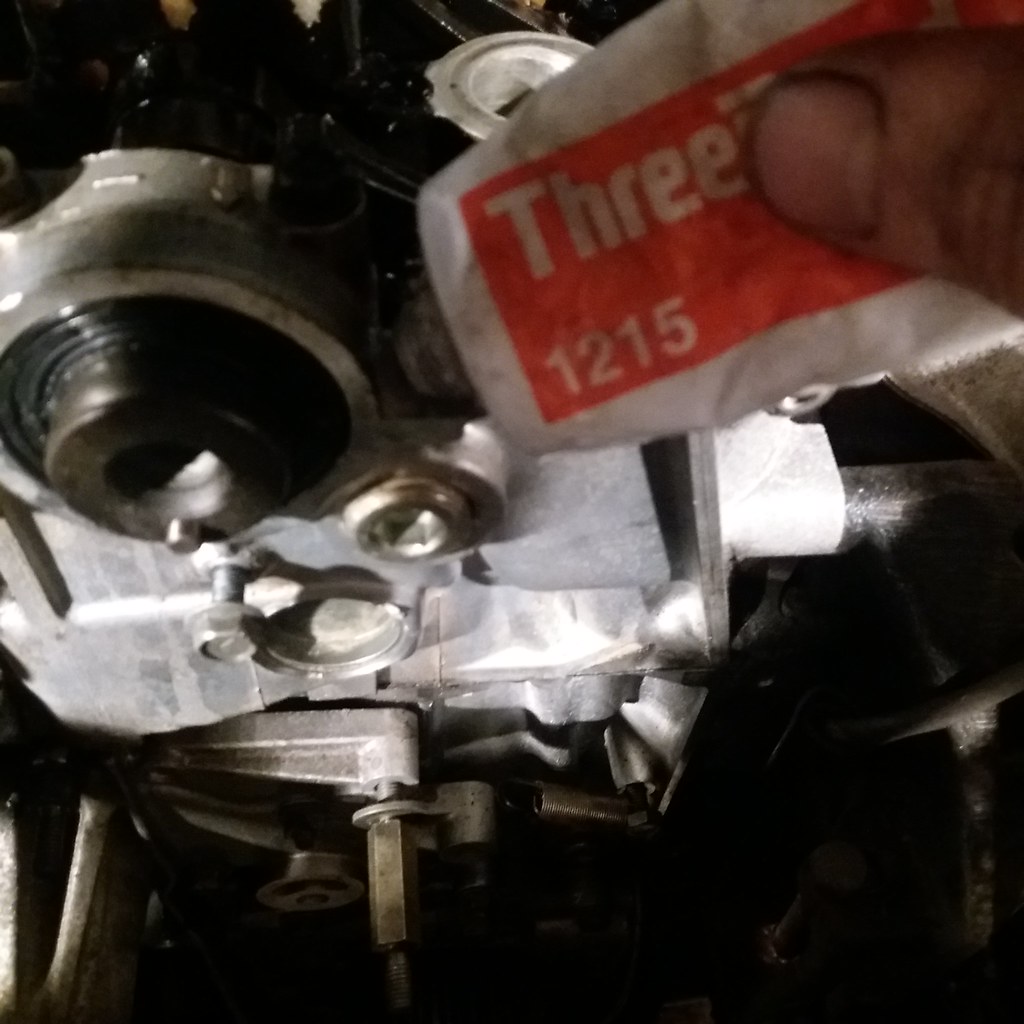
Before refitting, I add a pea sized blob of sealer at the tight bits either side of the cam cap. You dont want to put too much on as it may find its way into the engine and block an oil hole. In this pic I've probably applied more than I usually would but the camera button on my phone decided to ignore my finger the first few presses!
 20181229_105256
by
deeelux deeelux
, on Flickr
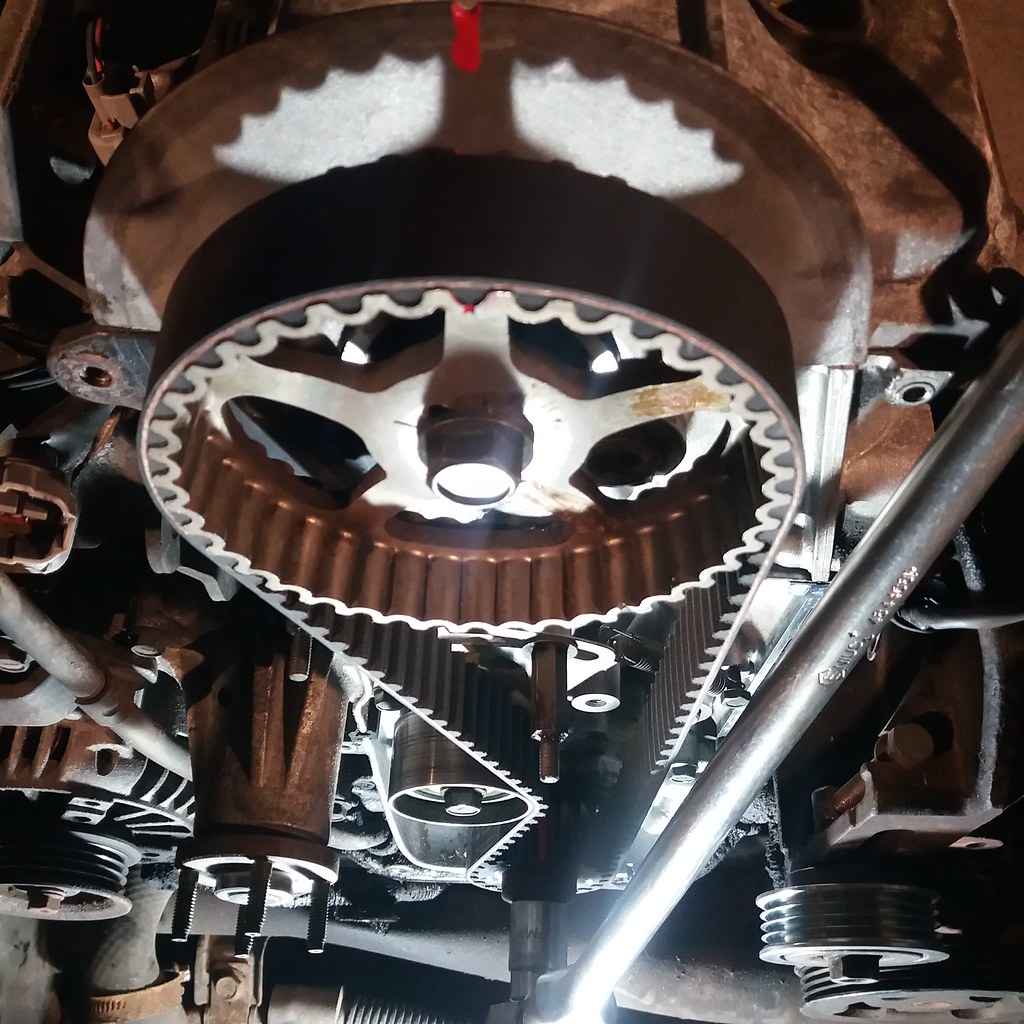
All built up and cleaned! I'm gonna do a timing belt fitting guide for the wiki unless someone has beaten me to it.
 20181229_112639
by
deeelux deeelux
, on Flickr
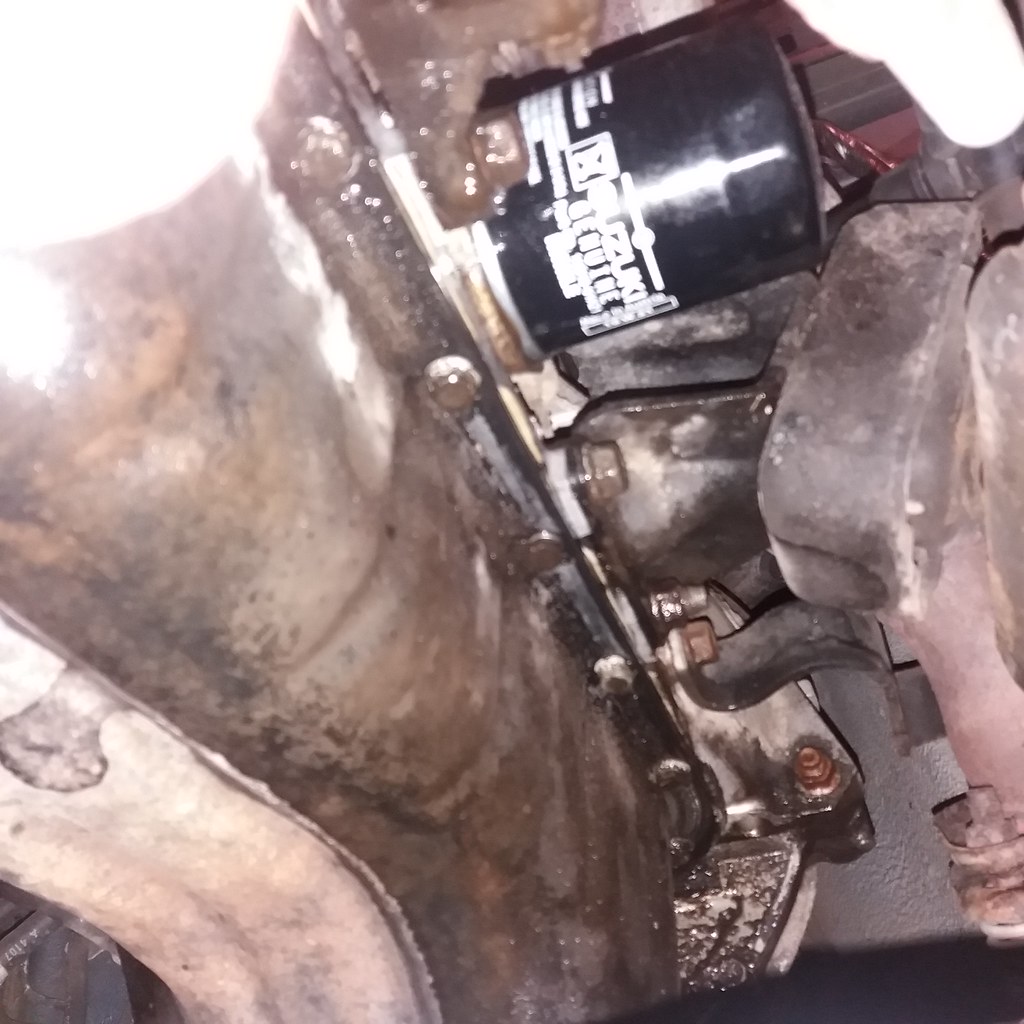
I'll take it to work and steam clean all traces of the oil leak but in the meantime, after running for 30 minutes or so the oil leak had not returned!
 20181227_105506
by
deeelux deeelux
, on Flickr

Camshaft oil seal was replaced. I removed the end camshaft cap cleaned the area. Greased the inside of the new seal and tapped it into place using the old seal as a protector.

Rocker cover was thoroughly steam cleaned and treated to a new gasket.

Before refitting, I add a pea sized blob of sealer at the tight bits either side of the cam cap. You dont want to put too much on as it may find its way into the engine and block an oil hole. In this pic I've probably applied more than I usually would but the camera button on my phone decided to ignore my finger the first few presses!

All built up and cleaned! I'm gonna do a timing belt fitting guide for the wiki unless someone has beaten me to it.

I'll take it to work and steam clean all traces of the oil leak but in the meantime, after running for 30 minutes or so the oil leak had not returned!

Busiest Mechanic in Scotland!
My pics (inc. pics of my latest Jimny project)...
www.flickr.com/photos/159422664@N08/albums
My ebay stuff for sale...
www.ebay.co.uk/usr/deeelux
Last edit: 30 Dec 2018 20:32 by Delux.
Please Log in or Create an account to join the conversation.
30 Dec 2018 19:35 - 30 Dec 2018 20:34 #199738
by Delux
Busiest Mechanic in Scotland!
My pics (inc. pics of my latest Jimny project)...
www.flickr.com/photos/159422664@N08/albums
My ebay stuff for sale...
www.ebay.co.uk/usr/deeelux
Replied by Delux on topic Deluxs new black Jimny, Project KZA
To gain access to the timing belt and oil leak I removed the radiator. There are bound to be people reading this now thinking "I've done loads of timing belts and never taken the radiator out!' thing is, it isnt much hassle to take the radiator out and it improves access to everything so much, it is probably faster to take it out than it is to work round.
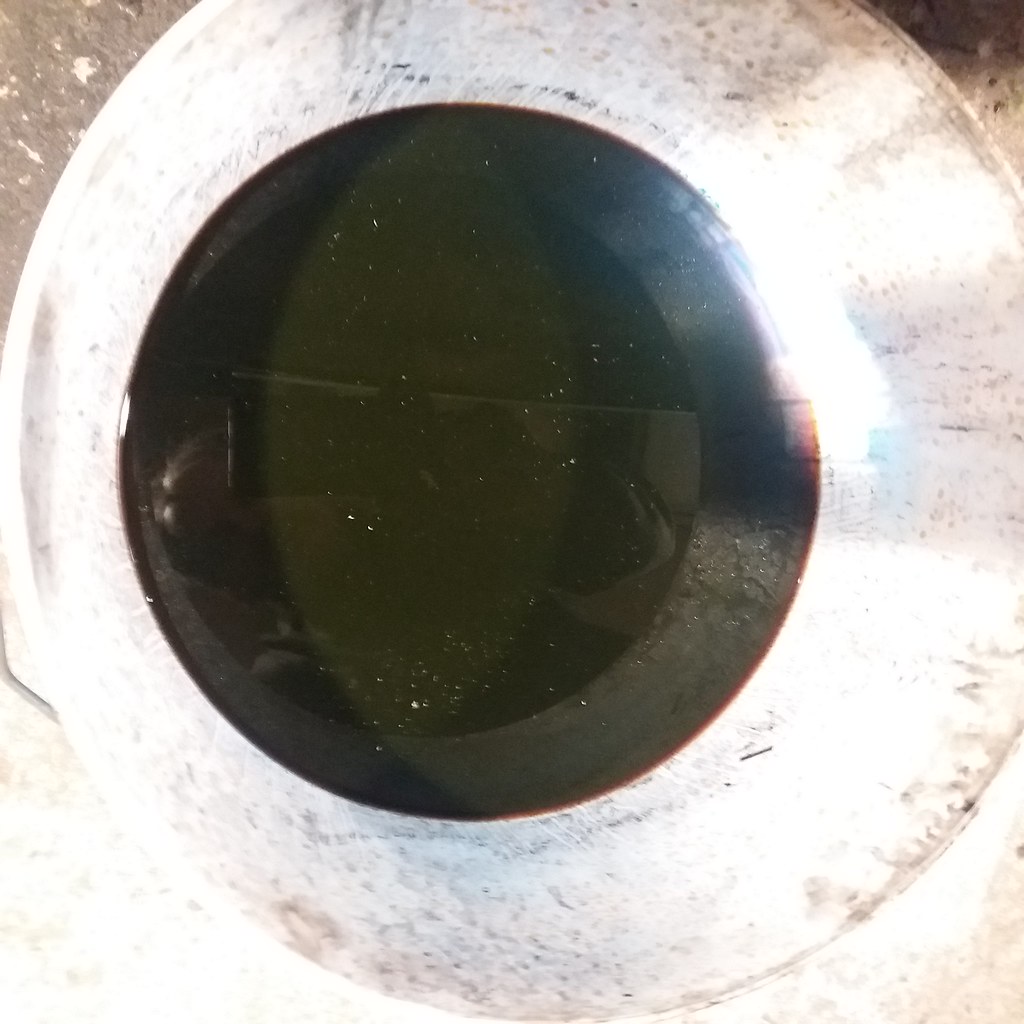
I started by draining the anti freeze out. I figured if it looked ok I'd probably just pour it back in. I've not sent any for lab analysis but I'm not pouring that anywhere other than the used anti freeze thing at the dump...
 20181216_134626
by
deeelux deeelux
, on Flickr
It has a woody, almost chemically nose with undertones of stagnant water and algae.
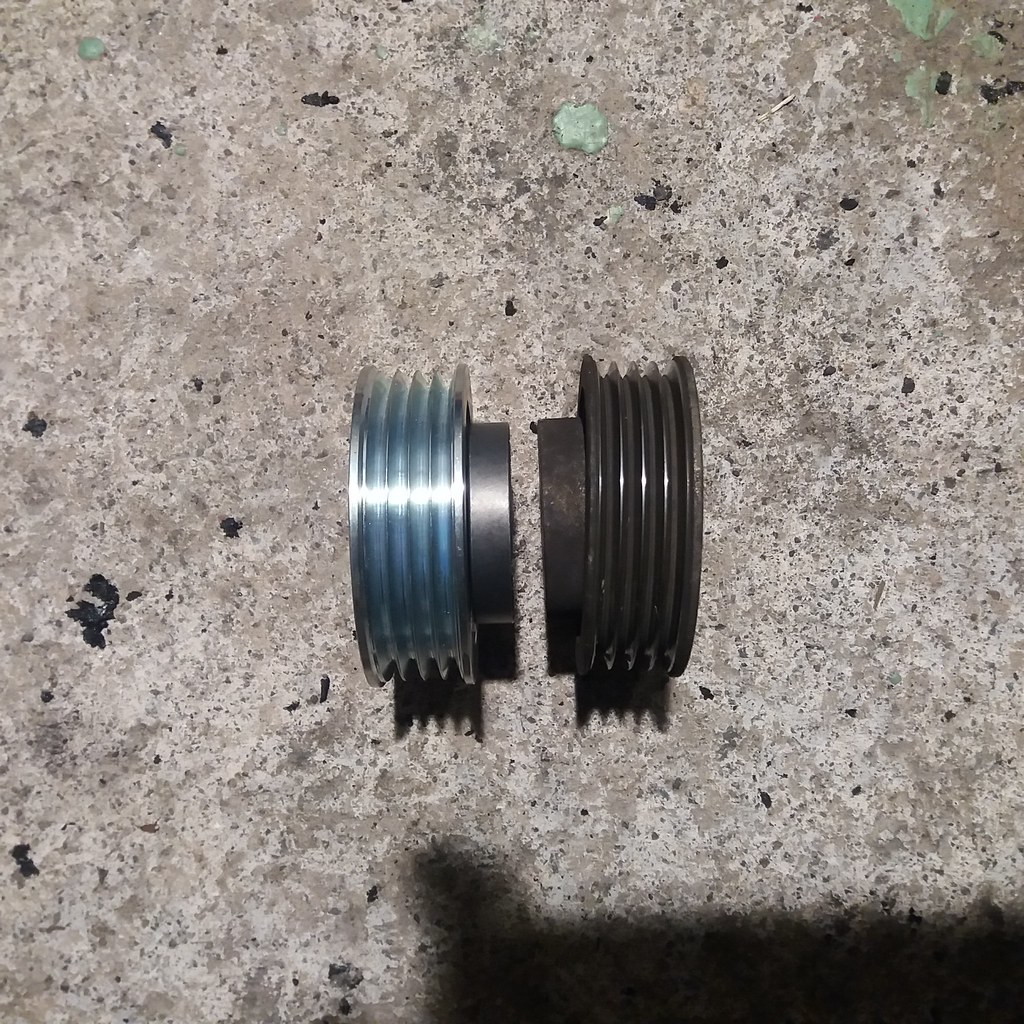
While I was in there I attended to the power steering tensioner pulley. The belt had been noisy and was ripe for replacement but I thought I better check the pulleys etc. The idler outer section had completely seperated from the bearing and it was only the belt tension holding it in place!
 20181227_104523
by
deeelux deeelux
, on Flickr
I built it back up with new fan belts. I already had them after buying the wrong ones for my last Jimny on ebay! LOL!
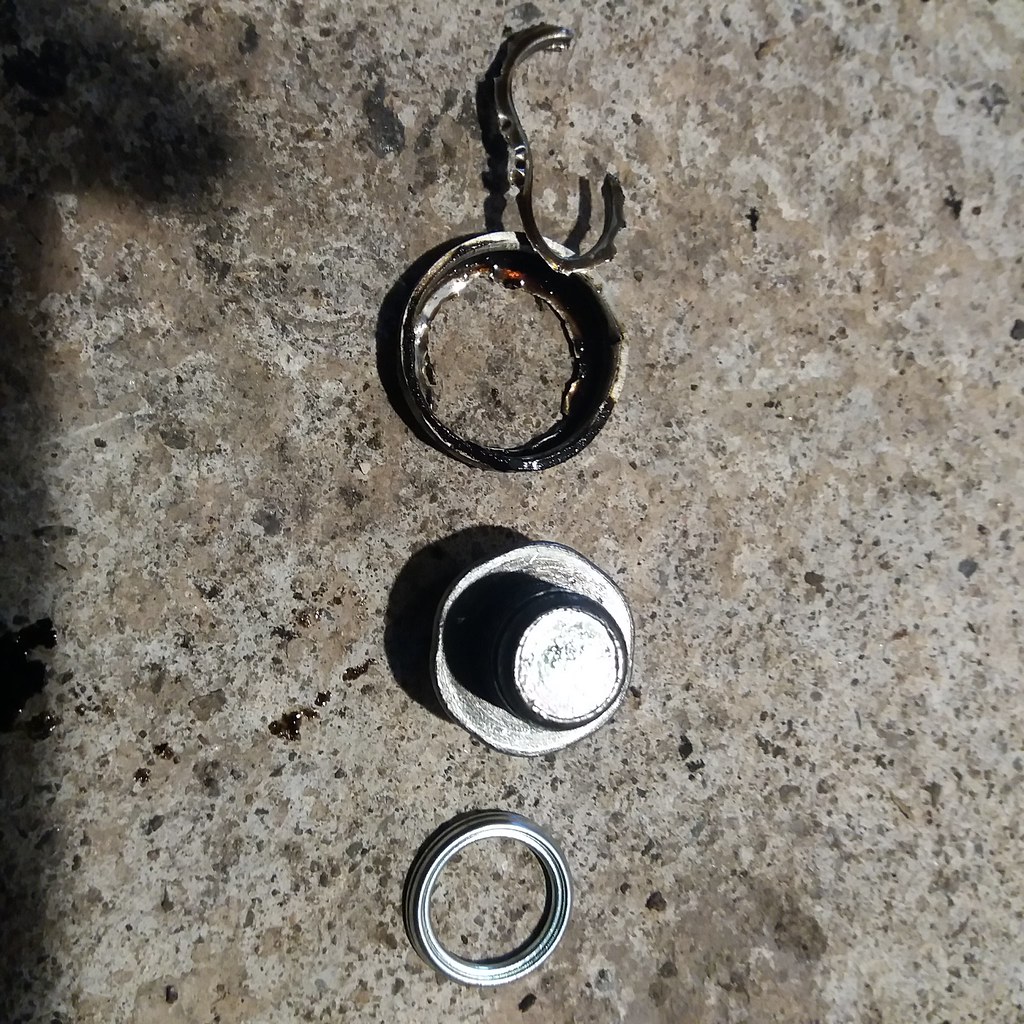
Carried out a full service while its in the garage, genuine Suzuki filters are still available in Big Jimnys store so there is no excuse really. I didnt take pictures because it wasnt that exciting but I was a bit confused by the sump washer.
 20181227_122344
by
deeelux deeelux
, on Flickr
It appeared to have had some sort of cupped washer forced onto the plug, very strange. I'm sure the sump plug is happier now its been fitted with a colapsable mitsubishi washer.
Turning my attention to the nearside wheelarch I could see the front axle was leaking, there was excessive play at the wheel, death wobble at 40mph and the brake pads were worn almost to the metal. There arent many pictures because its messy work and I didnt want stinking kinpin 'grease' all over my phone!
The excessive play appeared to be in the bottom kingpin and the rear track rod end. Usually I would remove both track rod ends, vacuum pipes, brake caliper, kingpins and big seal then slide the whole halfshaft out with the hub and brake disc still on. Which is fine when working on a ramp in a large dealer workshop. However, when working in the smallest workshop that can legally be described as a lock up there isnt enough space to slide the shaft all the way out so I had to remove the hub assembly.
Having removed the complete hub assembly I tried again, only to find there still wasnt enough space! I had to remove the cv joint before I could get the so**ing half shaft out!
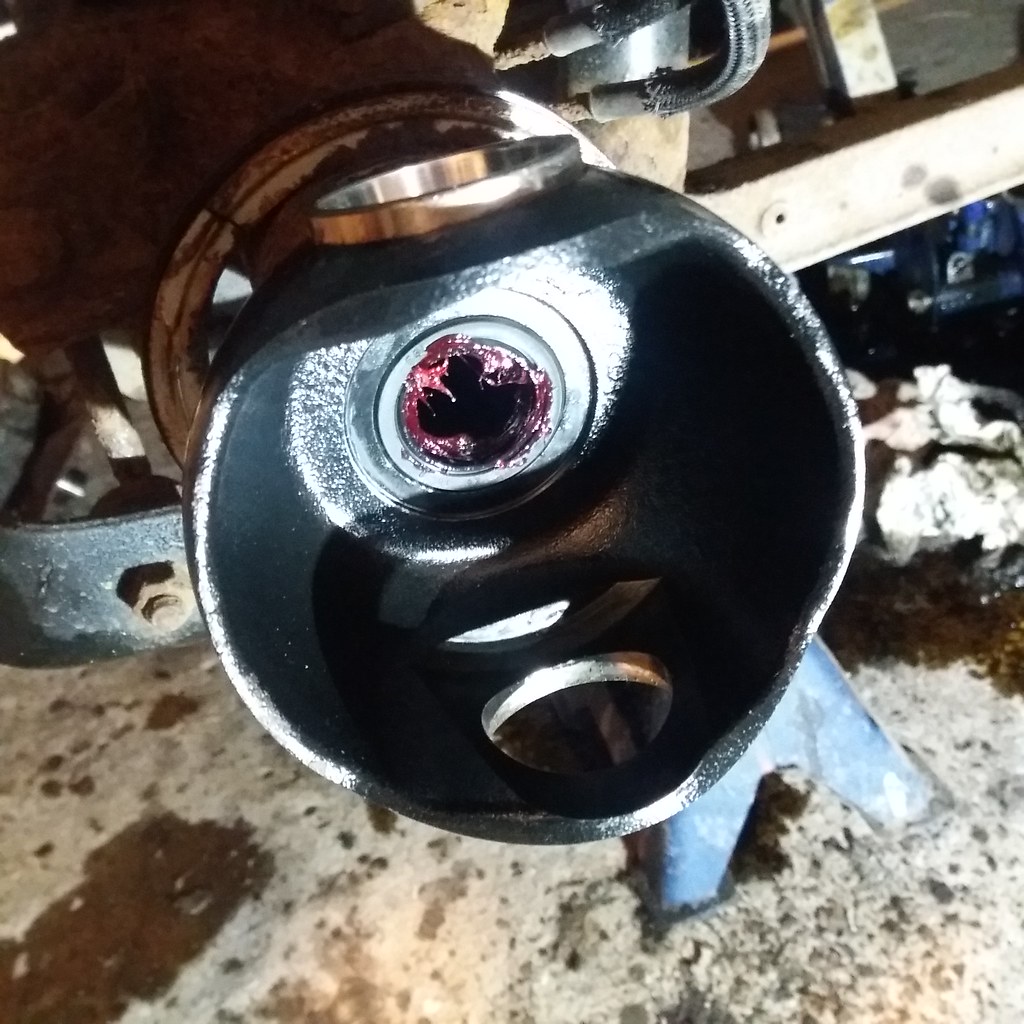
This is how it looked after removing the shaft...
 20181227_144243
by
deeelux deeelux
, on Flickr
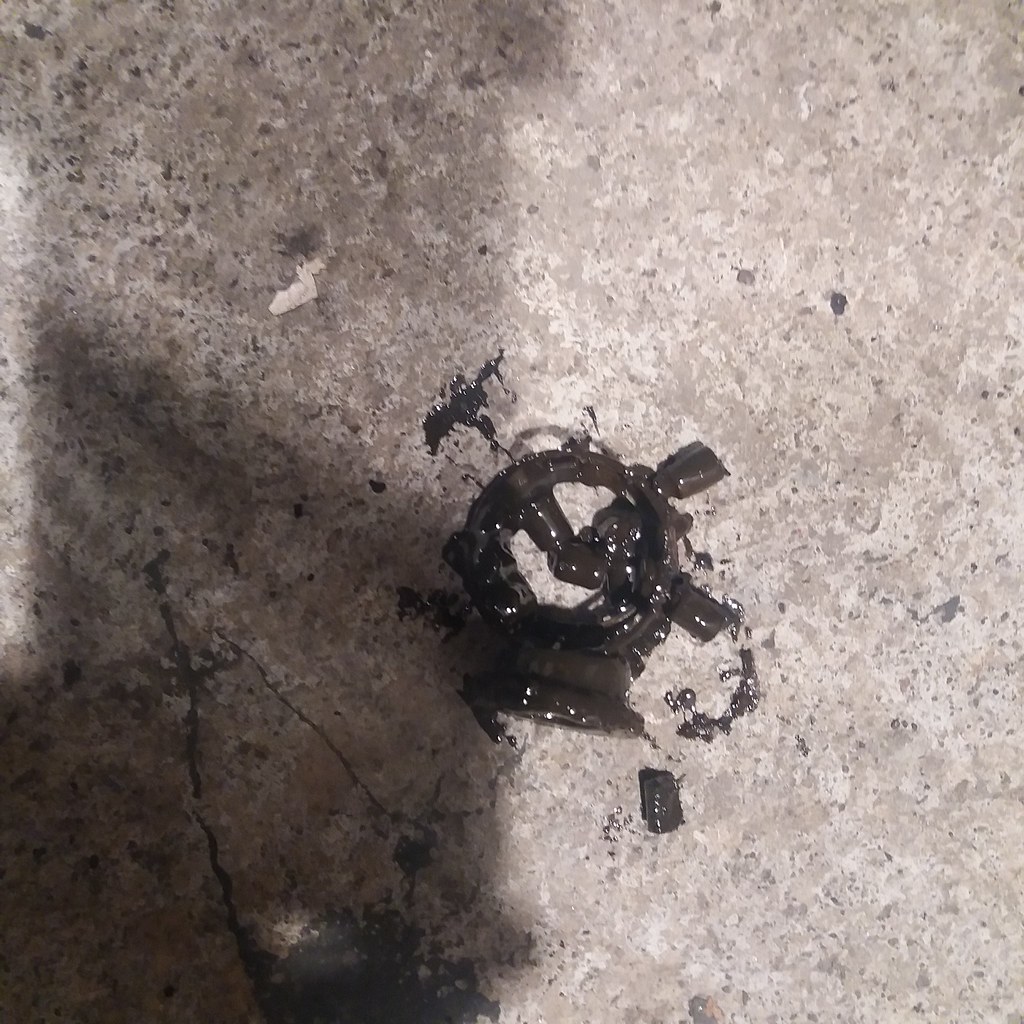
Yeah, I wish! Trowelled out all the stinking grease/CV grease/gear oil/mud slop. I had hoped I could get away with changing the oil seal, adding spacers to the kingpins and sticking it all back together. This was the plan until...
 20181223_140544
by
deeelux deeelux
, on Flickr
I removed the bottom bearing to clean and check it. Familiar scene?! Kingpin bearings promptly ordered!
Its all back together now.
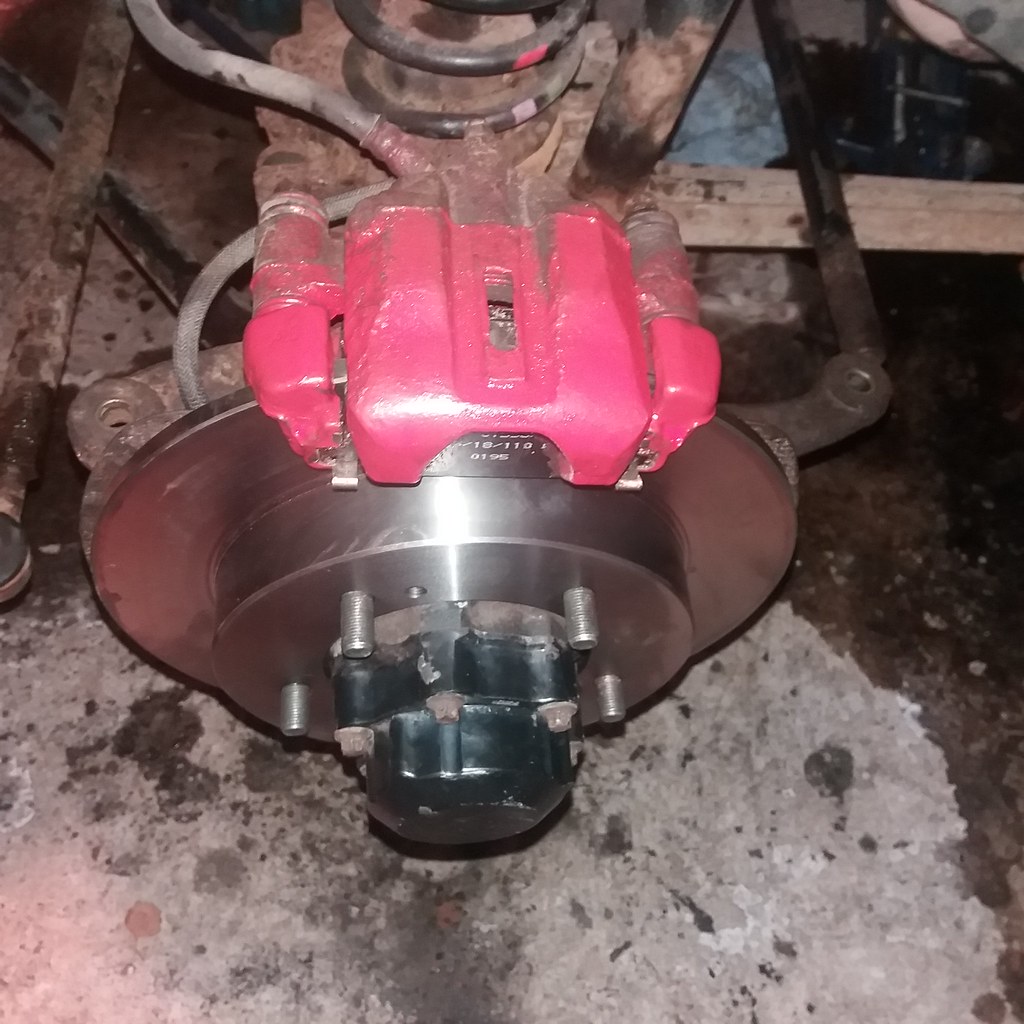 20181230_123052
by
deeelux deeelux
, on Flickr
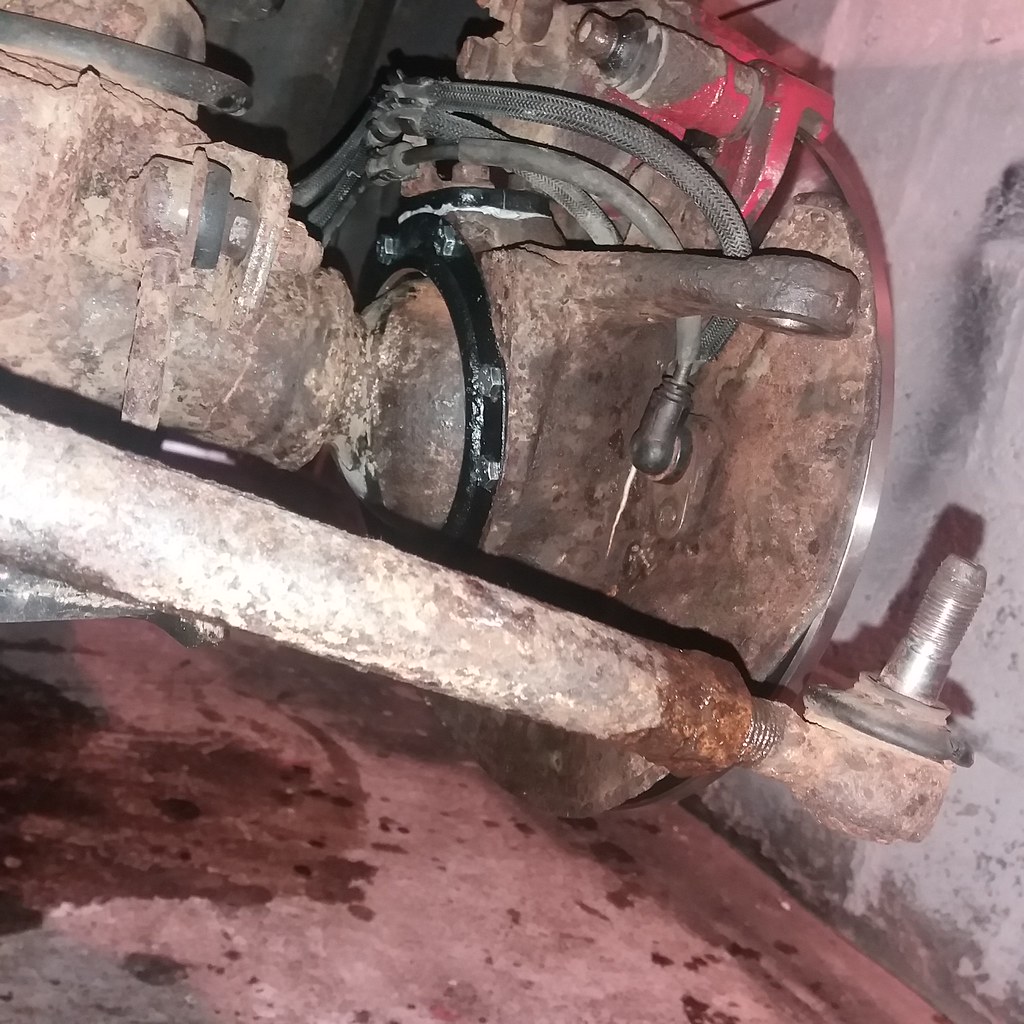 20181230_123109
by
deeelux deeelux
, on Flickr
Well, sort of! As I am off work I have to rely on ebay/Bigjimny for parts, usually thats fine but this time of year is a nightmare to be waiting on parcels. Then some blundering fool ordered the wrong side of track rod end! The disappointment faded a bit when I realised the boot it burst on the front track rod end so I can use the wrong one for that!
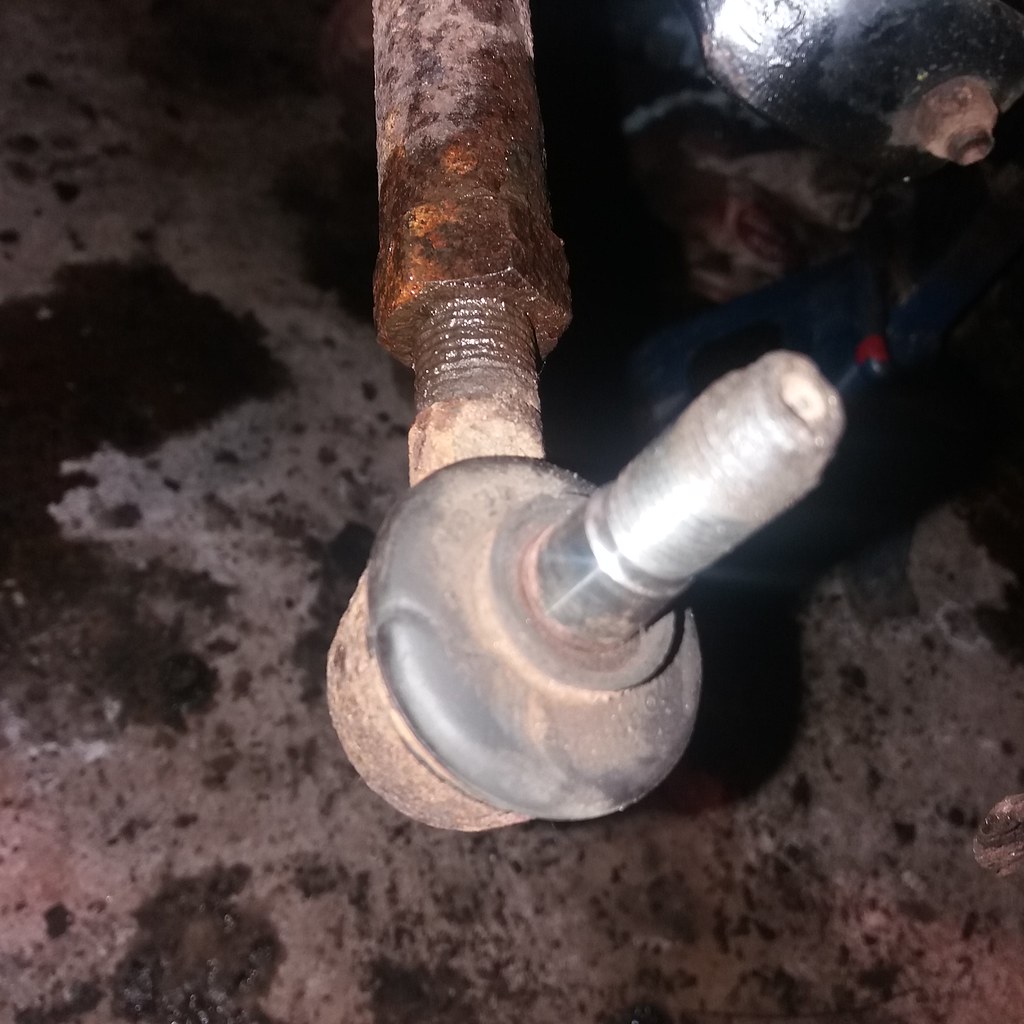 20181230_123120
by
deeelux deeelux
, on Flickr
I started by draining the anti freeze out. I figured if it looked ok I'd probably just pour it back in. I've not sent any for lab analysis but I'm not pouring that anywhere other than the used anti freeze thing at the dump...

It has a woody, almost chemically nose with undertones of stagnant water and algae.
While I was in there I attended to the power steering tensioner pulley. The belt had been noisy and was ripe for replacement but I thought I better check the pulleys etc. The idler outer section had completely seperated from the bearing and it was only the belt tension holding it in place!

I built it back up with new fan belts. I already had them after buying the wrong ones for my last Jimny on ebay! LOL!
Carried out a full service while its in the garage, genuine Suzuki filters are still available in Big Jimnys store so there is no excuse really. I didnt take pictures because it wasnt that exciting but I was a bit confused by the sump washer.

It appeared to have had some sort of cupped washer forced onto the plug, very strange. I'm sure the sump plug is happier now its been fitted with a colapsable mitsubishi washer.
Turning my attention to the nearside wheelarch I could see the front axle was leaking, there was excessive play at the wheel, death wobble at 40mph and the brake pads were worn almost to the metal. There arent many pictures because its messy work and I didnt want stinking kinpin 'grease' all over my phone!
The excessive play appeared to be in the bottom kingpin and the rear track rod end. Usually I would remove both track rod ends, vacuum pipes, brake caliper, kingpins and big seal then slide the whole halfshaft out with the hub and brake disc still on. Which is fine when working on a ramp in a large dealer workshop. However, when working in the smallest workshop that can legally be described as a lock up there isnt enough space to slide the shaft all the way out so I had to remove the hub assembly.
Having removed the complete hub assembly I tried again, only to find there still wasnt enough space! I had to remove the cv joint before I could get the so**ing half shaft out!
This is how it looked after removing the shaft...

Yeah, I wish! Trowelled out all the stinking grease/CV grease/gear oil/mud slop. I had hoped I could get away with changing the oil seal, adding spacers to the kingpins and sticking it all back together. This was the plan until...

I removed the bottom bearing to clean and check it. Familiar scene?! Kingpin bearings promptly ordered!
Its all back together now.


Well, sort of! As I am off work I have to rely on ebay/Bigjimny for parts, usually thats fine but this time of year is a nightmare to be waiting on parcels. Then some blundering fool ordered the wrong side of track rod end! The disappointment faded a bit when I realised the boot it burst on the front track rod end so I can use the wrong one for that!

Busiest Mechanic in Scotland!
My pics (inc. pics of my latest Jimny project)...
www.flickr.com/photos/159422664@N08/albums
My ebay stuff for sale...
www.ebay.co.uk/usr/deeelux
Last edit: 30 Dec 2018 20:34 by Delux.
Please Log in or Create an account to join the conversation.
- Venter
- New Member
-

Public
Less
More
- Thank you received: 0
30 Dec 2018 21:33 #199741
by Venter
Replied by Venter on topic Deluxs new black Jimny, Project KZA
Great thread, great info, keep it coming!
Please Log in or Create an account to join the conversation.
Time to create page: 0.276 seconds

