

A place for more technical discussions. Please make sure you post in the correct section on the site, this way it keeps the site tidy AND ensures you get a more relevant answer.
R72 to R7ME conversion guide
Less
More
- Posts: 1934
- Thank you received: 554
06 Jan 2019 17:40 - 06 Jan 2019 17:47 #200081
by Riccy
J999 MNY, ULYSSES M18 VVT with ITB's Dyno tested at 130hp
Pickup/tipper, R7me gearbox & 6.4 Rocklobster, 31" Toyo MT, 2x ARB air locker 3.9 diffs in braced axles, 6" total lift, Floating rear conversion, Raptor painted, CB, Recaro's, Caged, etc, etc...
www.youtube.com/user/riclemus
R72 to R7ME conversion guide was created by Riccy
Hi all,
Just completed the gearbox swap and write-up. Hopefully this will be useful to someone trying to change the gearbox... I would have made a Wiki page about it, but I just cant get the hang of it :huh:
:huh:
Photo's are hosted on Martins server differently this time so bear with me if they dont work first time.
R72 to R7me Gearbox conversion guide
(non VVT gearbox into a VVT Jimny)
This is intended to be a rough guide to swapping to the earlier gearbox.
This may be needed due to gearbox failure, but is more likely for gearing alterations to suit larger tyres (as in my case).
If its to replace a failed R72 gearbox, and no other alterations are being made, it will be necessary to swap the intermediate prop, transfer box and diffs to the earlier spec. This is to keep the gearing the same for the standard tyre size.
This guide assumes that the reader is aware of the difference in ratios between the boxes and the consequences of calculating that incorrectly. Also assumed is that the donor R7me gearbox includes the gearstick and mounting arrangement as well as the box itself.
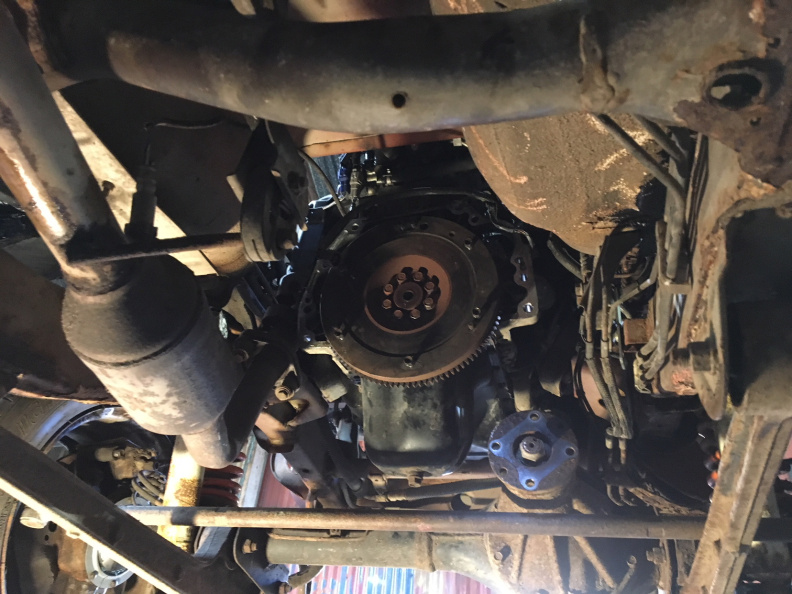
First thing to do is start draining the gearbox and transfer box (t-box drain not essential if refitting same box). Disconnect the battery as well to be safe.
Remove the props front and rear, then the transfer box. Try to keep the gearbox prop in the gearbox rather than pulling out with the t-box as it will leak oil on you. You are advised in manuals to put some alignment match marks on the props and flanges for their positions when refitting.
Start to loosen off the bolts around the bell housing and starter motor. Pull the starter motor out a bit and undo the rear mount (under the gearstick, check it hasn't separated).
Remove the clutch cable cover, cable/mount and the flywheel bottom cover. Disconnect the wiring plug to the reverse switch on the gearbox and check no other wiring is strapped to the gearbox (CAT sensor probably).
From inside remove the gearstick (remove trim, rubbers, etc and there is a metal ring similar to a bayonet light bulb. Push down on it and rotate, it then releases the collar and you can pull the stick out). You don't need to keep the old stick.
Complete removing the bolts and nut (6x bolts and 1x nut, plus 2x bolts for the starter motor, but leave a couple of easy-to-get-to bolts in, but slack, at the bottom). Then get under and swing on it! Wooden or brass wedges are handy for separating the block and bell housing. There are locator pins which get stuck. It cant fall out at this stage but don't get too close.
Next (once it loose, but on the two bolts you left in slack), is to undo the 4 bolts that hold the black bracket (rear mount bracket) onto the back of the gearbox itself whilst trying to support the box somehow. This black bracket is needed (see later on). The bolts are around the output shaft so a long extension bar is needed here.
It is possible to squeeze the R72 box out without removing that bracket or the clutch, but 4 bolts saves a lot of time and swearing, plus its needed later on anyway. On the earlier chassis the rear mount cross-member is forwards of the VVT model by about 6 inches, meaning there is even less room to get the box out (more on that later).
Anyway, that's all fairly basic but hard to get to stuff. The bell housing bolts will be really tight and have factory locktite-type stuff on them so a big breaker bar is handy, other than that its just undoing stuff. Prep with penetrating fluid of some sort is obviously going to help.
With luck you will end up with the gearbox out and either on the scrap pile or as a useful spare to someone.
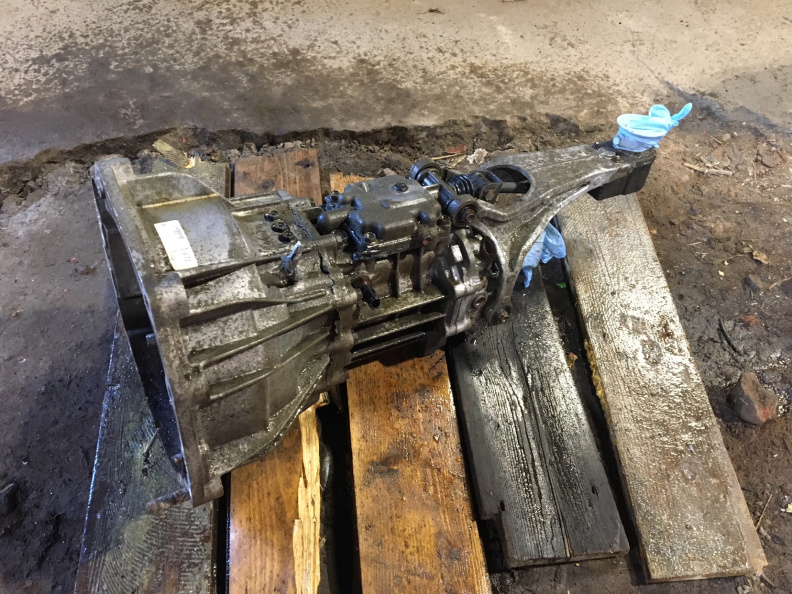
Next is to prep up the donor R7me box.
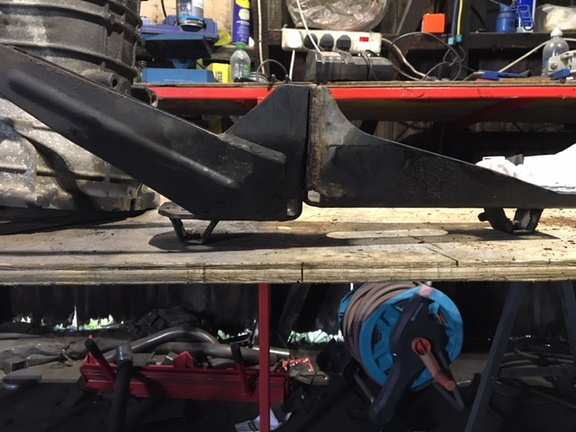
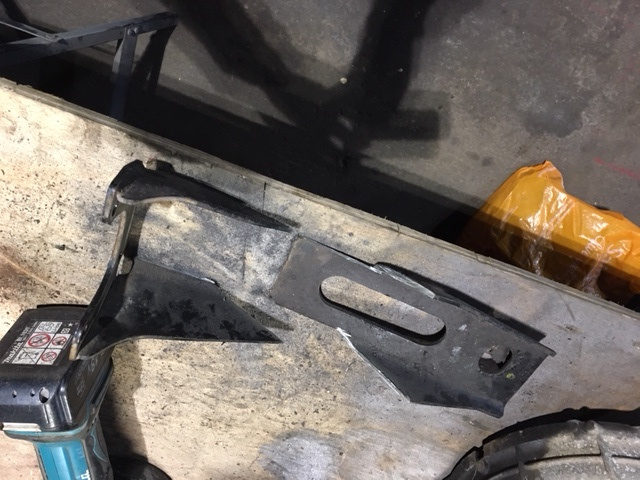
You need to cut the R72 bracket and weld onto the existing R7me bracket. On the R72 this bracket just serves as a rear support bracket for the engine & gearbox as a whole. On the R7me it also does service as part of the gearstick linkage mounting.
This means you need to keep the R7me bracket as it is and weld parts cut from the R72 bracket onto it. Having done this job once already, I would say that the pictures say most of what's needed. The thing I have done differently this time is to weld some 10mm steel spacers to the bracket before the bits from the R72 in the hope of getting better prop alignments.
The two brackets back to back:
Just completed the gearbox swap and write-up. Hopefully this will be useful to someone trying to change the gearbox... I would have made a Wiki page about it, but I just cant get the hang of it
:huh:Photo's are hosted on Martins server differently this time so bear with me if they dont work first time.
R72 to R7me Gearbox conversion guide
(non VVT gearbox into a VVT Jimny)
This is intended to be a rough guide to swapping to the earlier gearbox.
This may be needed due to gearbox failure, but is more likely for gearing alterations to suit larger tyres (as in my case).
If its to replace a failed R72 gearbox, and no other alterations are being made, it will be necessary to swap the intermediate prop, transfer box and diffs to the earlier spec. This is to keep the gearing the same for the standard tyre size.
This guide assumes that the reader is aware of the difference in ratios between the boxes and the consequences of calculating that incorrectly. Also assumed is that the donor R7me gearbox includes the gearstick and mounting arrangement as well as the box itself.
First thing to do is start draining the gearbox and transfer box (t-box drain not essential if refitting same box). Disconnect the battery as well to be safe.
Remove the props front and rear, then the transfer box. Try to keep the gearbox prop in the gearbox rather than pulling out with the t-box as it will leak oil on you. You are advised in manuals to put some alignment match marks on the props and flanges for their positions when refitting.
Start to loosen off the bolts around the bell housing and starter motor. Pull the starter motor out a bit and undo the rear mount (under the gearstick, check it hasn't separated).
Remove the clutch cable cover, cable/mount and the flywheel bottom cover. Disconnect the wiring plug to the reverse switch on the gearbox and check no other wiring is strapped to the gearbox (CAT sensor probably).
From inside remove the gearstick (remove trim, rubbers, etc and there is a metal ring similar to a bayonet light bulb. Push down on it and rotate, it then releases the collar and you can pull the stick out). You don't need to keep the old stick.
Complete removing the bolts and nut (6x bolts and 1x nut, plus 2x bolts for the starter motor, but leave a couple of easy-to-get-to bolts in, but slack, at the bottom). Then get under and swing on it! Wooden or brass wedges are handy for separating the block and bell housing. There are locator pins which get stuck. It cant fall out at this stage but don't get too close.
Next (once it loose, but on the two bolts you left in slack), is to undo the 4 bolts that hold the black bracket (rear mount bracket) onto the back of the gearbox itself whilst trying to support the box somehow. This black bracket is needed (see later on). The bolts are around the output shaft so a long extension bar is needed here.
It is possible to squeeze the R72 box out without removing that bracket or the clutch, but 4 bolts saves a lot of time and swearing, plus its needed later on anyway. On the earlier chassis the rear mount cross-member is forwards of the VVT model by about 6 inches, meaning there is even less room to get the box out (more on that later).
Anyway, that's all fairly basic but hard to get to stuff. The bell housing bolts will be really tight and have factory locktite-type stuff on them so a big breaker bar is handy, other than that its just undoing stuff. Prep with penetrating fluid of some sort is obviously going to help.
With luck you will end up with the gearbox out and either on the scrap pile or as a useful spare to someone.
Next is to prep up the donor R7me box.
You need to cut the R72 bracket and weld onto the existing R7me bracket. On the R72 this bracket just serves as a rear support bracket for the engine & gearbox as a whole. On the R7me it also does service as part of the gearstick linkage mounting.
This means you need to keep the R7me bracket as it is and weld parts cut from the R72 bracket onto it. Having done this job once already, I would say that the pictures say most of what's needed. The thing I have done differently this time is to weld some 10mm steel spacers to the bracket before the bits from the R72 in the hope of getting better prop alignments.
The two brackets back to back:
J999 MNY, ULYSSES M18 VVT with ITB's Dyno tested at 130hp
Pickup/tipper, R7me gearbox & 6.4 Rocklobster, 31" Toyo MT, 2x ARB air locker 3.9 diffs in braced axles, 6" total lift, Floating rear conversion, Raptor painted, CB, Recaro's, Caged, etc, etc...
www.youtube.com/user/riclemus
Last edit: 06 Jan 2019 17:47 by Riccy. Reason: picture embedding
Please Log in or Create an account to join the conversation.
Less
More
- Posts: 1934
- Thank you received: 554
06 Jan 2019 17:43 - 06 Jan 2019 17:52 #200082
by Riccy
J999 MNY, ULYSSES M18 VVT with ITB's Dyno tested at 130hp
Pickup/tipper, R7me gearbox & 6.4 Rocklobster, 31" Toyo MT, 2x ARB air locker 3.9 diffs in braced axles, 6" total lift, Floating rear conversion, Raptor painted, CB, Recaro's, Caged, etc, etc...
www.youtube.com/user/riclemus
Replied by Riccy on topic R72 to R7ME conversion guide
The R72 bracket cut:
10mm plate spacers welded onto R7me bracket:
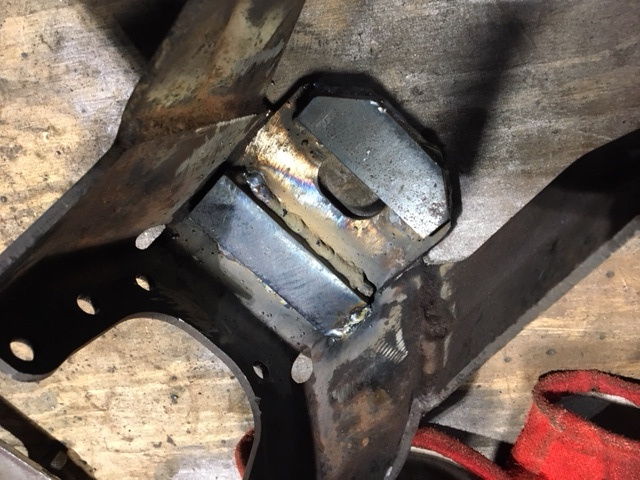
Brackets welded together:
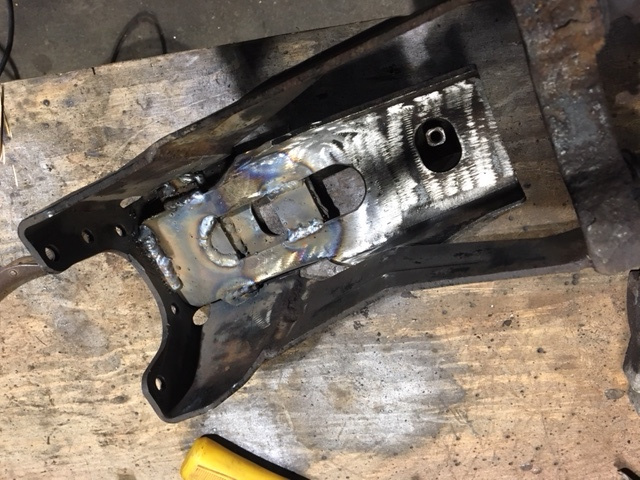
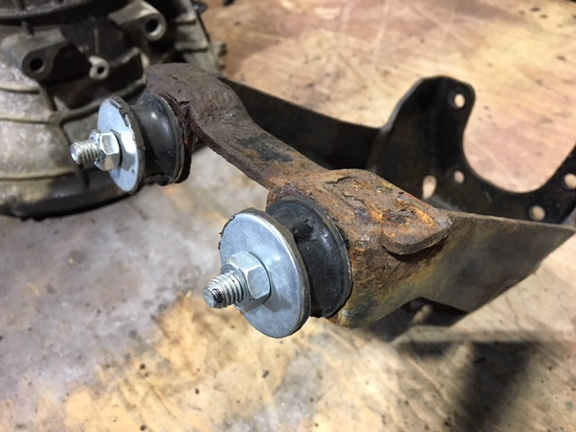
Another view with the new bushes in as well:
These new bushes are to hold the gearstick mount in place. They replace the square ones well and are much cheaper than the Suzuki parts. These come from Halfords and are intended for a exhaust on a classic mini. Come in at less than £2 each.
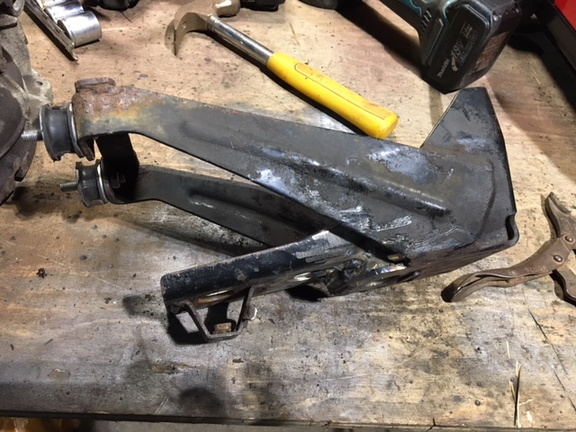
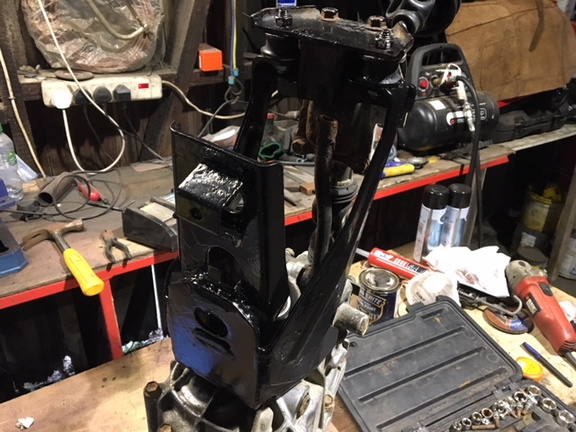
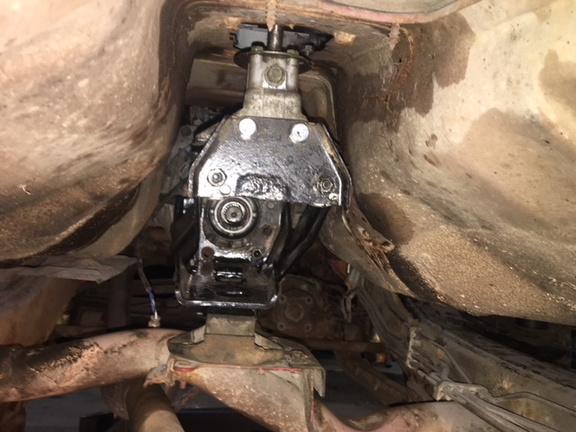
Bracket back on the box and painted up quickly. Needs to come back off to get the box into the car so this is just to show how it looks:
Next thing is to adapt the reverse light switch connector as it wont fit into the plug on the VVT loom. Cut off this white connector on the R7me box:
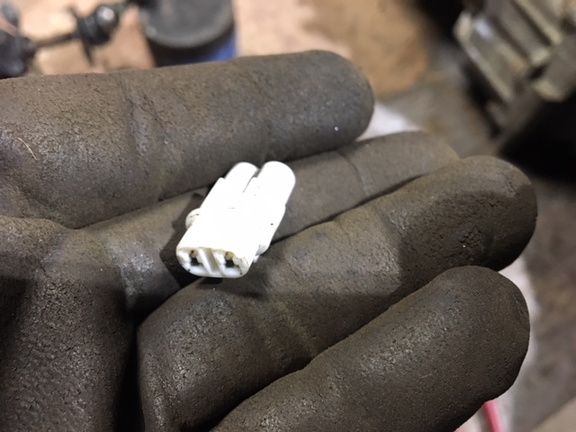
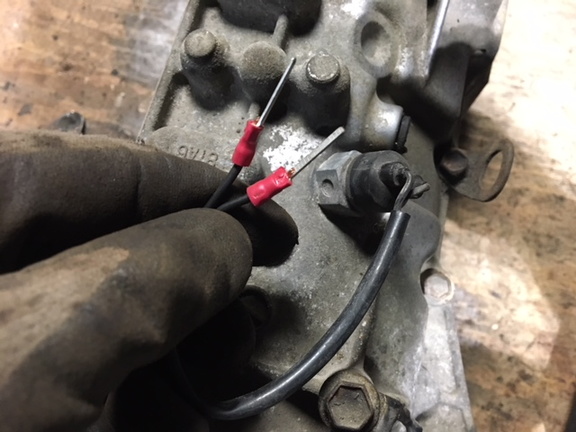
I then crimped these 'pin' crimps onto the two wires ready for pushing into the VVT wiring connector. You could use some other method of joining the wires together, I find this convenient and easy to unplug if needed. The polarity doesn't matter on these wires.
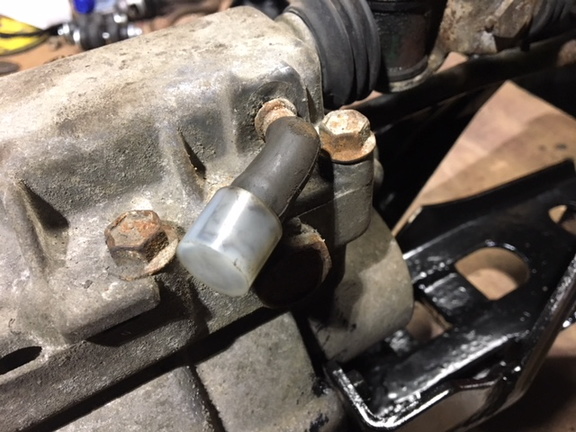
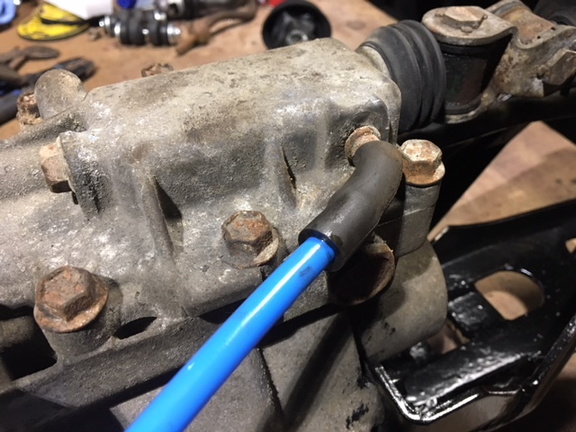
At the point the gearstick linkage enters the top of the R7me box there is the breather connection. Now is a good time to install a high level breather connection. This would ideally be done by tapping an airline adapter into the place where the pipe enters the box, but as I didn't have the right part I have improvised with what was there. There is a hose clip around it now as well.

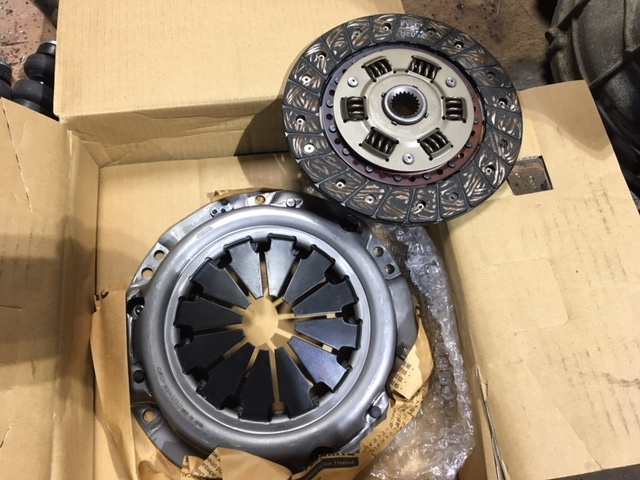
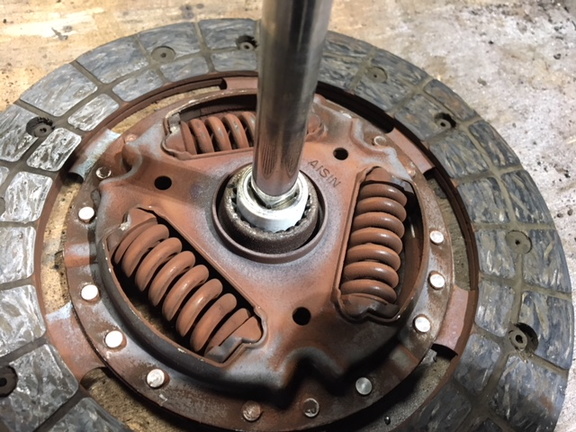
Now is also a good time to install a new clutch kit. This is a standard Exeedy one and includes a new thrust bearing.
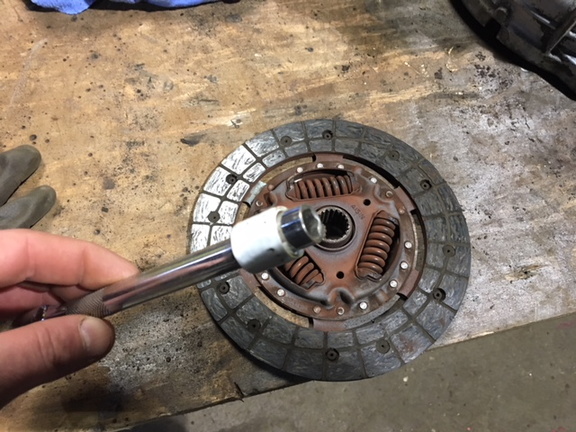
Note the home made alignment tool for the clutch. Its a 10mm socket with some tape around to make it a snug fit. Seems to work fairly well.
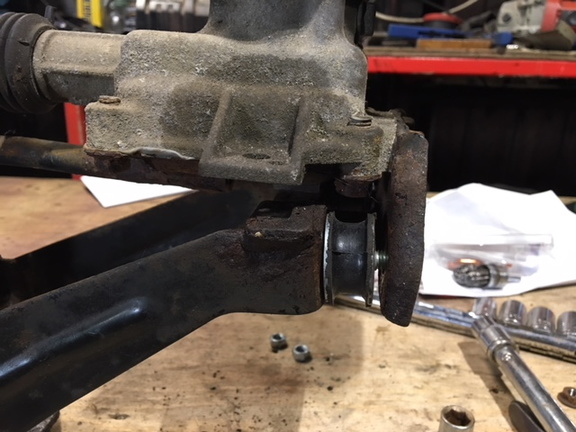
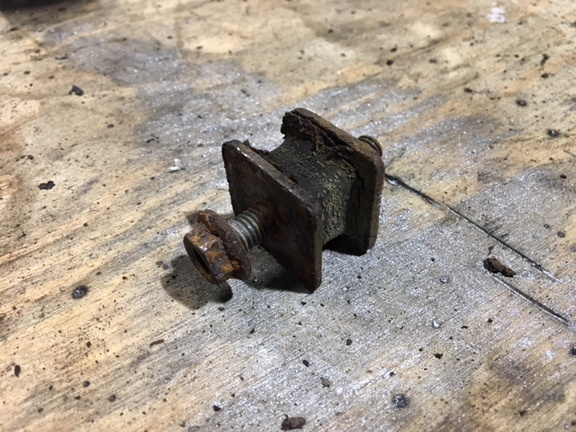
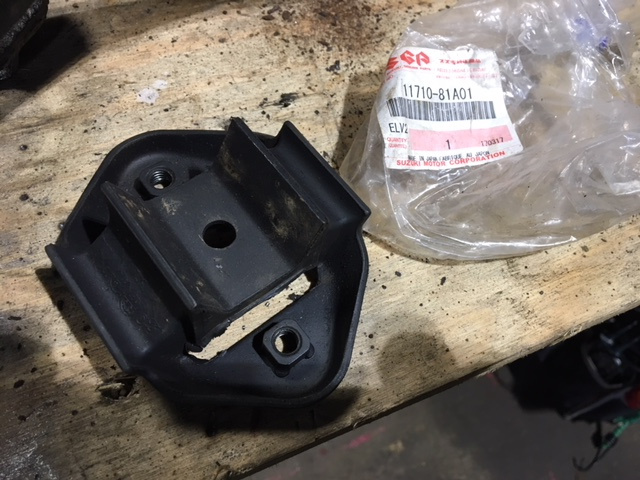
Finally check the condition of the rear mount and replace if needed. They are prone to de-laminating, resulting in no rear support:
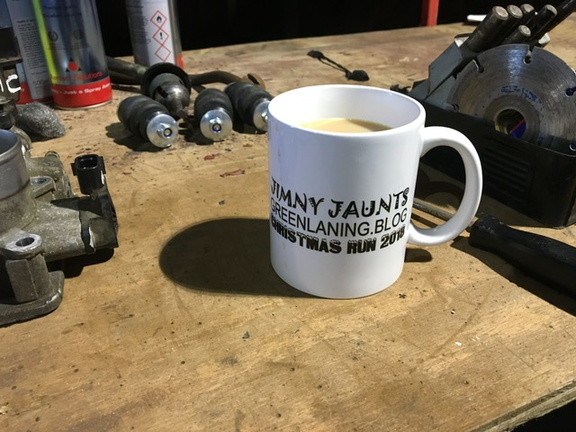
Brewtime then onto refitting:
Cue lots of swearing and fighting to get at the bolts, just the reverse of removal really. Get the box up in the space and start by getting all the bigger bolts and nut on loose (leave the starter motor until last). Gradually tighten them to draw the locating pins into position and join the bell housing to the engine block. Keep checking no pipes or wires have got into the gap.
Once the box is in and tightened up refit the rear black bracket and gearstick linkage. Reconnect the clutch cable and adjust (should be approx 10mm free play on the pedal before it does anything). Connect the reverse light switch wires to the existing connector, check wiring will not get into anywhere it shouldn't (wire will be too long now). Bottom flywheel cover also needs to go back on.
Inside fit the R7me gearstick into the hole and screw down the cover plate. Make sure not to loose or misalign the plastic bushing on the end of it.
Dont forget to use thread-locking glue on the bell housing bolts you refit, they really dont want to work loose!

Then its just a matter of fitting props and transfer box, fill with oil and go for a test run. Clutch cable might need adjusted, job done otherwise.
10mm plate spacers welded onto R7me bracket:
Brackets welded together:
Another view with the new bushes in as well:
These new bushes are to hold the gearstick mount in place. They replace the square ones well and are much cheaper than the Suzuki parts. These come from Halfords and are intended for a exhaust on a classic mini. Come in at less than £2 each.
Bracket back on the box and painted up quickly. Needs to come back off to get the box into the car so this is just to show how it looks:
Next thing is to adapt the reverse light switch connector as it wont fit into the plug on the VVT loom. Cut off this white connector on the R7me box:
I then crimped these 'pin' crimps onto the two wires ready for pushing into the VVT wiring connector. You could use some other method of joining the wires together, I find this convenient and easy to unplug if needed. The polarity doesn't matter on these wires.
At the point the gearstick linkage enters the top of the R7me box there is the breather connection. Now is a good time to install a high level breather connection. This would ideally be done by tapping an airline adapter into the place where the pipe enters the box, but as I didn't have the right part I have improvised with what was there. There is a hose clip around it now as well.
Now is also a good time to install a new clutch kit. This is a standard Exeedy one and includes a new thrust bearing.
Note the home made alignment tool for the clutch. Its a 10mm socket with some tape around to make it a snug fit. Seems to work fairly well.
Finally check the condition of the rear mount and replace if needed. They are prone to de-laminating, resulting in no rear support:
Brewtime then onto refitting:
Cue lots of swearing and fighting to get at the bolts, just the reverse of removal really. Get the box up in the space and start by getting all the bigger bolts and nut on loose (leave the starter motor until last). Gradually tighten them to draw the locating pins into position and join the bell housing to the engine block. Keep checking no pipes or wires have got into the gap.
Once the box is in and tightened up refit the rear black bracket and gearstick linkage. Reconnect the clutch cable and adjust (should be approx 10mm free play on the pedal before it does anything). Connect the reverse light switch wires to the existing connector, check wiring will not get into anywhere it shouldn't (wire will be too long now). Bottom flywheel cover also needs to go back on.
Inside fit the R7me gearstick into the hole and screw down the cover plate. Make sure not to loose or misalign the plastic bushing on the end of it.
Dont forget to use thread-locking glue on the bell housing bolts you refit, they really dont want to work loose!
Then its just a matter of fitting props and transfer box, fill with oil and go for a test run. Clutch cable might need adjusted, job done otherwise.
J999 MNY, ULYSSES M18 VVT with ITB's Dyno tested at 130hp
Pickup/tipper, R7me gearbox & 6.4 Rocklobster, 31" Toyo MT, 2x ARB air locker 3.9 diffs in braced axles, 6" total lift, Floating rear conversion, Raptor painted, CB, Recaro's, Caged, etc, etc...
www.youtube.com/user/riclemus
Last edit: 06 Jan 2019 17:52 by Riccy. Reason: photo embedding
Please Log in or Create an account to join the conversation.
06 Jan 2019 18:15 #200083
by mlines
Martin
2003 M13 early KAP build.
3" Trailmaster lift with 1.5 Spacers on front
Customised winch bumper and roll cage
235/85R16 Maxxis Bighorns on 16" Rims, 4:1 Rocklobster, Rear ARB locker and on-board air
Corrected arms all-round, rear disks, Recaro seats and harnesses
Replied by mlines on topic R72 to R7ME conversion guide
Great write up.
Thanks for using the new gallery (see GALLERY link above). This should make embedding photos into articles more straight forward in the sense you can put them in the gallery and then link to them lots of times or share them elsewhere (facebook etc.). It also has better permission controls so if anyone else wants a gallery entry then I can let you have access and upload your own pictures.
Thanks for using the new gallery (see GALLERY link above). This should make embedding photos into articles more straight forward in the sense you can put them in the gallery and then link to them lots of times or share them elsewhere (facebook etc.). It also has better permission controls so if anyone else wants a gallery entry then I can let you have access and upload your own pictures.
Martin
2003 M13 early KAP build.
3" Trailmaster lift with 1.5 Spacers on front
Customised winch bumper and roll cage
235/85R16 Maxxis Bighorns on 16" Rims, 4:1 Rocklobster, Rear ARB locker and on-board air
Corrected arms all-round, rear disks, Recaro seats and harnesses
Please Log in or Create an account to join the conversation.
Less
More
- Posts: 1934
- Thank you received: 554
06 Jan 2019 19:23 #200089
by Riccy
J999 MNY, ULYSSES M18 VVT with ITB's Dyno tested at 130hp
Pickup/tipper, R7me gearbox & 6.4 Rocklobster, 31" Toyo MT, 2x ARB air locker 3.9 diffs in braced axles, 6" total lift, Floating rear conversion, Raptor painted, CB, Recaro's, Caged, etc, etc...
www.youtube.com/user/riclemus
Replied by Riccy on topic R72 to R7ME conversion guide
Yes Thanks Martin for the gallery photo store. The linking pics is easier in the forum as I normally view it on a windows tablet with chrome, but hopefully this will overcome issues with pictures on tapatalk (fingers crossed).
J999 MNY, ULYSSES M18 VVT with ITB's Dyno tested at 130hp
Pickup/tipper, R7me gearbox & 6.4 Rocklobster, 31" Toyo MT, 2x ARB air locker 3.9 diffs in braced axles, 6" total lift, Floating rear conversion, Raptor painted, CB, Recaro's, Caged, etc, etc...
www.youtube.com/user/riclemus
Please Log in or Create an account to join the conversation.
Less
More
- Posts: 762
- Thank you received: 225
07 Jan 2019 02:14 #200106
by zukebob
I started out with nothing & still have most of it left
Replied by zukebob on topic R72 to R7ME conversion guide
Well done. Thanks for the write up Riccy. I have an automatic but I really like seeing these tech threads added to the forum.
I started out with nothing & still have most of it left
The following user(s) said Thank You: Riccy
Please Log in or Create an account to join the conversation.
04 Oct 2023 09:04 #251179
by Roly6555
Replied by Roly6555 on topic R72 to R7ME conversion guide
Ricky thinking about doing this swap (this will be second r72 box rebuild) currently 55 plate vvt soft top, planning on leaving the rest stock. How
Much bigger would tyres need to be to bring back to stock on road use. Any other negatives never played with gear ratios just rebuild and repairs. Thanks for your time.
Much bigger would tyres need to be to bring back to stock on road use. Any other negatives never played with gear ratios just rebuild and repairs. Thanks for your time.
Please Log in or Create an account to join the conversation.
Time to create page: 0.177 seconds