![]() The content of any article might be expanded / improved in the future - revisit it sometimes.
The content of any article might be expanded / improved in the future - revisit it sometimes.
![]() Seen a mistake? Know something that isn't written? Edit and change this article yourself!
Seen a mistake? Know something that isn't written? Edit and change this article yourself!
![]() Some images in the article (if present) can be enlarged by clicking on them.
Some images in the article (if present) can be enlarged by clicking on them.
Contents
Introduction
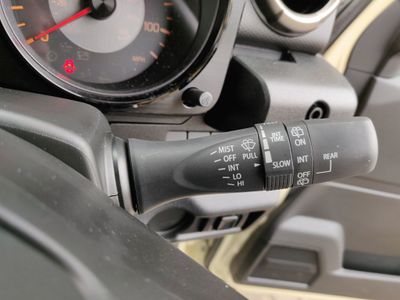
The Gen4 (2018-) Jimny provides one-time, intermittent and continuous wiper modes, however the speed of the intermittent wipe function is fixed. This guide details how to add variable speed intermittent wipe using parts from a 2017 onwards Suzuki Swift.
- **Note that this will only add intermittent wipe functionality to the front wipers, although an intermittent setting is shown for the rear, this does not function and only on/off functionality is available for the rear wiper.
Parts
This guide assumes that the following part is being used.
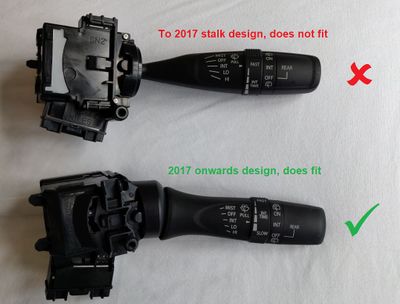
- 17J500 - 2017 onwards Suzuki Swift wiper stalk.
Note that the design of wiper stalks from earlier Swifts is different and they will not fit, the photo below shows the two different designs for reference.
Tools needed
- Small flat head screwdriver
- #2 Philips screwdriver
Procedure
To remove the steering column trim:
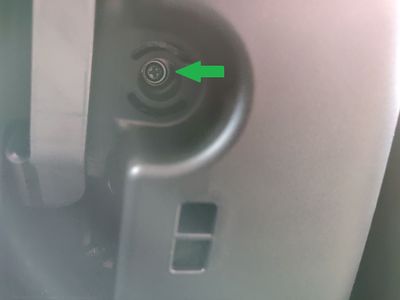
- Underneath the steering column, locate the single retaining screw (in the deeply recessed hole adjacent to the steering wheel heigh adjustment lever).
- Remove this screw using a #2 Philips screwdriver.
- Release the steering while height adjustment lever (this provides clearance to remove the lower half of the steering column trim.
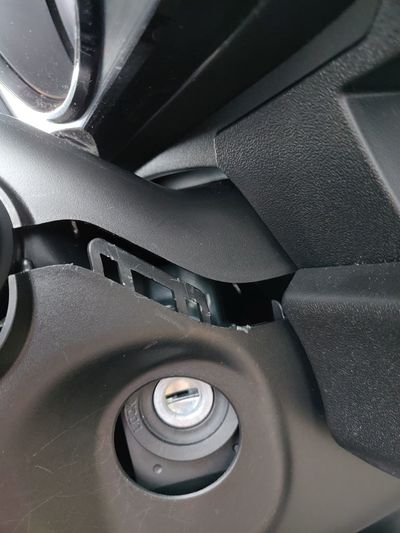
- The steering column trim lower is secured to the upper with plastic clips on each side.
- To release, push the lower half of the trim inwards and pull downwards.
- The photo below shows the exposed clips.
- Having released the clips on each side, remove the lower half of the trim, carefully pulling over the ignition key barrel and steering wheel adjustment lever.
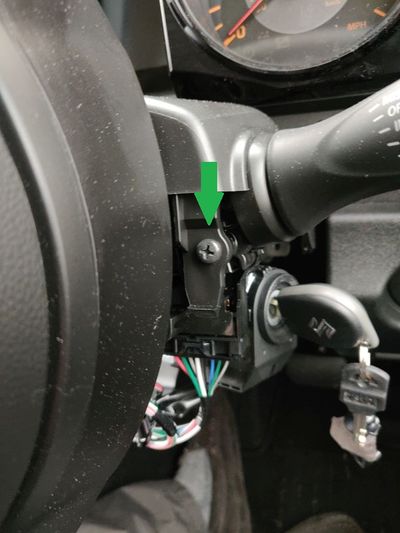
- Insert the ignition key (to prevent the steering lock activating) and rotate the steering wheel to expose the screw that secures the upper column trim to the wiper stalk body.
- Remove this screw using a #2 Philips screwdriver.
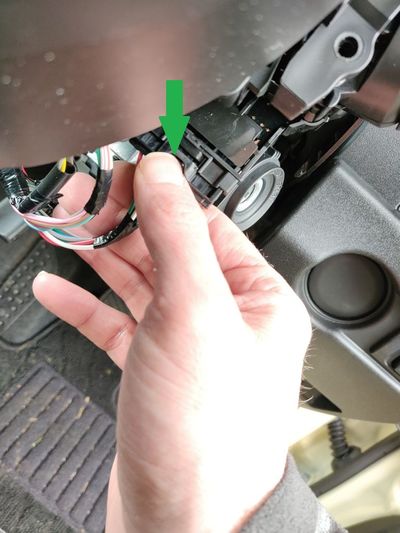
- Release the wiring harness by depressing the locking catch indicated and pulling downwards.
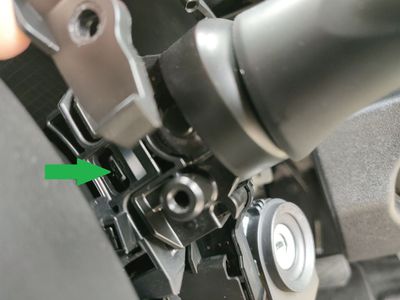
- To release the body of the wiper stalk, use a small flat head screwdriver to depress the locking tab indicated and pull the stalk to the right.
- Insert the new wiper stalk, taking care to slide it into the retaining housing until the locking catch clicks into place.
- Reattach the wiring harness, turn on the ignition and check that the stalk functions as expected.
- Replace the securing screw, then the lower column trim and lock into place using the lower screw.
- Enjoy your new adjustable intermittent wipers!
Page last edited on 12/07/2019 by user Bosanek

