![]() The content of any article might be expanded / improved in the future - revisit it sometimes.
The content of any article might be expanded / improved in the future - revisit it sometimes.
![]() Seen a mistake? Know something that isn't written? Edit and change this article yourself!
Seen a mistake? Know something that isn't written? Edit and change this article yourself!
![]() Some images in the article (if present) can be enlarged by clicking on them.
Some images in the article (if present) can be enlarged by clicking on them.
Contents
Introduction
- If your vehicle already has working front fog lamps (in the front bumper) installed from the factory, you don't need to read this article.
- Enjoy life instead.
- If you don't have factory-fitted front fog lamps, read this article to get acquainted with all compatible parts and options for installing them.
- Possible parts sources might be brand new parts from your Suzuki dealer, or from a local vehicle junkyard (taken from a dead Jimny).
- This article has several references to Jimny "types" (factory model revisions throughout its production lifetime).
- The wiki article "Manuals and Owners Guides" contains proper explanations on what each Jimny "type" represents.
- As far as it is known, all Jimnys 4 have front fog lamps fitted as standard equipment.
- Therefore, this article contains instructions on retrofitting fog lamps only for Jimnys 3.
![]() This article has been written by a single person, based on original research into the vast universe of various Suzuki accessories brochures, parts catalogues, info from various forums etc.
This article has been written by a single person, based on original research into the vast universe of various Suzuki accessories brochures, parts catalogues, info from various forums etc.
Great effort has been performed to double-check every info, but the topics of required and mutually compatible parts are so complex with so many variations over Jimny 3's 20 year production lifespan, that no guarantees on the accuracy of the written data can be made.
Principle of operation
- Factory wiring setup for the front fog lamps is made in such a way that front fog lamps illuminate ONLY when the head lamps are ON as well.
- This means that the front fog lamps will not turn ON even if the in-cabin switch for front fog lamps is pushed IN, until the head lamps are turned ON as well.
- It is not possible to control the operation of each front fog lamp (left and right) independently.
- It's either both OFF or both ON.
- This also means that no fog lamp turns ON automatically when you steer hard on a street corner, like in some fancy modern vehicles.
- If you don't like these restrictions, then you will have to make some custom wiring modifications.
![]() Don't be an idiot and use the fog lamps in non-foggy weather while other participants in traffic are present. Fog lamps are designed to "punch" light through fog. Therefore, they dazzle other drivers and pedestrians (and their precious pets) when there is no fog in between!
Don't be an idiot and use the fog lamps in non-foggy weather while other participants in traffic are present. Fog lamps are designed to "punch" light through fog. Therefore, they dazzle other drivers and pedestrians (and their precious pets) when there is no fog in between!
Required parts
Main notes:
- The exact required parts depend on which front bumper revision you have.
- In some cases, it also depends on the exact model production "type" and/or if the vehicle has a petrol or diesel engine;
- There have been three distinct front bumper revisions throughout the production lifetime of Jimny 3.
- See the wiki article "Front bumper issues" for some details on front bumper revisions.
- Read the detailed notes about parts compatibility in the corresponding chapter below.
You need to obtain the following:
- A pair of fog lamps;
- A pair of mounting brackets;
- Exception is if you have the newest (3rd model) front bumper revision - it has integrated brackets.
- A rectangular button / switch for the driver's console;
- Possibly the wiring (preferably original cables with connectors etc.);
- Your vehicle might already have the required wiring.
- Possibly some more electrics like a relay, a fuse etc.;
![]() In the case of 1st and 2nd model front bumper, you will have to cut out plastic blanks in the fog lamp openings in the front bumper. That operation is irreversible. You could glue the blanks back if you abandon the project, but it will hardly look virgin again. Therefore, it is recommended to obtain all the required parts (especially the electrics), and test-wire everything first before you finally cut the bumper and mount the lamps.
In the case of 1st and 2nd model front bumper, you will have to cut out plastic blanks in the fog lamp openings in the front bumper. That operation is irreversible. You could glue the blanks back if you abandon the project, but it will hardly look virgin again. Therefore, it is recommended to obtain all the required parts (especially the electrics), and test-wire everything first before you finally cut the bumper and mount the lamps.
You can get all these parts separately or as a complete upgrade set. The chapters below contain info on part numbers of complete sets, as well as of individual components.
Parts compatibility
Complete retrofit sets
Each of these sets should contain every big and little piece and part which might be needed to successfully install a pair of front fog lamps in a Jimny which has never had them. Not every set is compatible with every Jimny 3 revision / type, so read the notes carefully.
For Jimnys 3 type 1-5 (with 1st model front bumper):
- P.N. 99000-990YZ-011;
- This is the oldest upgrade set ever offered.
- This set contains the same parts which were originally used for 1st model front bumpers as a factory installation.
- It is compatible with Jimnys 3 type 1-4, but not with type 5.
- Type 5 is a "transitional" production edition from 2005 with 1st model front bumper but with 2nd edition interior and electric 4WD controls.
- The probable reason why it is not compatible with type 5 (although the front bumper is the same across types 1-5) is that the wiring might be different.
- This complete upgrade set might not be available from Suzuki anymore, because they usually offer a "revised" set for 1st model front bumpers (see the next set below).
- If the complete set is not available, perhaps some individual parts might be, or you could scavenge the entire set from a dead Jimny 3.
- This set includes:
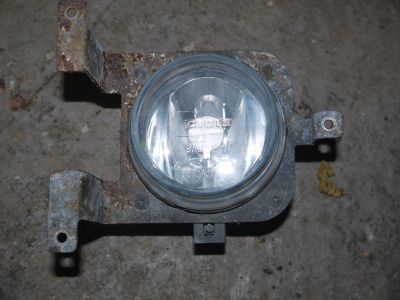
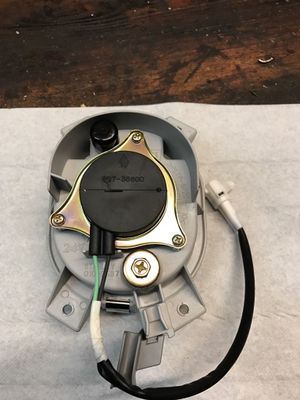
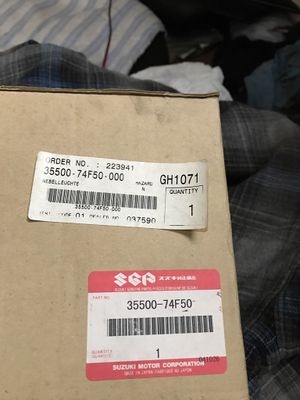
- A pair of fog lamps model 35500-74F50;
- A pair of mounting brackets model 35526-81A01;
- Fog lamp surrounding bezels model 99000-990YZ-B03 (for left side) and 99000-990YZ-B04 (for right side);
- These are used for the "flush" cosmetic fitting of the fog lamps into the holes in the front bumper;
- However, it makes no sense to include any bezels for fitting the fog lamp model 35500-74F50 to 1st model front bumper, because that fog lamp model is designed to fit flush on its own in that bumper model!
- Proof: See the pictures in the chapter "Pictures of lamps and brackets in bumpers".
- Therefore, the info from Suzuki diagrams about the inclusion of these bezels with these fog lamps might be erroneous!
- Wiring harness for the engine bay (connection to the fog lamps), OEM P.N. 99000-990YZ-A05;
- Includes a fuse;
- Wiring harness for the cabin console (connection to the in-cabin button / switch), OEM P.N. 99000-990YZ-A06;
- Relay P.N. 99000-990YZ-A07;
- In-cabin button / switch P.N. 37270-75F10;
- Various small bits (screws, nuts, bolts, clamps, ties, etc).
- P.N. 99000-990YZ-035;
- This appears to be a newer "revised" set which replaced the previous set described above.
- This set is stated to be compatible only with Jimnys 3 type 1-4, but not with type 5.
- Type 5 is a "transitional" production edition from 2005 with 1st model front bumper but with 2nd edition interior and electric 4WD controls.
- The probable reason why it is not compatible with type 5 (although the front bumper is the same across types 1-5) is that the wiring might be different.
- Suzuki's OEM accessory catalogues as old as 2006 already offer only this set for Jimnys 3 type 1-4 with 1st. model front bumper, and have no mention of the previous set described above.
- According to the pictures from a report from a German forum, this set appears to contain the following:
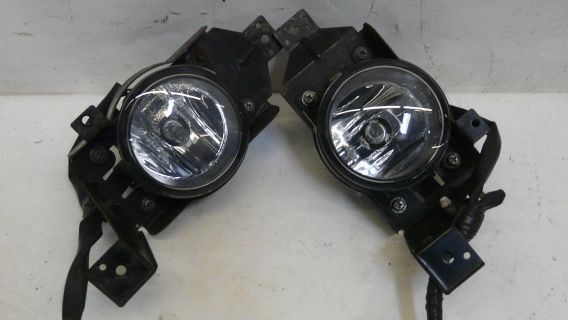
- A pair of fog lamps produced by Cibie (owned by Valeo), model 026719;
- It appears that this Cibie fog lamp is sometimes also referred by another Cibie P.N. 67721231;
- It is not known under which official "OEM" / virtual Suzuki P.N. this fog lamp is catalogued.
- A pair of brackets (P.N. UNKNOWN for left side and UNKNOWN for right side) to mount it to a 1st model front bumper.
- A pair of surrounding bezels for flush cosmetic fitting in the holes in the front bumper (P.N. UNKNOWN);
- One in-cabin button / switch (P.N. UNKNOWN);
- Wiring harness (P.N. UNKNOWN);
- Fuse;
- Various small bits (screws, nuts, bolts, clamps, ties, etc).
- A pair of fog lamps produced by Cibie (owned by Valeo), model 026719;
- The reason for the inclusion of the bezels for the front bumper is that the included fog lamps do not fit "flush" cosmetically in the holes of a 1st model front bumper (they were not originally designed for it), so the bezels correct that.
- For diesel type 4 vehicles (with 48 kW engine and mechanically operated 4WD transmission), the following are additionally required:
- A relay 95572-63C00-000 (1 piece);
- An adapter cable 99000-990YZ-C13 (2 pieces);
- P.N. 990E0-76J10-000;
- Suffix "-000" should be omitted in some searches.
- It is assumed (but not verified!) that this set contains a pair of front fog lamps, a pair of brackets, a pair of bezels, one in-cabin switch, wiring, relay, fuse and some screws.
- It is assumed (but not verified!) that the included fog lamp model is 35500-63J04.
- This set is officially only for Jimnys 3 type 5.
- Type 5 is a "transitional" production edition from 2005 with 1st model front bumper but with 2nd edition interior and electric 4WD controls.
- The probable reason why it is not compatible with types 1-4 (although the front bumper is the same across types 1-5) is that the wiring might be different.
- It is assumed that the lamps, brackets and bezels in this set are the same as in the set 99000-990YZ-035, but that the wiring is different.
- Complete front fog lamp upgrade set 99000-990YZ-035
For Jimnys 3 type 6-8 (with 2nd model front bumper):
- P.N. 990E0-84A02-000;
- Suffix "-000" should be omitted in some searches.
- This set includes:
- A pair of fog lamps model 35500-63J0x;
- It has not been verified what character behind "x" in the part number exactly is.
- It is most probably "4" (35500-63J04), but it could also be "0", "2" ...
- It has not been verified what character behind "x" in the part number exactly is.
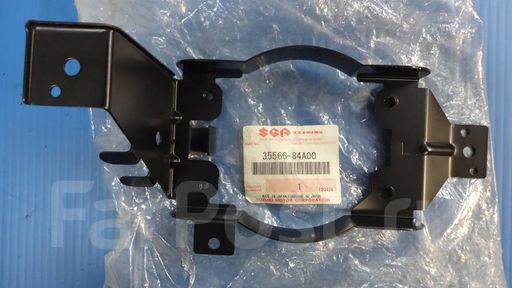
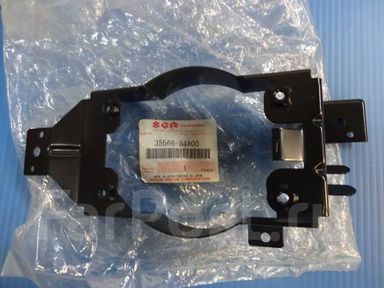
- A pair of mounting brackets - left model 35566-84A00 and right model 35526-84A00;
- Wiring harness between the engine bay and the lamps themselves (section "Wiring 4" from the DIY diagram below) - OEM P.N. UNKNOWN;
- In-cabin button / switch (P.N. UNKNOWN, probably 37270-76J00);
- Various small bits (screws, bolts, etc).
- A pair of fog lamps model 35500-63J0x;
- Complete front fog lamp upgrade set 990E0-84A02-000
For Jimnys 3 type 9-12, (with 3rd model front bumper):
- P.N. 990E0-57M51-000;
- Suffix "-000" should be omitted in some searches, and in some other catalogues it is listed with the suffix "-010".
- The difference between suffixes is probably in the languages in which the included paper instruction manual is written.
- It is assumed (but not verified!) that the included fog lamp model is 35500-63J04.
- It is assumed (but not verified!) that this set contains exactly the same parts as the set 990E0-84A02-000, with the exclusion of the pair of fog lamp mounting brackets.
- This is because 3rd model front bumper has integrated front fog lamp brackets specifically for front fog lamps 35500-63J0x;
- Suffix "-000" should be omitted in some searches, and in some other catalogues it is listed with the suffix "-010".
"Fog lamp + bracket" combos
- Fog lamp model 35500-74F50 and bracket model 35526-81A01 are available in a combo set P.N. 99000-990YZ-B01 (for the left side) and 99000-990YZ-B02 (for the right side).
- It is not known why there are two differently named sets (specifically for each side), since both the contained fog lamp and bracket models fit any side equally.
- Perhaps it could be that the fog lamp surrounding bezels model 99000-990YZ-B03 (for left side) and 99000-990YZ-B04 (for right side) are also included respectively (but this is not verified!);
- Fog lamp P.N. 35500-74F50 with bracket P.N. 35526-81A01, taken from 1st model front bumper
- Fog lamp Cibie 026719 with bracket (unknown P.N.), taken from 1st model front bumper
- Fog lamp P.N. 35500-63J04 with brackets 35566-84A00 and 35526-84A00, taken from 2nd model front bumper
Separate parts
- An alternative to buying entire fog lamp retrofit kits (usually from Suzuki dealers for a premium price) is to buy each required part separately.
- This method can be much cheaper, especially if buying used items on a used items market or from a vehicle junkyard.
- However, not each part (lamp, bracket, etc.) is mutually compatible nor compatible with each front bumper model.
- In short, there are:
- Three different fog lamp models;
- One of those models has three slightly different "sub-models";
- Three different lamp bracket / carrier models;
- At least two different lamp surrounding bezel models;
- Probably three different wiring setups (with two different connector shapes);
- One available wiring connector adapter at the "fog lamp to wiring" ("Cable connector 5") connection point (for one particular setup combination);
- Two in-cabin console switch models;
- Both switch models appear the same from the front and from the rear ...
- Three different fog lamp models;
- The following few tables below serve to portray which official part combinations are possible.
- In other words, use the tables below to determine which fog lamp model fits to which Jimny 3 type (front bumper model) when used with which bracket model and possibly with which lamp surrounding bezel model and possibly with which el. connector adapter.
For Jimny 3 types 1-5, with 1st model front bumper
| Lamp | Bracket left side |
Bracket right side |
Bezel left side |
Bezel right side |
El. connector adapter |
Comment |
|---|---|---|---|---|---|---|
| 35500-74F50 | 35526-81A01 | 35526-81A01 | None required | None required | None required | Standard setup |
| Cibie 026719 | Required Seen on pictures P.N. unknown |
Required Seen on pictures P.N. unknown |
Required Seen on pictures P.N. unknown |
Required Seen on pictures P.N. unknown |
Probably required Probably 36813-54G20 |
"Improved" (more complicated) setup |
| 35500-63J00 35500-63J02 35500-63J04 |
35566-81A30 | 35526-81A30 | Probably required P.N. unknown |
Probably required P.N. unknown |
36813-54G20 | "Universal retrofit" setup |
For Jimny 3 types 6-8, with 2nd model front bumper
| Lamp | Bracket left side |
Bracket right side |
Bezel left side |
Bezel right side |
El. connector adapter |
Comment |
|---|---|---|---|---|---|---|
| 35500-74F50 | Not produced | Not produced | Not produced | Not produced | Not produced | Infeasible setup unless custom brackets are made and el. connections are soldered |
| Cibie 026719 | Not produced | Not produced | Probably not needed | Probably not needed | None required | Infeasible setup unless custom brackets are made |
| 35500-63J00 35500-63J02 35500-63J04 |
35566-84A00 | 35526-84A00 | None required | None required | None required | Standard setup |
For Jimny 3 types 9-12, with 3rd model front bumper
| Lamp | Bracket left side |
Bracket right side |
Bezel left side |
Bezel right side |
El. connector adapter |
Comment |
|---|---|---|---|---|---|---|
| 35500-74F50 | Not produced | Not produced | Not produced | Not produced | Not produced | Infeasible setup unless custom brackets are made and el. connections are soldered |
| Cibie 026719 | Not produced | Not produced | Probably not needed | Probably not needed | None required | Infeasible setup unless custom brackets are made |
| 35500-63J00 35500-63J02 35500-63J04 |
Already integrated into bumper |
Already integrated into bumper |
71761-57M10-5PK | 71751-57M10-5PK | None required | Standard setup |
Notes on lamps
- All front fog lamp models are built to suit both the left and the right mounting position in a front bumper.
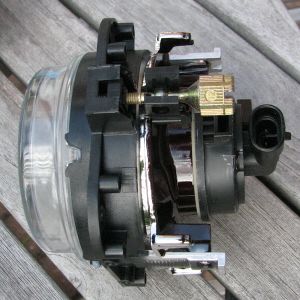
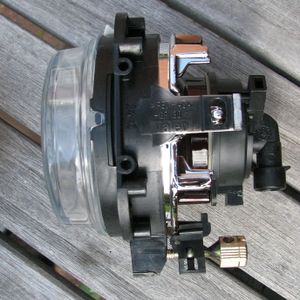
- Fog lamp model Suzuki 35500-74F50 is actually produced by Stanley, model 010-2587.
- This fog lamp is used on several other vehicle models, so you can find it from other cars as well.
- As evident from the tables above, both the 2nd model and the 3rd model front bumper use the same fog lamps.
- Those fog lamps can also be used in the 1st model front bumper with certain OEM adapters, since that front bumper model has its own different "default" fog lamp model.
- The following three fog lamp models appear to have exactly the same dimensions, shape, bulb, el. connector and mounting points to the brackets:
- 35500-63J04 - "main" / standard edition from Suzuki (with exceptions below);
- It appears that the actual fog lamp product under this Suzuki catalogue number is made by Valeo, P.N. 89210094.
- 35500-63J02 - meant for the African market;
- 35500-63J00 - used only in Jimnys 3 made by Santana in Spain;
- The actual differences between these three fog lamp models are unknown - possibly beam pattern or clear / ribbed glass?
- These same fog lamps are also used on some Suzuki Alto, Celerio, Vitara 2 (1998-2005), Swift and SX4 vehicle models.
- 35500-63J04 - "main" / standard edition from Suzuki (with exceptions below);
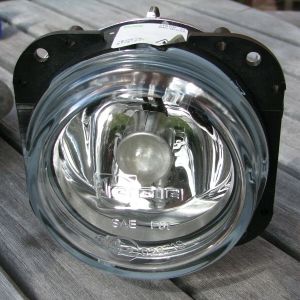
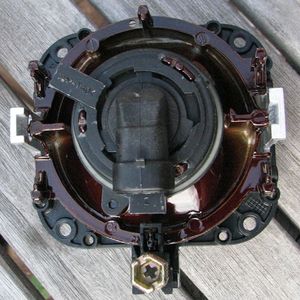
- Another fog lamp model which is often found on Jimnys with 1st model front bumper is produced by Cibie (division of Valeo), model 026719.
- It is not known under which official "OEM" / virtual Suzuki P.N. this fog lamp is catalogued.
- This fog lamp model requires its own specific bracket to mount it to the 1st model front bumper.
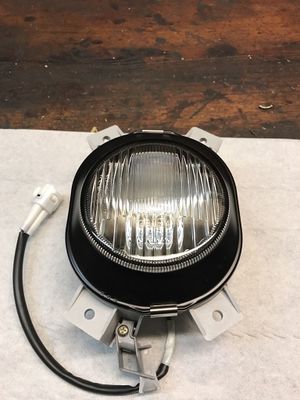
- Fog lamp model Suzuki 35500-74F50 / Stanley 010-2587
- Fog lamp Cibie 026719
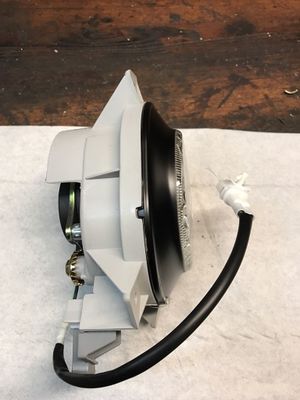
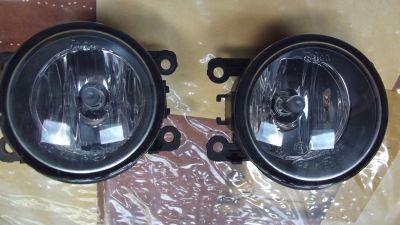
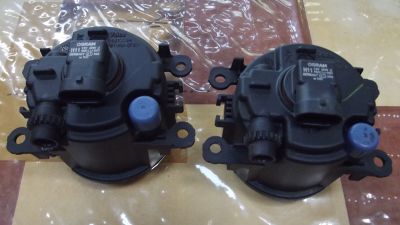
- Fog lamp model Suzuki 35500-63J04 / Valeo 89210094
Notes on lamp mounting brackets (carriers)
- Brackets / carriers are required for mounting any fog lamp model to 1st and 2nd model front bumper.
- The actual bracket model depends on the combination (see the tables above).
- The 3rd model front bumper already has fog lamp brackets as its integral part.
- Bracket model 35526-81A01 is the only model which is interchangeable between the left mounting side and the right mounting side.
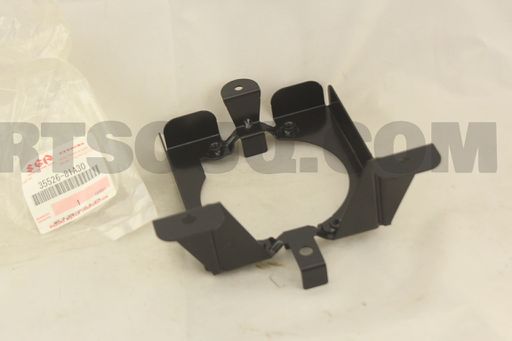
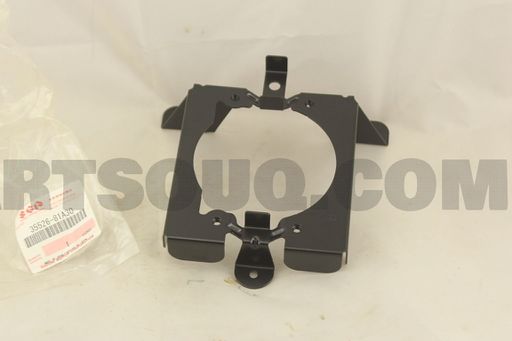
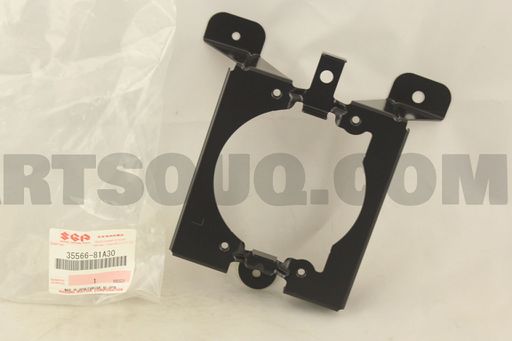
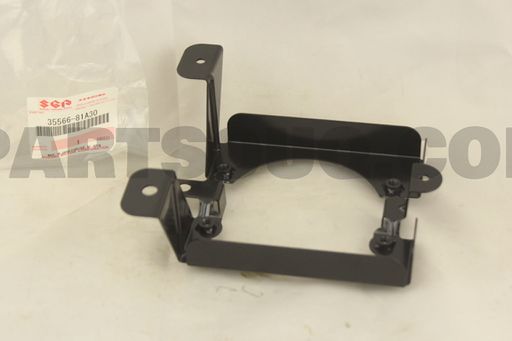
- Bracket model 35526-81A30
- Bracket model 35566-81A30
- Bracket model 35566-84A00
- 3rd model front bumper - view from inside - enlarge the pictures and note the screw holes in the integrated front fog lamp brackets, to which the compatible fog lamps directly attach
Notes on lamp surrounding bezels
- In some combinations (as indicated in the tables above), surrounding bezels are required to achieve nice "flush" cosmetic fitting of lamps inside the bumper holes.
- Otherwise, there would be ugly gaps between the fog lamps and the bumper, which would make the setup look like an aftermarket improvisation.
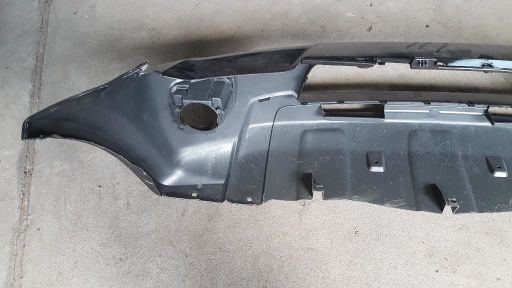
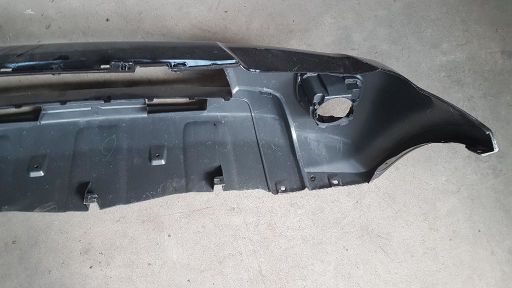
- 3rd model front bumper already comes with a pair of "blank" bezels attached in the place of fog lamps.
- The "proper" bezels look exactly like the "blank" bezels, but only with a pre-cut hole for the fog lamps.
- Therefore, in theory, there is no need to buy "proper" bezels for retrofitting fog lamps to a 3rd model front bumper, as it should be (in theory) possible to carefully cut suitable holes for the fog lamps in the default "blank" bezels which are already present in the bumper, and achieve exactly the same look and finish.
- However, someone needs to try this in practice and report.
- The P.N. of bezels, which are required for flush cosmetic fitting of fog lamp model Cibie 026719 in the holes in the 1st. model front bumper, is currently unknown.
- However, it is known that a pair of those bezels come included in complete front fog lamp retrofit sets 99000-990YZ-035 and 990E0-76J10-000 (see more in the chapter about complete retrofit sets).
- The P.N. of bezels, which are required for flush cosmetic fitting of fog lamp model 35500-63J0X in the holes in the 1st. model front bumper, is currently unknown.
Pictures of lamps and brackets in bumpers
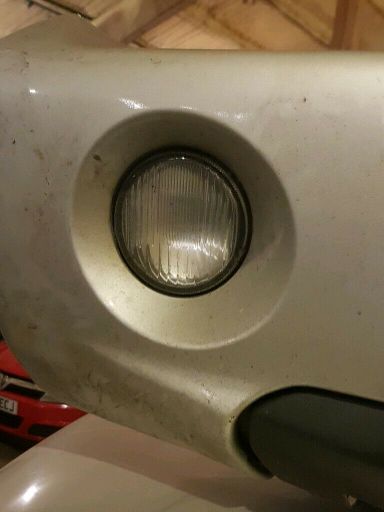
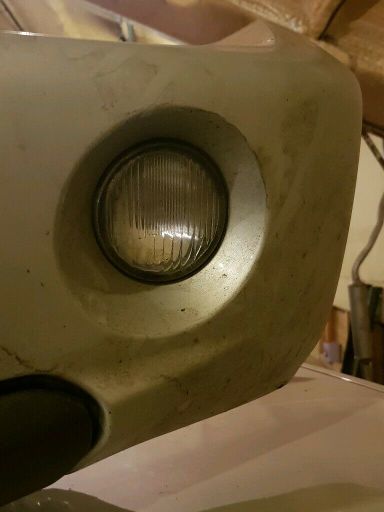
- Appearance of fog lamp 35500-74F50 when mounted in 1st model front bumper - notice that it fits flush without any additional bezels
Wiring
The wiring setup for the fog lamps in Jimnys 3 is made up of several sections, separated by connectors.
- Some Jimnys 3, which were produced without front fog lamps, still have most of the required wiring elements (cables, connectors, relays, fuses, etc.) for them already installed.
- The best case scenario which you could expect is to already have everything from the above crude diagram already installed from the factory, except Fog lamps + Cable connector 5, Wiring 4 and Switch.
- Therefore, you should first check for the presence of wires with unused el. connectors in the vehicle.
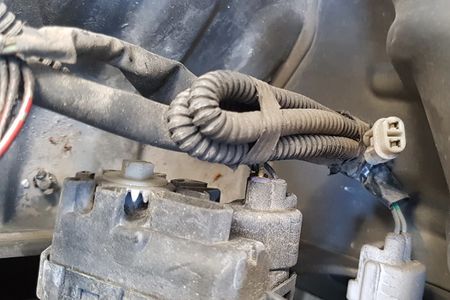
- First search for the unused Cable connector 4 in the engine bay, just behind the head lamps (usually front left).
- If not found there, then search for it somewhere behind the front bumper (after removing the front inner wheel arch liners).
- Then check if the unused Cable connector 3 for the console button / switch is present inside the console in the cabin (see the chapter about the installation of the console button / switch).
- First search for the unused Cable connector 4 in the engine bay, just behind the head lamps (usually front left).
- If you find both unused Cable connector 4 and Cable connector 3 (for the fog lamps and for the in-cabin switch) in your Jimny 3, consider yourself lucky!
- In that case, you then only need to obtain the following:
- A pair of fog lamps (with suitable brackets if needed) + Cable connector 5 (usually comes integrated or attached with the lamps);
- Wiring 4;
- Switch;
- Then just connect the following:
- Switch to Cable connector 3;
- Wiring 4 to Cable connector 4;
- Fog lamps to Wiring 4 via Cable connectors 5;
- Mount the fog lamps to the bumper and go on joyful rides ever since.
- In that case, you then only need to obtain the following:
- If you find no unused Cable connector 3 and/or Cable connector 4 in the vehicle, you will also need to obtain wiring harness kit(s) Wiring 2 (includes Cable connector 2 and Cable connector 3) and and/or Wiring 3 (includes Cable connector 1 and Cable connector 4) as well.
- You can also buy one of complete fog lamp retrofit kits mentioned earlier in the article.
- That way you will eliminate any risk of missing any of needed components.
- The OEM wiring harness kit in the engine bay, represented by Wiring 3 + Cable connector 1 + Cable connector 4 in the crude diagram above, is P.N. 99000-990YZ-A05.
- This kit also includes In-line fuse (15A rated current) and a plug to the Relay, but not the Relay itself.
- It is currently not known if this kit is compatible with every Jimny 3 revision and every fog lamp model used!
- However, it is known to be compatible with Jimnys 3 type 1-4 and fog lamps model 35500-74F50.
- The OEM wiring harness kit behind the dash board in the cabin, represented by Wiring 2 + Cable connector 2 + Cable connector 3 in the crude diagram above, is P.N. 99000-990YZ-A06.
- It is currently not known if this kit is compatible with every Jimny 3 revision!
- However, it is known to be compatible with Jimnys 3 type 1-4 (with old style interior console).
- The relay is P.N. 99000-990YZ-A07.
- There is another relay P.N. 95572-63C00 which is instead mentioned in some other catalogues.
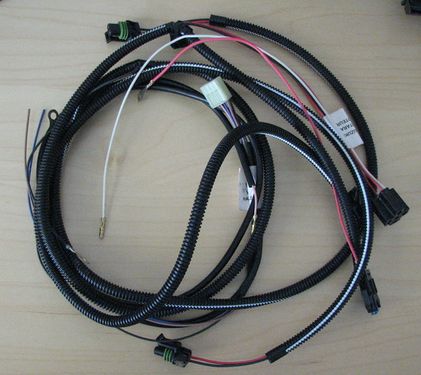
- Wiring harnesses 99000-990YZ-A05 & 99000-990YZ-A06 tangled together
- According to a forum report, it appears that the Cable connector 1 (if present) is located in the engine bay, near the bulkhead, almost behind the battery / below the brake master cylinder (in RHD Jimnys).
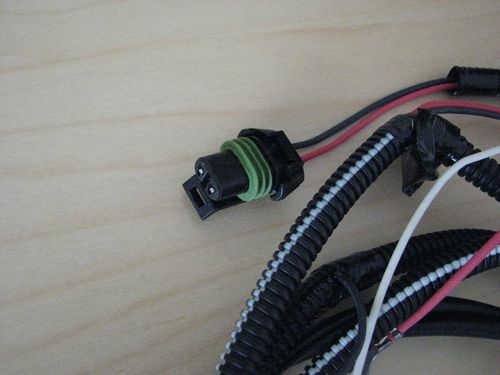
- It is a "single bullet" connector.
- According to the same reports, the Cable connector 2 (if present) is located near the wiring loom by the front right speaker (in RHD Jimnys).
- There are 2 main wiring bundles there - it should be in one of those.
Notes on Cable connector 4:
- It appears that this connector is some specific type in Jimnys 3 type 1-5 (with 1st model front bumper) (needs more investigation).
- This connector on Jimnys 3 type 6-12 (with 2nd and 3rd model front bumper) is actually the same male "bullet" type connector as Cable connector 5 in Jimnys 3 type 1-5!
- See notes about Cable connector 5 below for more details.
Notes on Wiring 4:
- It is a split dual wire harness which connects both fog lamps in parallel to Cable connector 4 and is easily removed from a donor vehicle while the fog lamps are being removed.
- This harness is represented by P.N. 36813-84A00 for Jimnys 3 type 6-8 and by P.N. 36813-57M00 for type 9-12.
- The connectors on both of these harness models should be the same.
- These two harnesses are compatible with fog lamps model 35500-63J0x, which all Jimnys 3 type 6-12 use.
- The reason for the existence of two different wiring harness P.N.s is probably because of different mounting clips for attaching the harness to the vehicle body and/or because of different wire lengths.
Notes on Cable connector 5:
- There are two types Cable connector 5 for front fog lamps in Jimnys 3.
- The first connector type is a "bullet" type connector, which was used in all Jimnys 3 type 1-5 (which originally came with 1st model front bumper, from 1998 to approx 2005).
- This connector type is compatible only with front fog lamp model 35500-74F50.
- All other / newer fog lamp models which use H11 bulbs (including OEM fog lamps 35500-63J0X) can be connected to the first / old type of Cable connector 5 through a suitable connector adapter 36813-54G20.
- This connector type is compatible only with front fog lamp model 35500-74F50.
- The second / newer Cable connector 5 type was used in all Jimnys 3 type 6-12 (which originally came with 2nd and 3rd model front bumper, from approx 2005 to 2018).
- This newer Cable connector 5 is actually a direct male connector for bulbs made according to H11 bulb standard.
- It is directly compatible with all fog lamp models 35500-63J0X, as these fog lamps use H11 bulbs.
- It is incompatible with front fog lamp model 35500-74F50 (which was not meant for 2nd and 3rd model bumpers anyway, since no brackets for that combination are available).
- However, a required el. connection could probably be made by cutting the Cable connector 5 off and soldering the Wiring 4 to the fog lamps directly.
- This newer Cable connector 5 is actually a direct male connector for bulbs made according to H11 bulb standard.
- The first connector type is a "bullet" type connector, which was used in all Jimnys 3 type 1-5 (which originally came with 1st model front bumper, from 1998 to approx 2005).

- Wiring connector adapter 36813-54G20, for certain equipment combinations in point 'Cable connection 5'
- Regarding all the specific details of wiring, refer to a corresponding wiring diagram manual for your vehicle revision (and for donor's vehicle revision if needed).
- You can determine the exact name of the corresponding document in a wiki article "Manuals and Owners Guides".
Console button / switch
Main info
- The switch appears to exist in two editions:
- Older model P.N. 37270-75F10;
- This model presumably fits Jimnys 3 with older (1998-2005) style interior and in-cabin console.
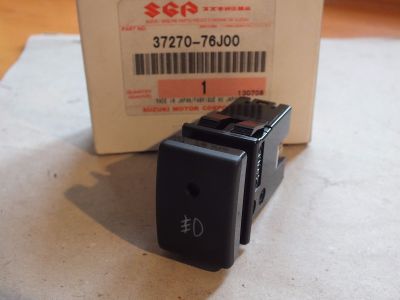
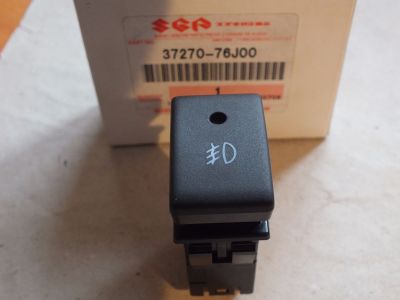
- Newer model P.N. 37270-76J00;
- This model presumably fits Jimnys 3 with newer (2005-2018) style interior and in-cabin console.
- Both switch editions appear the same - add info about the differences and compatibility if you know them!
- Older model P.N. 37270-75F10;
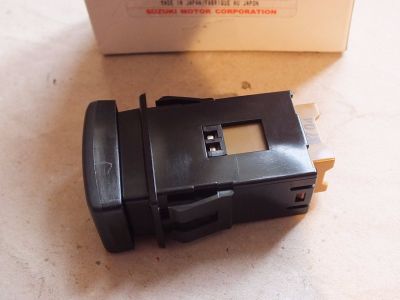
- The switch is a "permanent press-in" type - after you press it, it stays pressed in until pressed again. The switch also contains a small light indicator which is lit when the switch is pressed in.
- It appears that the same switch has been used for the front fog lamps in Suzuki Vitara 2 (a.k.a. "Grand Vitara") (1998-2005).
- In a Jimny 3, the switch is located next to rear fog lamp switch in a three-switch console cluster.
- The cluster is located to the left of the steering wheel (for LHD vehicles) or to the right of the steering wheel (for RHD vehicles).
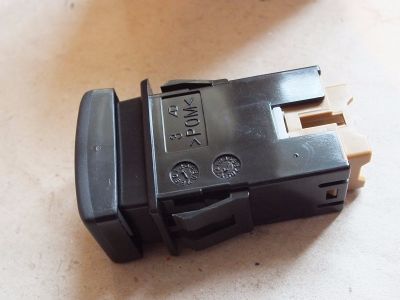
- In-cabin front fog lamp switch (P.N. 37270-76J00)
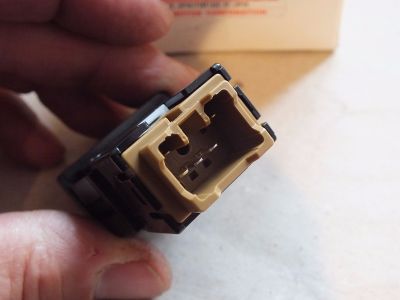
This should be the pinout of the switch P.N. 37270-76J00:
- Pins 1 and 2 are earth.
- Pin 3 is unused.
- Pin 4 is the output to the fog lamp relay.
- Pins 5 and 6 are the "+ve" feed - these are wired to the lighting circuit in the vehicle, as it is not allowed to have the fog lamps on without having the main head lamps on.
- Pin 5 is the power that goes through to the fog lamps.
- Pin 6 is just the feed to illuminate the switch itself.
If you are using some 3rd party 3-wire wiring to connect to the switch P.N. 37270-76J00, then wire it like this:
- Earth - Pins 1 and 2 (connect to BOTH)
- From relay - Pin 4
- From main head lamp circuit - Pins 5 and 6 (connect to BOTH)
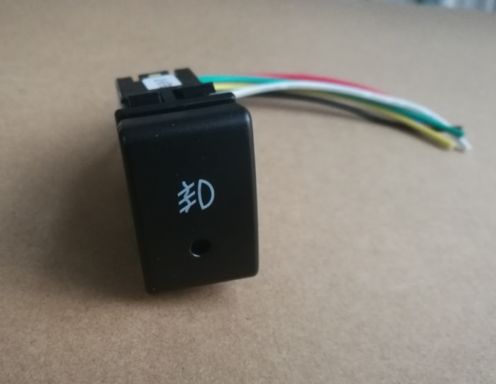
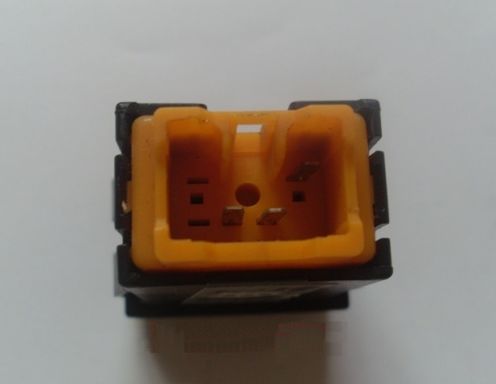
- In-cabin front fog lamp switch, unknown source. Probably aftermarket product. Note the presence of only 3 pins instead of 5.
How to install the switch in the console
- Use a flat-bladed plastic (not metal!) tool for the removal, in order to avoid damaging or scratching anything.
- It is best to prise an object off a little bit at each side at a time.
For pre-2006 Jimnys 3 (with 1998-2005 interior)
- Leverage the tool directly against the blank itself in order to prise it off.
- If the connector for the front fog lamp switch is already present behind in the hole, just connect it to the your new front fog lamp switch.
- Test if the switch works.
- Just push the newly connected switch into the opening - it will simply click in.
For post-2005 Jimnys 3 (with revised 2005-2018 interior)
- Notice that there is a bezel / enclosure which surrounds all three switches /blanks in the cluster in the console.
- Do not use the tool on a blank itself, but instead on the bezel / enclosure in order to remove it from the console.
- The entire enclosure will come off, including all three switches / blanks inside it.
- When it comes off, you will be able to easily disengage a blank cover from it by squeezing the latches on the rear side of the cover.
- Then just push in the front fog lamp switch in the empty slot in the enclosure - it will simply click in.
- If the connector for the front fog lamp switch is already present behind in the hole, just connect it to the your new front fog lamp switch.
- Test if the switch works.
- Then just push the entire three-switch cluster enclosure back in the console - it will simply click in.
Installation in the front bumper
In the case of 1st and 2nd model front bumper, you first have to cut out the plastic blanks in order to open the holes through which the fog lamps will illuminate the space in front of the vehicle. As this is an irreversible operation, it is advised to do this only after obtaining all the parts and test-connecting all the wiring to prove that it all works as planned.
Page last edited on 9/07/2019 by user Bosanek


