Difference between revisions of "Painted body elements"
m (Minor phrase correction) |
(Corrected instructions about removing front wheel arch moldings) |
||
| (3 intermediate revisions by the same user not shown) | |||
| Line 286: | Line 286: | ||
| − | + | ==== How to deal with the clips ==== | |
| Line 292: | Line 292: | ||
* If some of the clips holders / mounting points inside the molding panels break or crack, you need to re-weld them carefully with a soldering iron. | * If some of the clips holders / mounting points inside the molding panels break or crack, you need to re-weld them carefully with a soldering iron. | ||
** It is additionally recommended to reinforce each clip holder inside every molding panel with a coat of some two-component epoxy glue which is designed specifically for plastics. | ** It is additionally recommended to reinforce each clip holder inside every molding panel with a coat of some two-component epoxy glue which is designed specifically for plastics. | ||
| + | * It is also recommended to apply heavy duty reinforced fabric / textile / cloth tape over the mounting hole for each clip (when the clip is removed), and then puncture it with a screwdriver to reopen the hole. | ||
| + | ** The cloth tape will serve as a cushioning layer which will eliminate any possible rattles and vibrations caused by imperfect clip connections. | ||
| + | ** An example of a quality cloth tape product is [https://www.tesa.com/en/consumer/tesa-tough-tape.html Tesa 57230]. | ||
| − | + | {{note|The wiki article [[Clips and bits for body and trim elements|'''"Clips and bits for body and trim elements"''']] contains vast details on all the clip types and their parts numbers etc.}} | |
| − | * These clips are not accessible unless you remove the entire front side metal fender from the car. | + | ===== Clips in front wheel arch moldings ===== |
| − | ** | + | |
| − | + | ||
| + | * These clips are not accessible unless you remove the inner wheel arch. | ||
| + | ** Even then, access to these clips is rather constrained (you don't see what you are doing to them). | ||
| + | *** The access gets a bit better if you remove the road wheel. | ||
| + | ** Access to these clips is the best if the entire front side metal fender is removed from the car. | ||
| + | *** Then it's a super easy job to squeeze out each clip, but it might be difficult to perfectly align the fender back onto the car. | ||
* Beware that the front wheel arch molding is also held to the fender by a couple of metal screws or plastic rivets which are found in the bottom (underneath the molding) and in the wheel arch edge itself (where the mud flap usually attaches). | * Beware that the front wheel arch molding is also held to the fender by a couple of metal screws or plastic rivets which are found in the bottom (underneath the molding) and in the wheel arch edge itself (where the mud flap usually attaches). | ||
** Remove the plastic rivets by carefully prying out their center piece with a flat screwdriver and then pulling out the entire rivet. | ** Remove the plastic rivets by carefully prying out their center piece with a flat screwdriver and then pulling out the entire rivet. | ||
| − | + | ===== Clips in rear wheel arch moldings ===== | |
| Line 315: | Line 323: | ||
| − | + | ===== Clips in side door moldings ===== | |
| Line 338: | Line 346: | ||
* With the interior cavities in the doors exposed, it is a good idea to clean and then to rust proof that area with a spray application of automotive wax for example. | * With the interior cavities in the doors exposed, it is a good idea to clean and then to rust proof that area with a spray application of automotive wax for example. | ||
** Just make certain that the water drain holes in the bottom of the doors do not get clogged with wax after everything is done. | ** Just make certain that the water drain holes in the bottom of the doors do not get clogged with wax after everything is done. | ||
| + | * It is also recommended to stick vibration damping (constrained layer damper) material to door panels to greatly improve in-cabin comfort. | ||
| + | ** Read the wiki article [[Sound insulation and vibration damping|'''"Sound insulation and vibration damping"''']] for the full details. | ||
| + | ** Do this after cleaning the door interiors and ''before'' applying wax inside! | ||
| − | + | ===== Clips in side door sill moldings ===== | |
| Line 349: | Line 360: | ||
| − | + | ==== How to deal with the tape ==== | |
| Line 366: | Line 377: | ||
| − | + | ==== Additional considerations ==== | |
| Line 378: | Line 389: | ||
* If the vehicle had endured some collision damage in the past, the side body panels and plastic moldings might have been poorly repaired and just glued/stuck together by some improvised methods by someone. | * If the vehicle had endured some collision damage in the past, the side body panels and plastic moldings might have been poorly repaired and just glued/stuck together by some improvised methods by someone. | ||
** If you try to separate that, you will probably open Pandora's box of issues and properly returning everything back will be a nightmare! | ** If you try to separate that, you will probably open Pandora's box of issues and properly returning everything back will be a nightmare! | ||
| − | * So, if you suspect that your or other person's car has had collision damage to the side body panels in the past, avoid removing any plastic | + | * So, if you suspect that your or other person's car has had collision damage to the side body panels in the past, avoid removing any plastic moldings from that car! |
| Line 392: | Line 403: | ||
* The casings of external mirrors exist in two versions - thinner (older) and thicker (newer). It appears that the change occurred around 2005. | * The casings of external mirrors exist in two versions - thinner (older) and thicker (newer). It appears that the change occurred around 2005. | ||
* There are several designs of spare rim covers and spare wheel covers, but they all fit stock size wheels. | * There are several designs of spare rim covers and spare wheel covers, but they all fit stock size wheels. | ||
| − | * The bonnet bulge from a DDiS Jimny is glued to the bonnet and would have to be forcibly removed - high risk of damage. It's better to buy the entire bonnet with the bulge and repaint them. | + | * The bonnet bulge from a DDiS Jimny 3 is glued to the bonnet and would have to be forcibly removed - high risk of damage. It's better to buy the entire bonnet with the bulge and repaint them. |
| − | * The bonnet bulge from a | + | * The bonnet bulge from a late (2012-2018) petrol Jimny 3 is mostly a die-cast single piece with the bonnet, apart from its front end section. |
| − | * The vinyl soft top, as well as plastic hard top of cabrio Jimnys are the same for all Jimnys (unconfirmed !!) | + | * The vinyl soft top, as well as plastic hard top of cabrio Jimnys 3 are the same for all Jimnys (unconfirmed !!) |
| − | {{note|If your Jimny has a 2nd model front bumper, definitely consider changing it for a 1st model front bumper on this occasion. You might even consider changing a 3rd model front bumper for a 1st model front bumper.}} | + | {{note|If your Jimny 3 has a 2nd model front bumper, definitely consider changing it for a 1st model front bumper on this occasion. You might even consider changing a 3rd model front bumper for a 1st model front bumper.}} |
{{note|See wiki article [[Front bumper issues|'''"Front bumper issues"''']] for all the details on front bumpers.}} | {{note|See wiki article [[Front bumper issues|'''"Front bumper issues"''']] for all the details on front bumpers.}} | ||
Latest revision as of 21:31, 26 November 2019
![]() The content of any article might be expanded / improved in the future - revisit it sometimes.
The content of any article might be expanded / improved in the future - revisit it sometimes.
![]() Seen a mistake? Know something that isn't written? Edit and change this article yourself!
Seen a mistake? Know something that isn't written? Edit and change this article yourself!
![]() Some images in the article (if present) can be enlarged by clicking on them.
Some images in the article (if present) can be enlarged by clicking on them.
Contents
- 1 Introduction
- 2 Examples of factory paints
- 3 Further enhancements
- 4 How to change the colors
- 5 Final words
Introduction
- You might have noticed that some Jimnys (and maybe yours too) have two body colors.
- The typical case is that the plastic side body moldings, as well as the front and rear bumper, have a different color than the main body.
- Such dual-tone Jimnys look prettier and more joyful to many people.
- That two-tone painting also creates an optical illusion that the vehicle appears larger than it is.
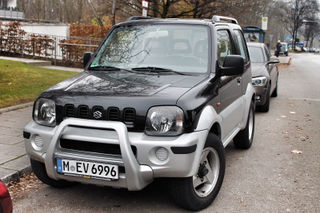
- Based on a used car market research in Europe, it appears that Suzuki always used silver, some shade of gray, or plain plastic black color as the secondary color in all of its dual-color Jimny paint schemes.
Examples of factory paints
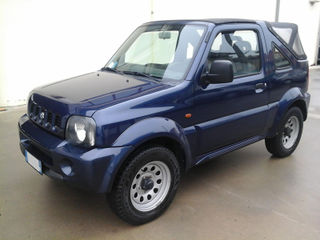
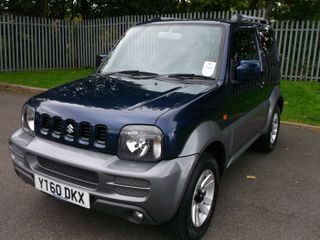
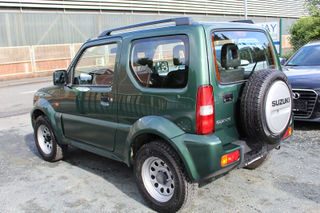
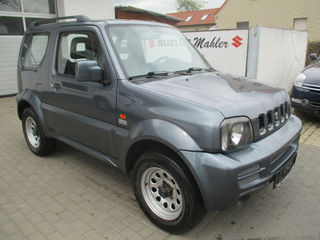
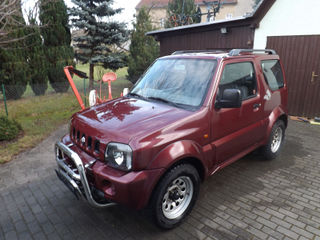
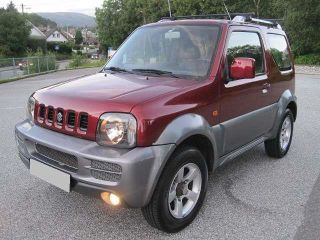
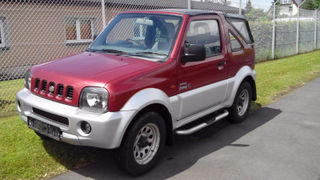
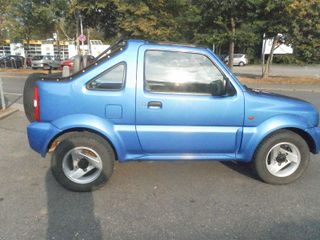
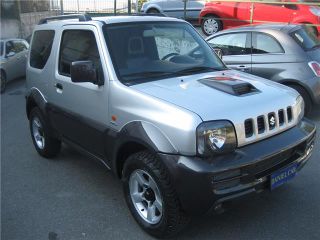
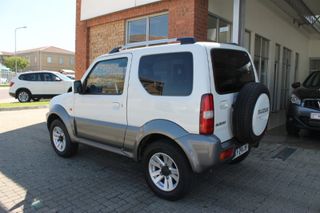
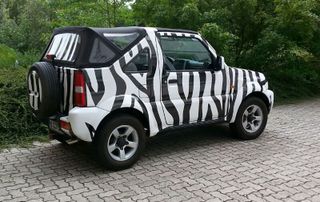
- Enjoy this obscure eye candy.
- The pictures in each group have been carefully chosen to be as similar as possible, in order to better compare the combinations.
Further enhancements
Introduction
For the sake of this article, for multi-color body paints, we need to name the colors:
- The primary color is the color in which most of the vehicle is painted in (the roof, bonnet, doors).
- The secondary color is the color in which the bumpers, side moldings etc. are painted in.
- The tertiary color (if it exists) is the color in which remaining elements are painted (roof rails, wheel rims, body decals, etc.).
Now, when you get the concept behind dual-color Jimny paints, the idea is to extend this factory dual-paint concept further - to paint some other body elements in the secondary color as well, or to paint them in a tertiary color.
Extending secondary color's presence
- Many small body elements could also be in the secondary color as well, giving the car even more diversified look, while staying completely in style of the original two-color design.
- It would look like a factory design, just further enhanced.
The other recommended body parts to also be in the secondary color are:
- Exterior mirror casings;
- Exterior door handles (all three doors);
- Fuel filler cap lid/cover (metal flap);
- Plastic spare rim cover or plastic/metallic spare wheel cover (if present);
- Bonnet bulge on DDiS Jimnys;
- Vinyl soft top or plastic hard top on cabrio Jimnys;
Additional ideas:
- If the primary and secondary color are quite different, also consider having the plastic door sill moldings in the primary color (see the "Orange + Silver + Black" picture example below).
- Another consideration might be to paint the black parts of the front and rear bumpers into the primary color (each bumper has that black part irrespective of its color).
- The entire factory longitudinal roof rails could also be swapped/painted in the secondary color, or just the bar section without the foots.
- In some dual-color combinations, painting the wheel rims into the primary color can look really good. In that case, don't forget the spare rim, even if it's usually hidden under a cover!
- For post-2012 Jimnys which have separate front grille from the hood, consider having the entire grille in the secondary color, or perhaps paint every odd or even section of the grille in the secondary color.
Examples of extended dual-color bodies
- This picture "Silver + Dark Grey" shows a DDiS Jimny where its bonnet bulge, exterior mirror casings, external door handles and roof rails are also in the secondary color.
- The fuel filler cap is not though, although it might have been a good idea to be as well.
- This is an example of a custom-repainted front grille section on the old (pre-2013) bonnet.
- On pre-2013 Jimnys (like this one), the front grille is a single piece with the bonnet.
- Judge the appeal of the outcome yourself - repainting the front grille on pre-2013 Jimnys like this is not recommended in this article.
Introducing a tertiary color
- This is generally a more risky concept than any "extended" dual-color scheme, mostly because many three-color combinations tend to look too flashy and "colorFULLY".
- However, it might look very nice in certain three-color combinations, but requires careful choice of colors and of which element would be in which color.
Perhaps the tertiary color could be used on the following:
- wheel rims
- longitudinal roof rails
- cabrio soft/hard top
- window wiper arms
- exterior mirror casings
- five small plastic grilles in the bonnet front grille (for pre-2013 Jimnys)
- black portions of the front and rear bumper
- roof box (if fitted), etc.
Examples of triple-color bodies
- Here is one three-color example.
- Judge it for yourself.
How to change the colors
Introduction
- You are probably thinking "Well, repaint them, what else".
- Well first try to think "outside the box"!
- First of all, notice that most of the body elements, which are candidates to bear a secondary or tertiary color, are "modular" elements - they either clip on or bolt on to the main body.
- They are more or less easy to remove and install.
There are two ways to change the color of chosen body elements:
- The obvious method is to repaint them.
- The alternative method is to swap them from another Jimny which has the desired color!
Repainting
Introduction
Although this is the obvious method, an overview of its advantages or disadvantages for this particular case is beneficial.
Advantages
- You can choose any color that you like.
- You can apply special paint protector films (against scratching and chipping) onto the new paint.
- You don't need to mix-and-match parts with anyone.
- If some of your body elements are currently damaged, you can fix the damage on the same occasion.
- Side moldings on the door and wheel arches can usually be painted "on the spot" (without demounting them), saving labor cost and eliminating the risk of breaking the mounting clips.
Disadvantages
- The cost of repainting, especially if done properly. You should best let all the painting be done by a professional vehicle painter.
Swapping parts
Introduction
- The method of swapping parts with another vehicle is quite "unorthodox", but could be very rewarding if you succeed.
- It is especially rewarding in case of two single-color Jimnys, which would then both become dual-color, just in inverse order.
- Furthermore, the secondary color in that case does not have to be some shade of silver or gray, as Suzuki has always used as the secondary color.
- For example, imagine a single-color light blue Jimny and a single-color blue (or dark blue) Jimny (all those are factory Suzuki colors).
- After exchanging the body parts, the first Jimny would get darker bumpers, moldings etc. while the second Jimny would get lighter bumpers, moldings, etc.
- They would both become unique.
- Another example would be a silver Jimny and a grey Jimny.
- They both look completely bland and ordinary, just as any other ubiquitous silver or grey car today.
- But after the exchange, both vehicles might get completely transformed into the "fifty shades of grey" trend.
- Now imagine all the other color combinations of your liking.
Advantages
- The best situation would be if you can find another Jimny owner, whose vehicle's color is your desired secondary color.
- Then just convince them that your vehicle's color is in fact their desired secondary color :).
- Perhaps showing them this article might help!
- If you manage do to that, you can arrange an almost cost-free body parts exchange deal with them.
- In that case you would both be happy.
- The best of all - two Jimnys get colorfully outfitted for a price of none!
- If you are confident in (dis)assembling body parts, you don't even need to go to a workshop.
- Just park two Jimnys together, strip them and refit them.
- You will have to lay down on the ground to remove some rivets and screws which hold the bumpers and door sill covers.
- If you can't find a willing Jimny owner to exchange vehicle body parts with you, then search for dead Jimnys in vehicle junkyards.
- Their willingness to exchange vehicle's body parts with yours' can always be bought with a certain sum of money.
- Additional advantage of removing all the side body molding panels and the bumpers is that you can clean the bodywork which was hidden behind them, repair some rust if present, and then properly rust proof those areas (for example with a spray application of a high quality automotive wax).
Disadvantages
Disadvantage 1 - visually damaged parts
- The first disadvantage with the "parts exchange" method is the possibility that some of the parts (either yours or the others') have visual damage.
- That could impair the exchange process, because the receiving party won't be so happy to exchange a good part for a scratched or cracked one.
- But some good will or even money infusion should sort out the situation.
- It all depends on who is more eager to accomplish the parts exchange deal.
Disadvantage 2 - replacement process
Be aware that it is not nearly that simple to remove and refit all these these side body moulding panels, as all of them (wheel arch moldings, side door moldings, door sill moldings) are held to the body with a combination of hidden plastic clips and industrial automotive double sided tape.
There are two main things to consider:
- If you just pull the moldings away, you will certainly brake a some of the clips, and possibly even a few clip holders / mounting points inside the molding panels!
- The double sided tape will certainly be irreversibly damaged during disassembly in any case.
How to deal with the clips
- Prepare for the occurrence of broken clips by preventively purchasing a few compatible replacement clips.
- If some of the clips holders / mounting points inside the molding panels break or crack, you need to re-weld them carefully with a soldering iron.
- It is additionally recommended to reinforce each clip holder inside every molding panel with a coat of some two-component epoxy glue which is designed specifically for plastics.
- It is also recommended to apply heavy duty reinforced fabric / textile / cloth tape over the mounting hole for each clip (when the clip is removed), and then puncture it with a screwdriver to reopen the hole.
- The cloth tape will serve as a cushioning layer which will eliminate any possible rattles and vibrations caused by imperfect clip connections.
- An example of a quality cloth tape product is Tesa 57230.
![]() The wiki article "Clips and bits for body and trim elements" contains vast details on all the clip types and their parts numbers etc.
The wiki article "Clips and bits for body and trim elements" contains vast details on all the clip types and their parts numbers etc.
Clips in front wheel arch moldings
- These clips are not accessible unless you remove the inner wheel arch.
- Even then, access to these clips is rather constrained (you don't see what you are doing to them).
- The access gets a bit better if you remove the road wheel.
- Access to these clips is the best if the entire front side metal fender is removed from the car.
- Then it's a super easy job to squeeze out each clip, but it might be difficult to perfectly align the fender back onto the car.
- Even then, access to these clips is rather constrained (you don't see what you are doing to them).
- Beware that the front wheel arch molding is also held to the fender by a couple of metal screws or plastic rivets which are found in the bottom (underneath the molding) and in the wheel arch edge itself (where the mud flap usually attaches).
- Remove the plastic rivets by carefully prying out their center piece with a flat screwdriver and then pulling out the entire rivet.
Clips in rear wheel arch moldings
- Most of the clips which hold the rear side wheel arch moldings can be properly accessed and disengaged from the inside of the car if you remove the rear seats and then the large rear side inner plastic body covers.
- Removing those two is not complicated, but it does take at least 15-20 minutes to do.
- Most of the the clips will then be visible and properly accessible in the internal body cavities above the rear wheel arches.
- Use long curved pointy pliers to simultaneously squeeze the clips and push them out - this will disengage the clips from vehicle's body nicely without damaging anything.
- Beware that two or three clips will simply be out of reach for this method and will have to be forcibly disengaged (probably broken) when you pull out the rear wheel arch molding.
- Use long curved pointy pliers to simultaneously squeeze the clips and push them out - this will disengage the clips from vehicle's body nicely without damaging anything.
- With the interior body cavities above the rear wheel arches exposed, it is a good idea to clean and then to rust proof that area with a spray application of automotive wax for example.
Clips in side door moldings
- Most of the clips which hold the side door moldings can be accessed from the inside of the car if you remove the interior door trim.
- Removing the door trim is not overly complicated:
- Remove the two small plastic covers on the large plastic interior door handle (which you use to push the door out or pull it to close it).
- Then unscrew the two screws which connect the door handle to the door, and remove the door handle.
- Unscrew the only screw which connects the inner door latch to the door.
- Then move the door latch to the left or to the right, and gently pull it away from the door (the latch has two plastic latches behind which release easily if you move it to one of those sides).
- Use a small flat screwdriver to "fish out" the centre of the only plastic rivet in the door trim, which is located in the area of the internal door trim roughly below the exterior mirror.
- Then gently remove the plastic rivet.
- Pull out the entire door trim in the bottom section first. It is held by about six plastic clips (all located in the lower portion of the trim), which easily disengage when the trim is pulled.
- When the bottom part of the door trim has disengaged, then gently raise the upper part of the door trim so that the long seal (which goes all along the door glass window) disengages from the door. When the seal has disengaged, the door trim has been completely separated. Only then you can pull the upper part of the door trim away from the door.
- Disconnect the wires for the door window motor (the wiring connector has a latch which you need to press by hand during pulling).
- Gently twist the door latch and squeeze it through the hole in the door trim so that the latch goes through and stays connected to the door lock mechanism.
- The door trim is now completely separated and free.
- Removing the door trim is not overly complicated:
- With the naked door interior exposed, you need to gently separate the nylon from the door (it is held on along its entire circumference with some sort of raw rubber strip.
- With the nylon partially removed, you will be able to easily access most of the side door molding clips inside the door.
- Use long curved pointy pliers to simultaneously squeeze the clips and push them out - this will disengage the clips from the doors nicely without damaging anything.
- With the interior cavities in the doors exposed, it is a good idea to clean and then to rust proof that area with a spray application of automotive wax for example.
- Just make certain that the water drain holes in the bottom of the doors do not get clogged with wax after everything is done.
- It is also recommended to stick vibration damping (constrained layer damper) material to door panels to greatly improve in-cabin comfort.
- Read the wiki article "Sound insulation and vibration damping" for the full details.
- Do this after cleaning the door interiors and before applying wax inside!
Clips in side door sill moldings
- These clips are not accessible - you will just have to pull the molding away by force.
- This molding also has at least two plastic rivets in its bottom (underneath it).
- Remove the plastic rivets by carefully prying out their center piece with a flat screwdriver and then pulling out the entire rivet.
- Removing the front wheel arch molding and rear wheel arch molding will be a lot easier if you first remove this sill molding.
How to deal with the tape
- You will first need to scrape the remains of the old double sided tape both from the molding panels and from vehicle's body.
- Scraping off those remains is certainly a bit tedious process - use a combination of knife scraping and sand paper scraping to accomplish it - it takes time!
- You will then need to apply new good quality automotive grade UV and weather resistant double sided tape.
- Application of the tape is not complicated if you have steady hands.
- Most of the aftermarket double-sided tapes are 0,8 mm thick, while Suzuki used a tape which is approx 1,5 mm thick.
- Therefore, you will probably have to apply your aftermarket tape in two layers.
- Applying the first layer is not hard, but applying the second layer on top of the first one can be quite tricky - very steady hand are required and there is no possibility to retreat when progressing with the application of the 2nd layer on top of the 1st one.
- Therefore, you will probably have to apply your aftermarket tape in two layers.
- Amounts of tape needed:
- Front wheel arch molding needs about 20 cm of tape.
- Rear wheel arch molding needs about 10 cm of tape.
- Side door sill covers don't use any tape.
- Side door moldings use the tape on the entire top edge and on both side edges - about 150 cm of tape!
- You will first need to scrape the remains of the old double sided tape both from the molding panels and from vehicle's body.
Additional considerations
- Front and rear wheel arch moldings also have visible rubber seals which run along the curvature of the moldings.
- These seals are glued to the moldings with a thin double sided tape, but are not glued to the body panels (they are just pressed against the body).
- So, when removing the moldings from the body panels, these seals should not endure any force (they should not be affected by the removal - they should stay on the moldings).
- If these seals are in good condition (not cracked or porous, and the adhesion of double sided tape which holds them to the moldings has not perished), you will not have any work to do around these seals.
- You can easily check if the seals look good (and that some idiot had not glued them to vehicle's body before by just putting / running a thin plastic card between them and vehicle's body and running it along.
- If the vehicle had endured some collision damage in the past, the side body panels and plastic moldings might have been poorly repaired and just glued/stuck together by some improvised methods by someone.
- If you try to separate that, you will probably open Pandora's box of issues and properly returning everything back will be a nightmare!
- So, if you suspect that your or other person's car has had collision damage to the side body panels in the past, avoid removing any plastic moldings from that car!
Additional notes
Compatibility of parts:
- All the side moldings on the doors, door sills, front wheel arches and rear wheel arches are the same on all Jimny production years.
- The rear bumper is the same as well.
- The front bumper exists in three different models (oldest / middle / newest), but the mounting points should be the same. See more below.
- The external door handles are also the same, as well as the lid of the fuel filler cap.
- The longitudinal roof rails are the same.
- The casings of external mirrors exist in two versions - thinner (older) and thicker (newer). It appears that the change occurred around 2005.
- There are several designs of spare rim covers and spare wheel covers, but they all fit stock size wheels.
- The bonnet bulge from a DDiS Jimny 3 is glued to the bonnet and would have to be forcibly removed - high risk of damage. It's better to buy the entire bonnet with the bulge and repaint them.
- The bonnet bulge from a late (2012-2018) petrol Jimny 3 is mostly a die-cast single piece with the bonnet, apart from its front end section.
- The vinyl soft top, as well as plastic hard top of cabrio Jimnys 3 are the same for all Jimnys (unconfirmed !!)
![]() If your Jimny 3 has a 2nd model front bumper, definitely consider changing it for a 1st model front bumper on this occasion. You might even consider changing a 3rd model front bumper for a 1st model front bumper.
If your Jimny 3 has a 2nd model front bumper, definitely consider changing it for a 1st model front bumper on this occasion. You might even consider changing a 3rd model front bumper for a 1st model front bumper.
![]() See wiki article "Front bumper issues" for all the details on front bumpers.
See wiki article "Front bumper issues" for all the details on front bumpers.
- If you are interested in a certain color from another Jimny as your secondary color, but are not certain how it would look on your car, there is a simple test (apart from parking the cars next to each other!).
- Replace the fuel filler lids/covers just for a quick visual test.
- Those covers are dead simple to demount and mount in the middle of a parking lot in just 10 seconds with a simple tool.
Final words
- There are so many other combinations and ideas which can not be covered.
- But now you at least have a basis for thinking and day-dreaming.
- Just don't get yourself carried away this much!
Page last edited on 26/11/2019 by user Bosanek


