

A place for general chat about the Jimny. Please make sure you post in the correct section on the site, this way it keeps the site tidy AND ensures you get a more relevant answer.
Suppliers/Dealers or anyone selling with a commercial view in mind CANNOT post here unless responding to a specific request of a member in a "wanted" post.
Suppliers include people "breaking for spares" on a regular basis, when purchasing spares members should ask a supplier what they contribute to the running of the forum particularly if contacted by a Private Message
Suppliers or Members who have contributed to the forum can be identifed by the
 logo.
logo.
Suppliers/Dealers or anyone selling with a commercial view in mind CANNOT post here unless responding to a specific request of a member in a "wanted" post.
Suppliers include people "breaking for spares" on a regular basis, when purchasing spares members should ask a supplier what they contribute to the running of the forum particularly if contacted by a Private Message
Suppliers or Members who have contributed to the forum can be identifed by the
Re:Recovery points on a Gen 3 (2011)
12 Jul 2022 21:02 #244071
by Busta
Replied by Busta on topic Recovery points on a Gen 3 (2011)
Use the tow bar. You should be aware that there are some very very very rare instances where bolt-on towballs have failed after seriously heavy handed recoveries on big 4x4s that are very stuck. For recovering a Jimny when you've made a small error of judgement it will be fine.
Please Log in or Create an account to join the conversation.
Less
More
- Posts: 2015
- Thank you received: 520
12 Jul 2022 21:42 #244073
by DrRobin
2020 blue SZ5 (one of the last to be registered in the UK)
Ex 2011 Blue Jimny SZ4
Northumberland Jimny Blog
Replied by DrRobin on topic Recovery points on a Gen 3 (2011)
Thanks Busta, all good advice and good to know the tow bar will do what I need.
Robin
Robin
2020 blue SZ5 (one of the last to be registered in the UK)
Ex 2011 Blue Jimny SZ4
Northumberland Jimny Blog
Please Log in or Create an account to join the conversation.
Less
More
- Posts: 9170
- Thank you received: 1839
13 Jul 2022 03:22 #244074
by Lambert
Temeraire (2018 quasar grey automatic)
One of the last 200ish of the gen3s, probably.
ADOS Attention Deficit Ooooh Shiny!
Replied by Lambert on topic Recovery points on a Gen 3 (2011)
On the occasion of needs must I loop a strap round the back of the flange that the ball bolts to rather than just the neck of the actual towball. But like Busta said it's people being violent with huge shock loading that have the problems.
Temeraire (2018 quasar grey automatic)
One of the last 200ish of the gen3s, probably.
ADOS Attention Deficit Ooooh Shiny!
Please Log in or Create an account to join the conversation.
13 Jul 2022 13:34 #244078
by gv42
Replied by gv42 on topic Re:Recovery points on a Gen 3 (2011)
We use Dave marsh racing , jimny recovery points, in my brother's car, the rear ones fit perfectly well with his tow bar
Sent from my 2201116SG using Tapatalk
Sent from my 2201116SG using Tapatalk
Please Log in or Create an account to join the conversation.
Less
More
- Posts: 2015
- Thank you received: 520
19 Jul 2022 13:28 #244151
by DrRobin
2020 blue SZ5 (one of the last to be registered in the UK)
Ex 2011 Blue Jimny SZ4
Northumberland Jimny Blog
Replied by DrRobin on topic Re:Recovery points on a Gen 3 (2011)
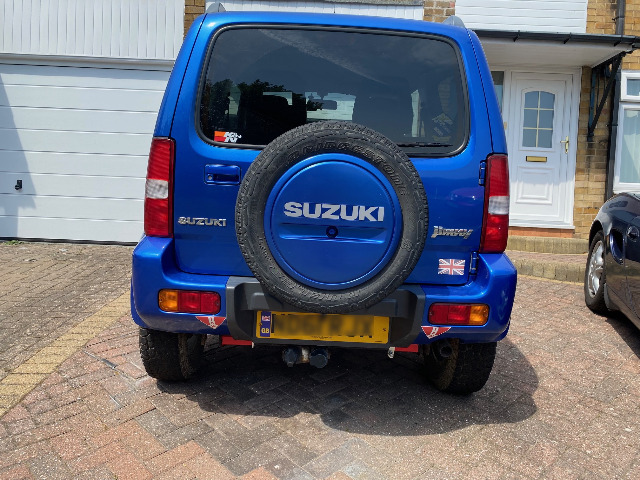
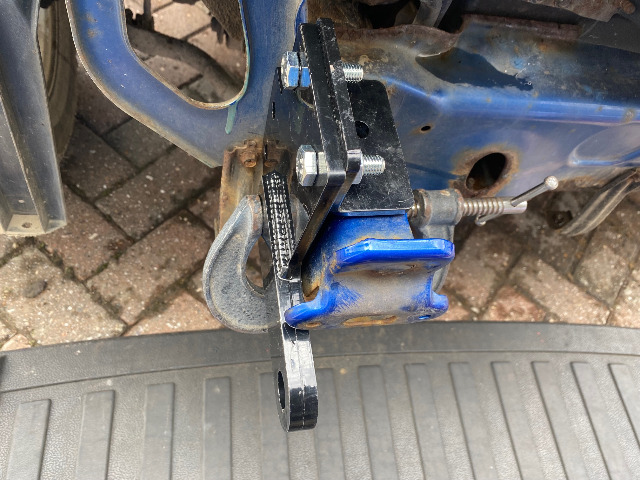
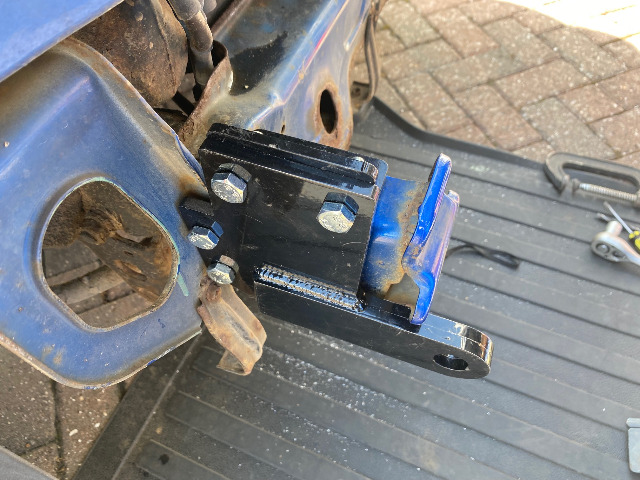
I decided to use the tow bar, marked an area in red at each end then fitted a clamp round the bar to stop the straps from moving inwards.
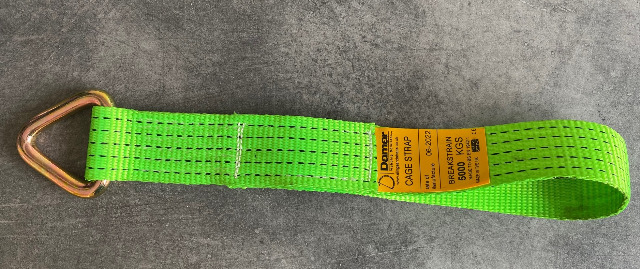
I then purchased 2 x Cage Straps, that just go over the tow bar support bracket and loop back on themselves, 5T each.
I will use a bridle to proivide a single recovery point. When off-roading I could fit the cage straps and bridle, loop it over the spare, just case of rescue.
Next job, the front recovery points.
Robin
2020 blue SZ5 (one of the last to be registered in the UK)
Ex 2011 Blue Jimny SZ4
Northumberland Jimny Blog
Please Log in or Create an account to join the conversation.
Less
More
- Posts: 2015
- Thank you received: 520
26 Jul 2022 15:07 #244236
by DrRobin
2020 blue SZ5 (one of the last to be registered in the UK)
Ex 2011 Blue Jimny SZ4
Northumberland Jimny Blog
Replied by DrRobin on topic Re:Recovery points on a Gen 3 (2011)
I bought Jimnybits front recovery points from Lambert, even better he brought them round on Sat morning. Typical I was busy Saturday, but had opportunity on Sunday, so got started.
I found a video guide to removing the front bumper www.scegliauto.com/en/video/suzuki/tutorial/18575/
then we are ready to get going.

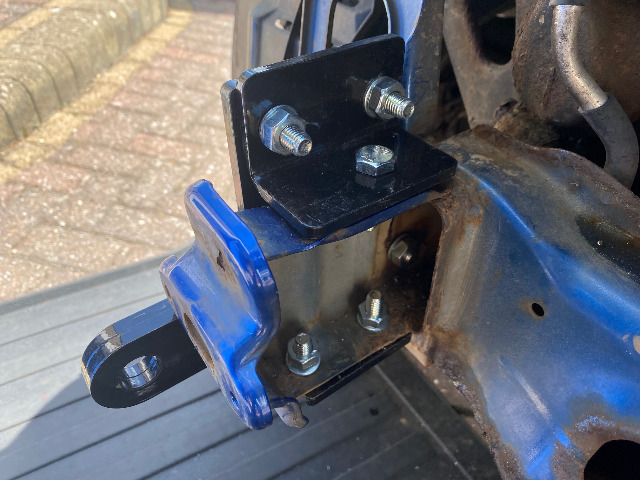
The Jimnybits recovery points don't seem to come with instructions, so I used their webpage as a guide.
I positioned the offside (UK) recovery point and held in place with a clamp.
Once held in the right place, I drilled the top hole, checked it on the Jimnybits webpage, then drilled the bottom and two at the back.
The back two bolts go through a double thickness and it helps if you have a 10mm long shank drill as they are close to the body work.
I put all of the bolts in loose just to get everything in the right place.
Then moved on to the nearside with the same procedure. This is harder as the recovery point sits over the access to the bolts.
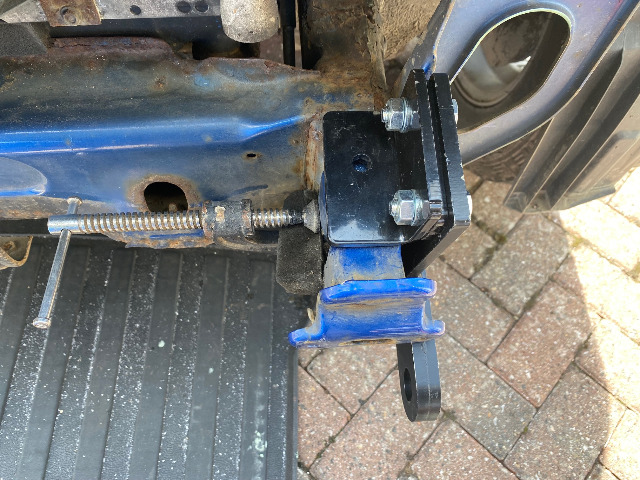
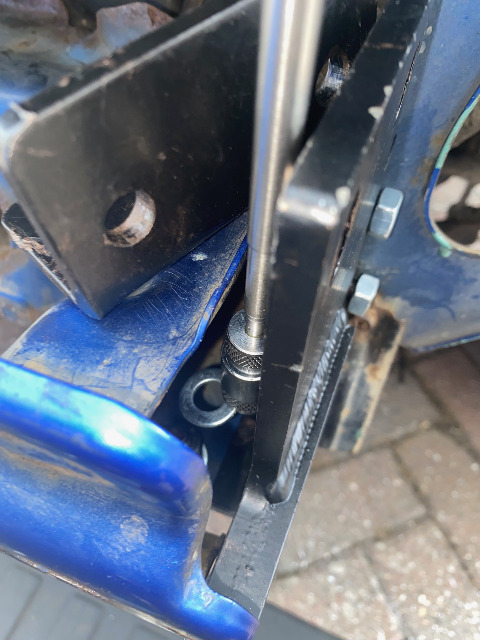
I drilled all 5 holes and checked it was in the right place, before trying to assembly it proper. A 17mm cranked ring spanner just fits through the end to tighten the top and bottom bolts.

I wanted all of the nuts on the inside, so used a magnetic pick up to place the washers and nuts on the bottom bolts. The front was easy, but the back, I just couldn't get the nut to thread on to the bolt and after several minutes trying, just put the bolt in with the nuts underneath.
The two bolts at the back with the captive metal were difficult to do, they wouldn't sit flat in the frame and the bracket was difficult to centre. I reckon with the ring spanner ordinary bolts would have worked just fine.
With the brackets mounted, time to cut the bumper. I measured twice, once with a ruler and again by applying tape on the back of the bumper.
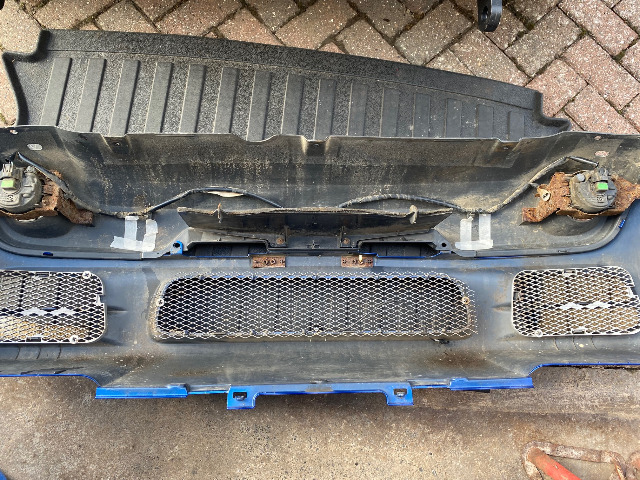
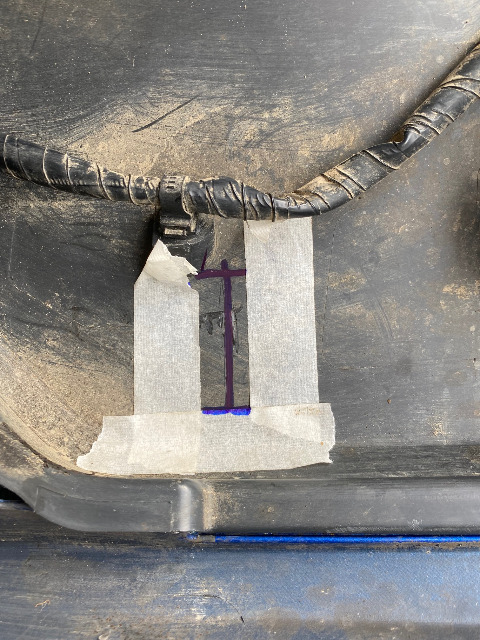
I even made some cardboard templates, then cut a 50x16mm slot, it was perfect in the vertical, but a couple of mm out horizontally. Not a problem, time to break the file out.
I had a suspicion that the recovery points weren't going to come far enough out for my bumper and with the bumper cut, sure enough there wasn't enough space to get the shackle on. So I had to break out the drill, saw and file and make a larger cut out. To hide this, I cut some foam and glued it to the back of the bumper. It is soft enough to allow the shackle to be fitted and will keep most of the dirt out.
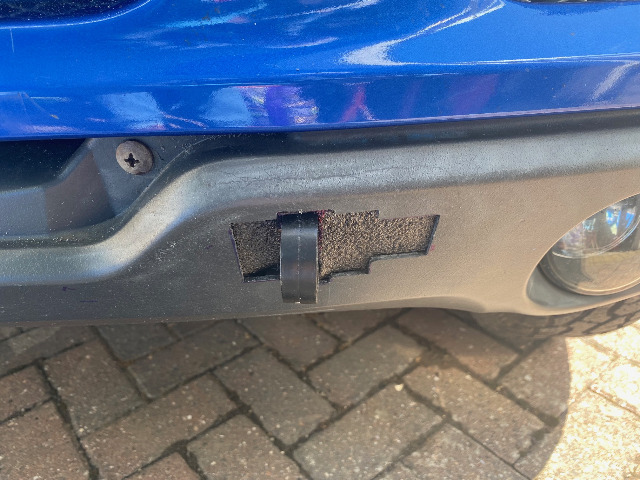
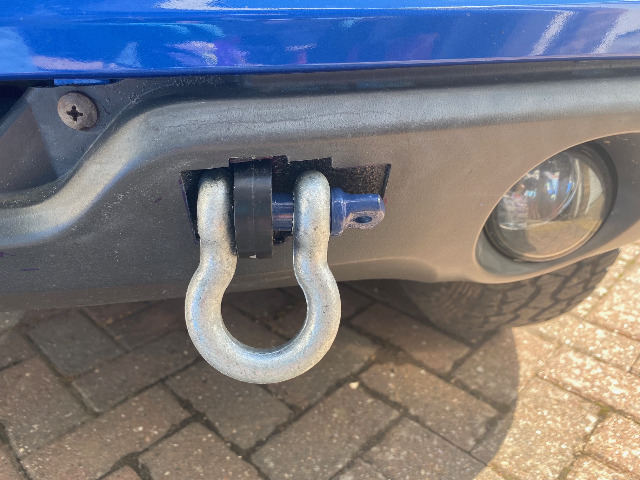
I have some rubber sheet, I will make a couple of covers to go on the outside, when time permits. Actually I don't mind them set back a bit, it means you don't bash your leg on when going round the front and makes it less obvious to anyone looking.
Robin
I found a video guide to removing the front bumper www.scegliauto.com/en/video/suzuki/tutorial/18575/
then we are ready to get going.
The Jimnybits recovery points don't seem to come with instructions, so I used their webpage as a guide.
I positioned the offside (UK) recovery point and held in place with a clamp.
Once held in the right place, I drilled the top hole, checked it on the Jimnybits webpage, then drilled the bottom and two at the back.
The back two bolts go through a double thickness and it helps if you have a 10mm long shank drill as they are close to the body work.
I put all of the bolts in loose just to get everything in the right place.
Then moved on to the nearside with the same procedure. This is harder as the recovery point sits over the access to the bolts.
I drilled all 5 holes and checked it was in the right place, before trying to assembly it proper. A 17mm cranked ring spanner just fits through the end to tighten the top and bottom bolts.
I wanted all of the nuts on the inside, so used a magnetic pick up to place the washers and nuts on the bottom bolts. The front was easy, but the back, I just couldn't get the nut to thread on to the bolt and after several minutes trying, just put the bolt in with the nuts underneath.
The two bolts at the back with the captive metal were difficult to do, they wouldn't sit flat in the frame and the bracket was difficult to centre. I reckon with the ring spanner ordinary bolts would have worked just fine.
With the brackets mounted, time to cut the bumper. I measured twice, once with a ruler and again by applying tape on the back of the bumper.
I even made some cardboard templates, then cut a 50x16mm slot, it was perfect in the vertical, but a couple of mm out horizontally. Not a problem, time to break the file out.
I had a suspicion that the recovery points weren't going to come far enough out for my bumper and with the bumper cut, sure enough there wasn't enough space to get the shackle on. So I had to break out the drill, saw and file and make a larger cut out. To hide this, I cut some foam and glued it to the back of the bumper. It is soft enough to allow the shackle to be fitted and will keep most of the dirt out.
I have some rubber sheet, I will make a couple of covers to go on the outside, when time permits. Actually I don't mind them set back a bit, it means you don't bash your leg on when going round the front and makes it less obvious to anyone looking.
Robin
2020 blue SZ5 (one of the last to be registered in the UK)
Ex 2011 Blue Jimny SZ4
Northumberland Jimny Blog
The following user(s) said Thank You: Lambert
Please Log in or Create an account to join the conversation.
Time to create page: 0.181 seconds