![]() The content of any article might be expanded / improved in the future - revisit it sometimes.
The content of any article might be expanded / improved in the future - revisit it sometimes.
![]() Seen a mistake? Know something that isn't written? Edit and change this article yourself!
Seen a mistake? Know something that isn't written? Edit and change this article yourself!
![]() Some images in the article (if present) can be enlarged by clicking on them.
Some images in the article (if present) can be enlarged by clicking on them.
Contents
Introduction
The Leading/Trailing Arms (or Radius Arms) on a Jimny are prone to off-roading or accident damage whilst the bushes are prone to wear.
The arms also control the castor angle of the front axle and the diff angle of the rear axle.
This section covers the changing of the arms, bushes and repair of general damage.
Compatible replacement arms
If you decide on obtaining a replacement arm instead of repairing yours, there are several options:
- Genuine arm - either new from Suzuki or used from a dismantled Jimny.
- All Jimnys 3 use the same arms.
- New compatible aftermarket replacement arm.
- A few aftermarket manufacturers (Blue Print for example) produce compatible replacements.
- Quality of an aftermarket part might not be the same as of the original part.
- Compatible original arm from another vehicle model.
- According to one report from a mechanic, Daewoo Tico uses identical radius arms for its rear axle.
- That mechanic replaced a damaged radius arm on a Tico with an original radius arm from a dismantled Jimny as a straight bolt-on swap.
- Daewoo Tico is heavily based on Suzuki Alto gen3, so a rear radius arm from an Alto gen3 might also be compatible for Jimnys.
- According to one report from a mechanic, Daewoo Tico uses identical radius arms for its rear axle.
Even if you decide to replace an entire radius arm with a used radius arm, you really ought to put in new bushes in the replacement radius arm, as they do wear. However, they are difficult to press out of old used arms.
Typical Damage
Damaged Arms
- My arms had suffered from a number of years of off-roading.
- They were also fitted with correction bushes, which are good for a 2 inch lift but not really ok for the 3 inch lift I have got fitted.
- The arms on mine were nicely bent when compared to the edge of my yellow spirit level.....
- Therefore I decided to replace the arms and cure the castor correction issues at the same time.
- A number of places do suitable replacement arms.
- Be very careful about what arms you buy, as the quality varies and any failure of the arm is very dangerous.
- The process for installation of fronts and rears is basically the same.
Damaged Bushes
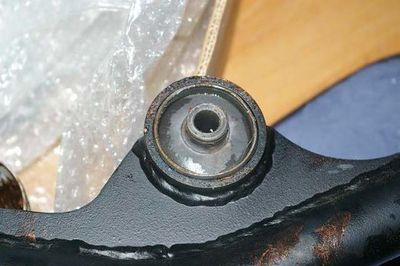
- Worn bushes can be a source of "Death Wobble".
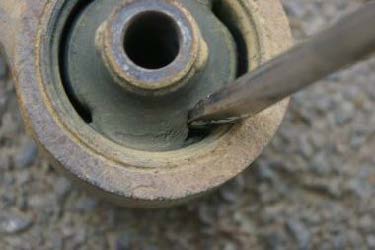
- Here bushes themselves are splitting.
- Whilst they had not completely failed they were not in good health.
- You can see where the screwdriver can open up the split in the picture.
Damaged Mounts
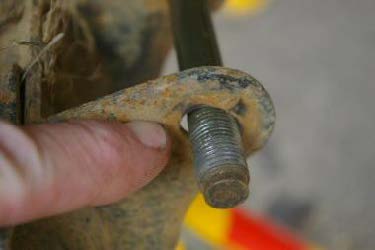
- The mounting points for the arms are really weak and thin.
- They can wear out in an "oval" fashion that results in a strange "clunk" noise when letting the clutch up.
- In the worst case the mount can corrode through and rip away from the axle - this is becoming increasingly common as Jimnys get older.
- Here is a picture from Dave over at Bits4vits showing the wear in his mounts.
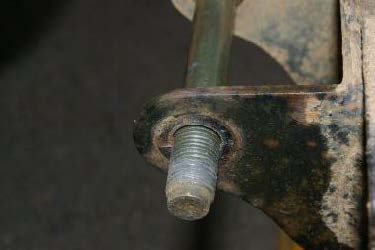
- It is worth checking every now and then by undoing the bolts and taking a look at whether wear is occurring.
- For reference, this is what a mount should look like!
- This is the same part as shown in the previous pictures, except it is completely ripped off and gone!
- Again from Dave, his destroyed axle mounting brackets.
- Further information on repairing the mounts can be found in "Axle mount repairs" article.
Castor Correction
If you are performing a lift then you may have heard about castor correction.
The process of a spring lift (NOT a body lift) moves the position and angle of the axle slightly. This shows itself in the steering by making the steering feel loose and also reduces its ability to self centre.
You can test this by steering in a gentle circle and then letting go of the steering wheel. A properly corrected Jimny will straighten up on its own whilst an uncorrected one will keep turning.
There are a number of ways of correcting the castor.
Correction Arms
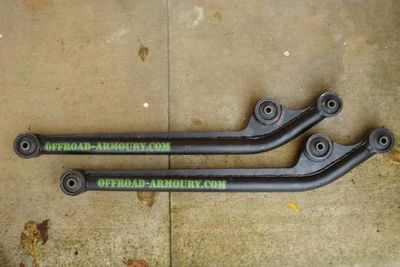
- The picture shows the arms for the front along with a free bush insertion tool with the ones I purchased.
- These arms are made with the adjustment built in.
- Therefore they should be fitted with STANDARD bushes.
- They are typically available for 3 inch or 4 inch lifts.
- Most people feel that 2 inch lifts do not need correction.
- If you are buying aftermarket arms make sure they provide for vacuum piping, handbrake cables and ABS cables.
Correction Bushes
- These work by off-setting the centre of the mount to achieve the correction.
- They are popular because of the price.
- However, they are probably best for small lifts (2 inches up to possibly 3 inches at a push).
- The reason is that the off-set required to give a larger lift means there is little to no rubber on one side of the bush, which really affects its performance and ride.
Standard rubber bushes
The parts are ALL available by contacting the BigJimny store via phone or email (these are not stock items so are not shown directly in the store).
If going for the standard rubber bushes, it is recommended to buy the original Suzuki ones:
- 46282-81A30 - Front radius arm to front axle (two per arm)
- 46213-76J00 - Front radius arm to vehicle chassis (one per arm)
- 46282-81A00 - Rear radius arm to rear axle (two per arm)
- 46213-76J00 - Rear radius arm to vehicle chassis (one per arm)
![]() Suzuki earlier used to produce a "radius arm to chassis" bush model 46213-65D01, but they later identified that it can cause Death Wobble. Therefore they replaced it around year 2007-2008 with newly developed bush model 46213-76J00 in all Jimnys produced from then on. When buying an original radius arm to chassis bush, you should avoid the obsolete P.N. and choose the improved one. The improved original bush can also be bought from the BigJimny store in an OEM "Anti-Wobble Kit"
Suzuki earlier used to produce a "radius arm to chassis" bush model 46213-65D01, but they later identified that it can cause Death Wobble. Therefore they replaced it around year 2007-2008 with newly developed bush model 46213-76J00 in all Jimnys produced from then on. When buying an original radius arm to chassis bush, you should avoid the obsolete P.N. and choose the improved one. The improved original bush can also be bought from the BigJimny store in an OEM "Anti-Wobble Kit"
If you want to save some cash, you can also buy these aftermarket bushes:
- ADK 88008 - Front radius arm to front axle (two per arm)
- ADK 88007 - Front radius arm to vehicle chassis (one per arm)
- ADK 88006 - Rear radius arm to rear axle (two per arm)
- ADK 88007 - Rear radius arm to vehicle chassis (one per arm)
Polyurethane bushes
- A number of after-market suppliers also supply replacement bushes.
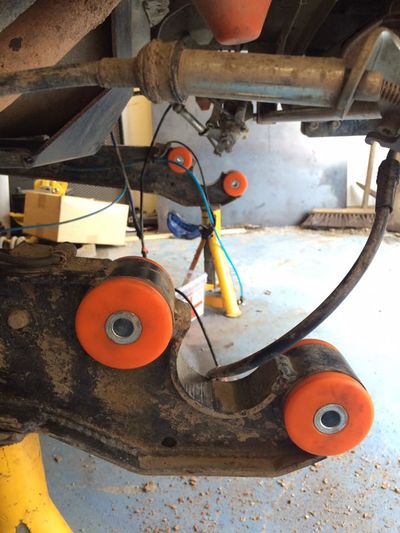
- Some aftermarket suppliers also offer polyurethane ("Poly-Bush") style bushes (instead of standard rubber material) and usually come in the form of a split bush which can be more easily inserted in the arms.
- For example here are some from Dave at Bits4Vits
Replacing the Bushes and Arms
Tools
- Standard metric sockets and spanners
- Assorted screwdrivers
- Access to a press (Desirable)
- Tools to cut away old bush - see text
- Homemade puller - see text
Removing the arms/bushes
- The first activity is to remove the old arms.
- You need to jack up the car and remove the front wheel.
- I assume you can do that so have not included it here.
- The arm is secured with three bolts, one at the back and two at the front.
- You may have to cut the old bolts off as they could be rusted on.
![]() You will have to jack up the car WITHOUT using the axle or leading arm as a jacking point. You need the axle to be free to be unbolted from the arm.
You will have to jack up the car WITHOUT using the axle or leading arm as a jacking point. You need the axle to be free to be unbolted from the arm.
- Those of you with older Jimnys may have the vacuum tubes for the locking hubs routed down the arms.
- If you are putting new aftermarket arms, make sure that they have made provision for the vacuum tubes (front) or handbrake cables/ABS cables (rear).
- A lot of cheaper replacement arms forget these fundamental items.
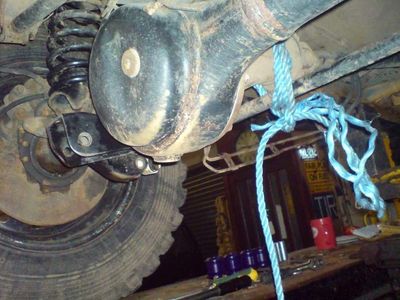
- As the axle will be hanging free, make sure it is secured in position to stop it moving too far.
- Otherwise bolting in back up may give issues.
- If you are putting new bushes into old arms, then you need to remove the old bushes first.
- There are two ways to remove the bushes.
- The first is to press them out with a hydraulic press.
- This is the method I went for.
- I went to the local garage and they pushed them out for beer money.
- However people started to leave the workshop when gauge on the press went through 35 tonnes!.
- They finally moved out at 38 tonnes with an extremely loud bang.
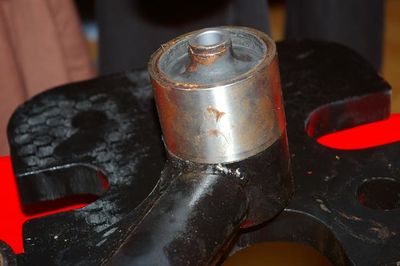
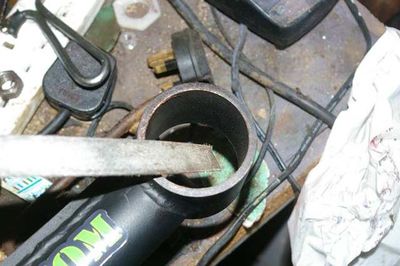
- Another way to remove them is to cut out the centre rubber section and then carefully saw two thin cuts in the remaining steel sleeve.
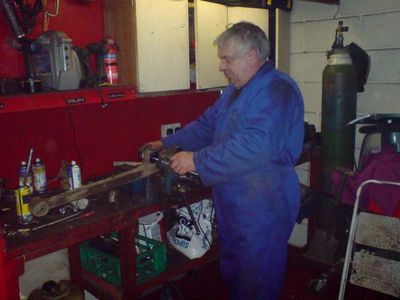
- This is the method Brian from the forum used and sent in these pictures.
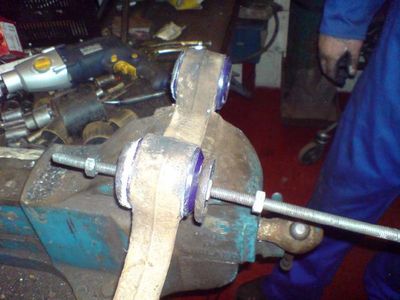
- With the arms secured in a vice, you can drill out a lot of the rubber.
- Then you can burn the rest of the rubber out.
- Finally cut the steel ring that is stuck in the arm with a hacksaw and chisel out the remains.
Installing the arms/bushes
- There are two ways of installing the new bushes that depends on the bushes you have.
- If you have the steel cased bushes, then these will need pressing in with a press.
- I have played about with trying to "wind" the new ones in with a piece of threaded rod but this was not successful.
- For the Poly-bush or split style bushes you can press these in with a large engineering vice or even by hand (split bushes).
Orientation
Before you start, it is important to understand that some bushes need to be installed in the correct orientation.
- The picture shows the correct orientation for standard bushes that have slots in them.
- The picture shows the correct orientation for castor correction bushes.
Polybush installation
Polybush style bushes are pretty straight forward to install.
- First grease the inside of the arms.
- Then you can create a puller using a long piece of studding and some large washers.
- By tightening the nuts the action pulls in the bush.
- Studding is available from builders merchants.
- It is then a straight forward task to fit the bushes.
- Apparently it is then easy to push it all in the final bit by hand.
- If necessary, I understand other people have used a Rubber Mallet as well.
Split bush installation
Split bushes are even easier to install once the old bush has been removed (See previous section for removal)
- Once the old bush has been removed, the split bush can be inserted by placing both halves and the steel tube in place and winding in with a G-Clamp.
- A nice neat installation.
Steel Cased bush installation
As previously stated, the steel cased bushes need to be pressed in. You should be able to find a local garage or engineering shop prepared to press them in for a small consideration. However, as I have worn a bit thin my welcome at my local garages with pressing in wheel bearings I decided to splash out on my own press. I am glad I did because of the time it took to press in the six bushes would have definitely seem me less than welcome at the garage.
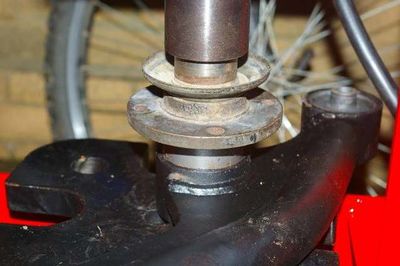
- The picture shows the principle behind pressing in the bush.
- My arms came with a press tool.
- The outer ring from the tool is placed over the hole and the bush is dropped in (with a smear of copper grease to help everything along).
- Then the centre part of the tool is placed on top of the bush and the pressure is applied using the press, driving the bush into the arm.
- Result is a bush neatly pressed into the arm.
- However, it did not all go as smoothly as this for all the bushes.
- Whilst the outer part of the tool is a good fit, the inner part is right on the edge between sitting on the lip of the bush and dropping into the inner part where the rubber is.
- It is just a fraction too small.
- This applies to both ADK and Suzuki bushes.
- The problem is slightly worse on the body end bushes, as these are longer and stand proud of the tool.
- This means the tool/bush can move off of "straight" and result in damage to the bush.
- I had to clean up the damaged bush with a file to get rid of the edges that stood proud and would stop the bush fitting.
![]() Really cheap aftermarket bushes (such as some I have seen from Eastern Europe suppliers) do not have any chamfering on the edge of the bush, which also makes fitting more difficult.
Really cheap aftermarket bushes (such as some I have seen from Eastern Europe suppliers) do not have any chamfering on the edge of the bush, which also makes fitting more difficult.
- The cure to this for the longer bushes was to stop using the tool and simply use a large flat surface to press on top of the bush.
- The pressing surface has to have a hole in it to allow the bush centre to stand proud.
- An old flange from my SJ did the trick.
- I also created a very light chamfer on the edge of the arm with a file to "point" the bush in the correct direction.
- The picture shows the chamfer.
- Then the SJ flange pushed the bush in fair and square.
- So I ended up with a smart pair of arms complete with bushes.
Re-fitting the arms
The next challenge is to fit the arms back onto the car. Because mine is a full rebuild, everything has been off the car and hence has "moved". If you were doing this as an upgrade, you are more likely to remove one arm at a time, keeping most parts in line.
I had to line everything up to get the bolts in. I replaced all the bolts etc whilst I was doing this task. New bolts are available from the BigJimny Store.
- I would recommend that you hang the arm from the body end first.
- With the rear of the arm attached, I then offered up the front arms to the mounting point on the axle.
- This was a long way off, so I used a jack to lift the arm into position.
- I then used a lever (ok - I admit it - a large screwdriver!) to move it all around until the bolts fitted.
- Just a further word on the bolts/nuts. They can be fitted through in either direction, but if they are too long or fitted the wrong way around (which is possible if you have removed the shock absorber) then you will find they foul on the shock absorber.
- Play about with the bolt arrangements BEFORE tightening them or you may have to take them out again, guess how I learned that!
Torque Settings
Full details of the torque settings can be found in the reference data
Page last edited on 11/01/2021 by user Bosanek


